A credit card (you will NOT be charged any money provided you follow the directions and do NOT leave your system running)
PLEASE USE A CREDIT CARD, NOT A DEBIT CARD. IF YOU DO NOT HAVE ACCESS TO A CREDIT CARD PLEASE EMAIL YOUR INSTRUCTOR ASAP!
Expectations
****Need to add here.****
Please be sure to create a Google Doc that contains screenshots with captions indicating what you are accomplishing.
This will be used to help show that you completed the project and can be used as a reference later on for you. This will also be your submission for this project.
The number of screenshots is to be determined but typically it should match the page count of the project.
Directions
Using any web browser (I recommend using a secondary browser, not your primary. If you use Chrome as your main browser, then use Firefox for the projects), go to the following site:
https://cloud.google.com/free/
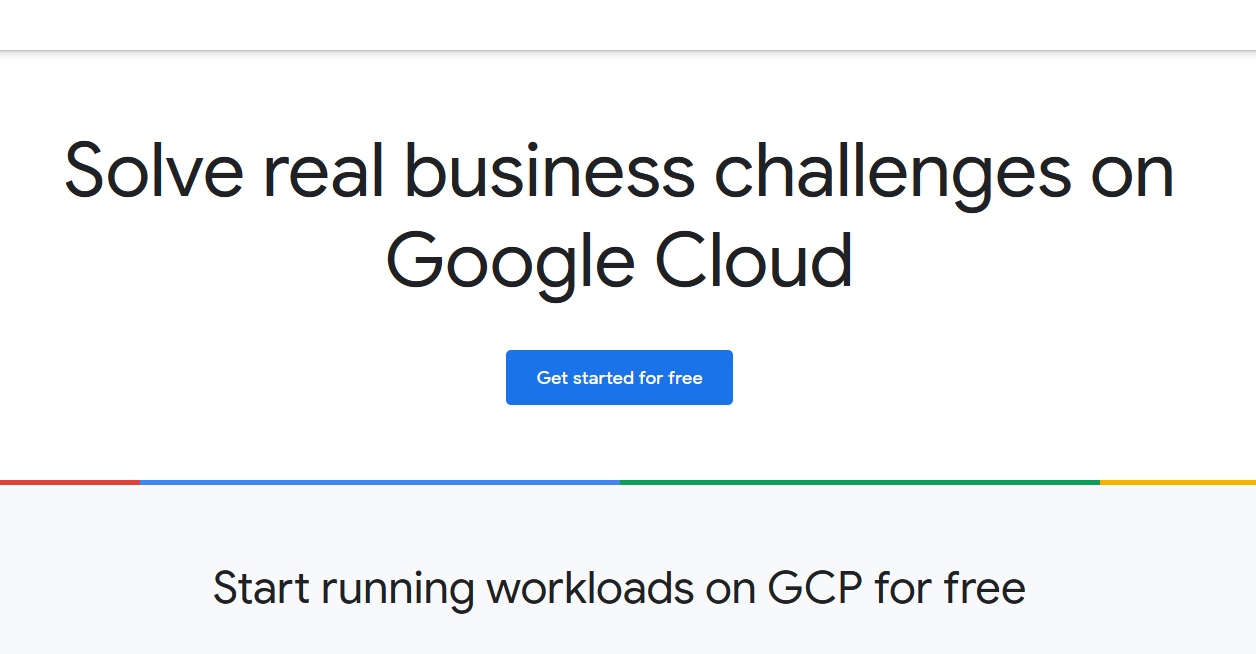
Please click on "Get started for free". Upon clicking on that, create a new Gmail account by clicking on either "Use a new account" or "Create a new account."
Again, please create a new Google Account for the projects in this course. This will be a throwaway account. You just need to make sure that I have some way of Identifying you from what you create. I will leave that up to you.
Fill in the the required information. When it prompts you for a credit card, PLEASE USE A CREDIT CARD. (Debit cards if used are harder to revoke charges should you need to do that).
You will not be charged unless you give Google permission to charge your card which means if you run out of free credit. AGAIN, PLEASE HEED THE DIRECTIONS AND MAKE SURE YOU SHUT DOWN YOUR GOOGLE CLOUD SYSTEM WHEN NOT IN USE.
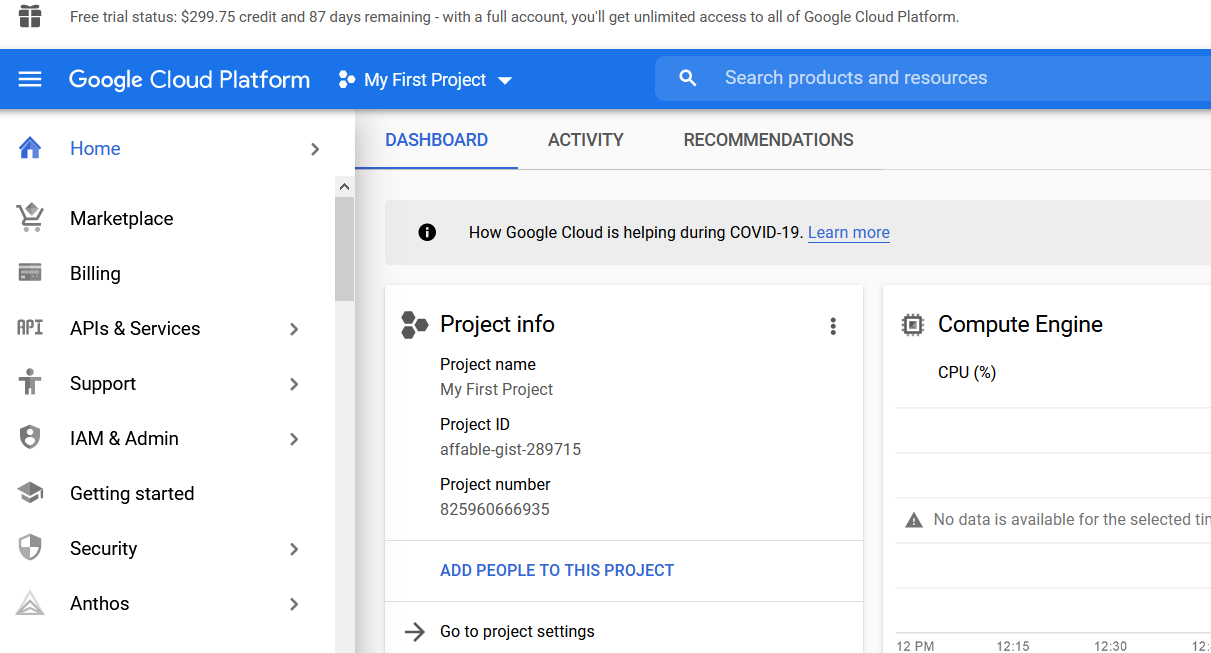
Once you are signed in, you should something similar to what is shown below (you should have $300.00 worth of free credit):
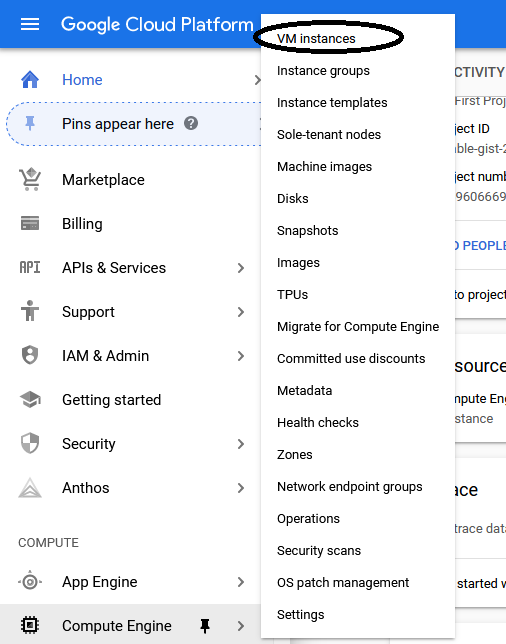
From here, you need to scroll down on the left side and find Compute Engine. Inside that menu will be something called VM Instances. See below for an example:
From here, it may prompt you about billing. If it does, just enable billing. This is a hit and miss thing with Google but again, note that it will NOT charge your credit card unless you give them permission to do so as explained earlier.
It may take VM Instances a few moments to get ready depending on how long ago you opened/created your account. Please be patient with it. When it's ready, you should the following screen:
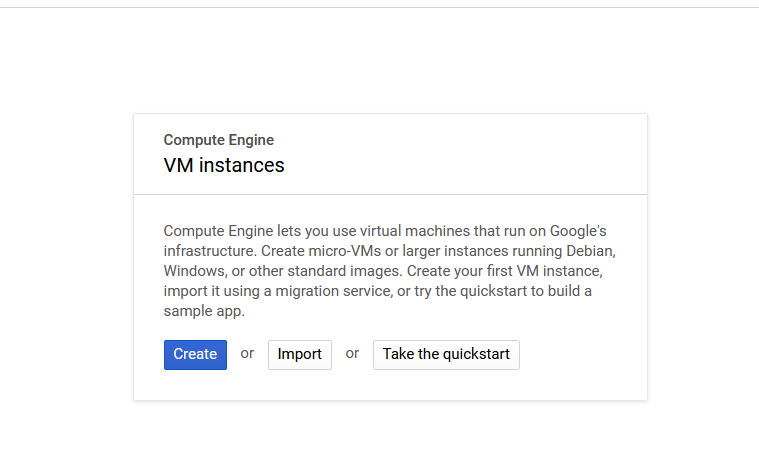
Click on the Create button.
(If you are resuming from a previous set of directions, click on Create Instance as shown below)

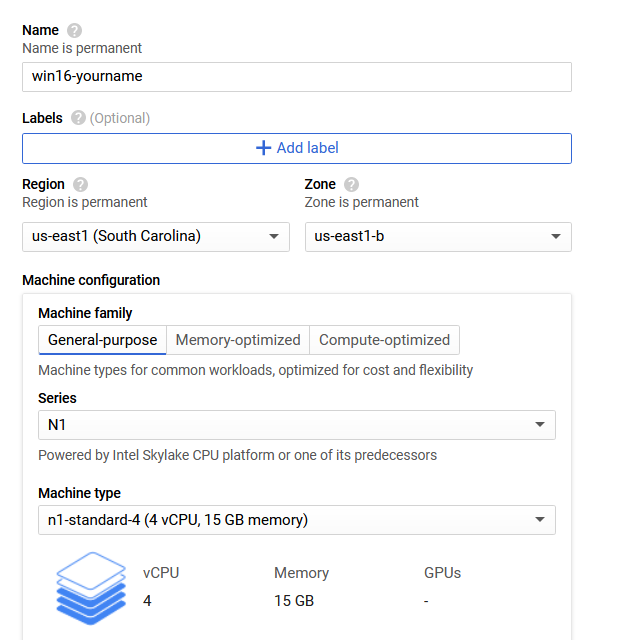
In the "Create an instance" page, enter the following:
*Under Machine Configuration, you will need to change the following:
Machine Type: n1-standard-4 (4 vCPU, 15GB memory)
See below for details.
Choose Change under the Boot Disk options. Select the Operating System of "Windows Server" and the version should be Windows Server 2016 Datacenter Server with Desktop Experience. See image below for reference:
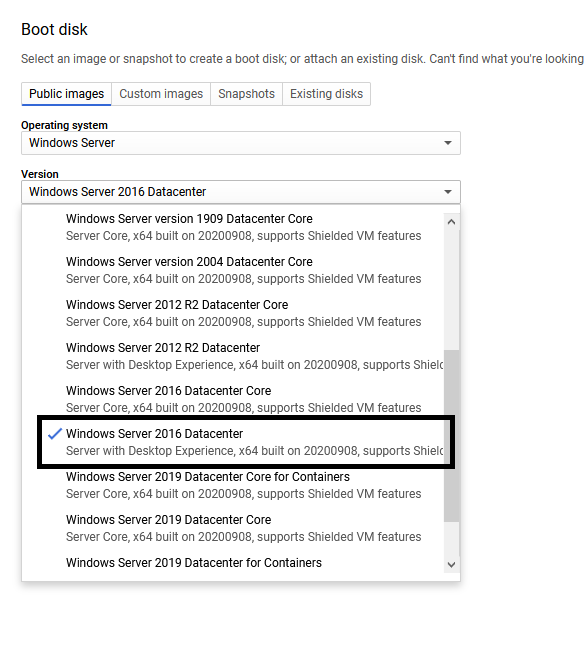
Choose Select at the bottom left once you have found the correct edition. Once are you back to the "Create an Instance" page, scroll down and find "Management, security, disks, networking, sole tenancy".
Click on that to open a new area. Find "Preemptibility" as shown below:
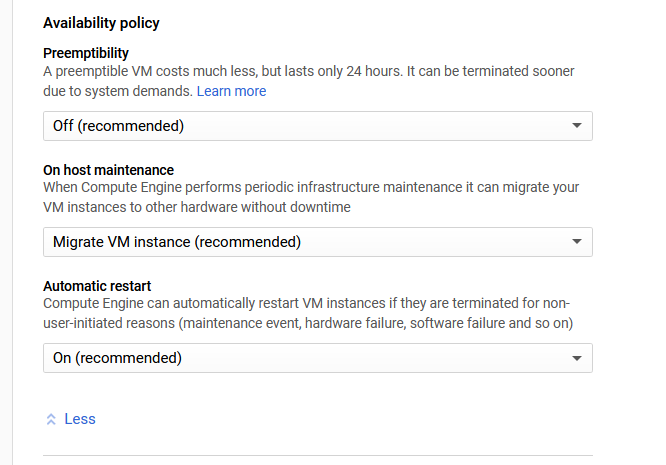
Change Preemptibility to On so this will help in the event you forget to turn off your system when it's not in use. This is NOT a guarantee, but it will help you none of the less to keep your costs down.
Note in the top right corner that it should show how much free credit you have remaining, and what the monthly estate would be if you ran this VM for 24/7.
Take a screenshot of this amount for proof of completion at this point in the project making sure to show the full details with the breakout costs for each part.
Click on Create at the bottom of the page. It should take a few moments to create your machine.
If you get the image above with the stop sign and exclamation point, it means that your billing isn't enabled. Do the following. Look at the top right corner and click on the gift icon "Free Trial Status".
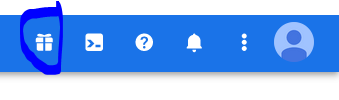
Choose Activate in the top right corner. Choose Upgrade.
Return to your VM Instances. If your Windows Server 2016 is there, proceed. If it is not, repeat the steps above to recreate. Again this is hit and miss.
There are still some additional settings that need changing. Let's start with assigning a static IP address. Go back to the Navigation menu in the top left, click on it, and go down to the Networking section.
From there, hover over VPC Network and click "External IP Addresses" as shown below:

If you look at the in-use column, you should see your name with the Windows Server. In the Type column, you should see a drop down. Change it from Ephemeral to Static.
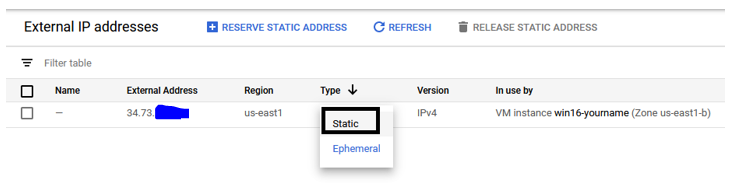
Take a screenshot here showing your address change. It should look similar to mine above so use it as reference. Note that it shows my devices name, yours should do the same.
From here provide it a new name. You may follow my example if you want.
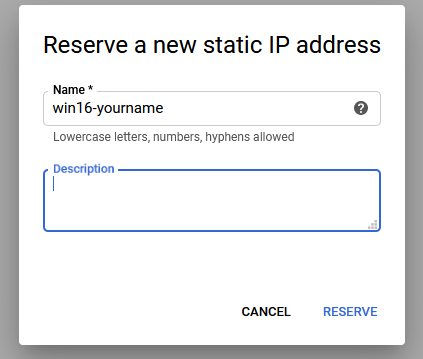
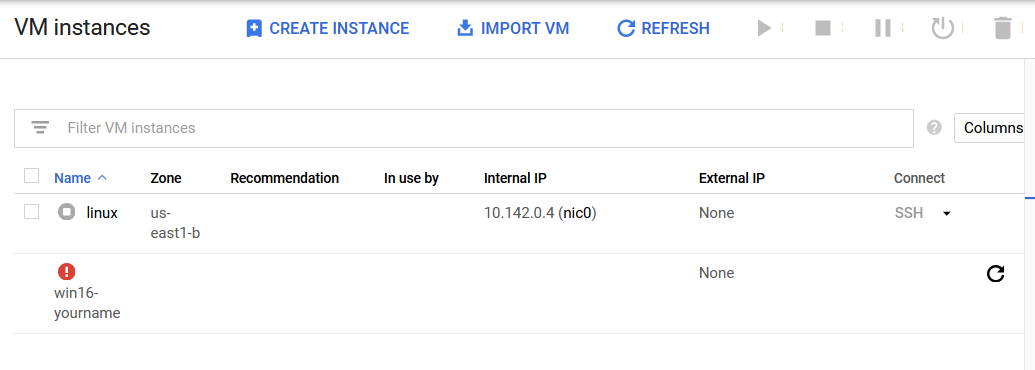
Click on Reserve. From here go back to VM Instances to see your Windows Server up and running.
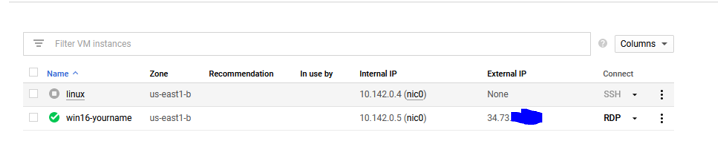
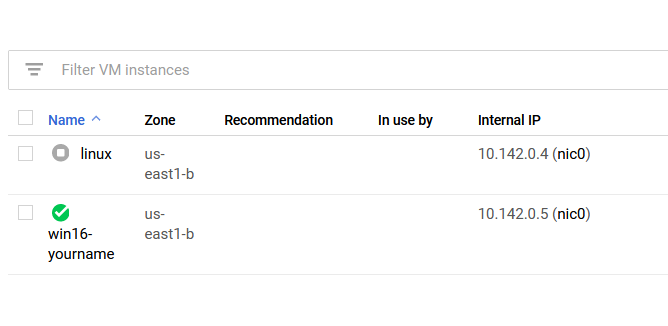
Take a screenshot showing your VM's using mine as a reference point. Be sure that you are marking through or hiding your public IP address for your system. Again, refer to mine for an example.
As you can from the above image, there should be one item shown named win16-yourname with a green check mark beside it. This indicates that the system is up and running. Your IP addresses will be different than mine shown.
Under the connect column, you should see a drop down that is also similar to the one shown. In order to access our Window's client, we will be using RDP or Remote Desktop Protocol. Let's set that up now.
Click on RDP, and then click on "Set Windows Password." A new window will pop up.
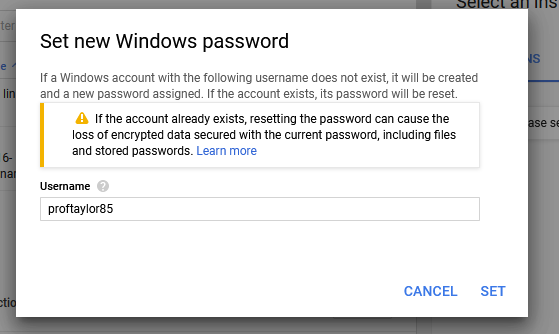
Take a screenshot using mine as a reference showing your username.
Your default name will be your Google Account name. Leave it as is and click on SET.
The next window that will pop up is your password for your account. COPY THAT PASSWORD DOWN SOMEWHERE AND STORE IT IN A SAFE PLACE.
Everyone will have different passwords and these machines are live on the Internet so a strong password was given to you initially. Click close once you it have it copied somewhere safe.
Now go back and choose RDP again, but choose "Download the RDP file". Make note of where that file downloads as you will need it. Generally, it's the Downloads folder.
If you are using Windows (EXCEPT Windows 10 Home), follow these steps found here to access RDP. Windows Usually the first link found helps with configurations.
If you are using Windows 10 Home, you do NOT have the ability to setup RDP to remember connections, however, you can still proceed with this project, you will just need to use the download file each time.
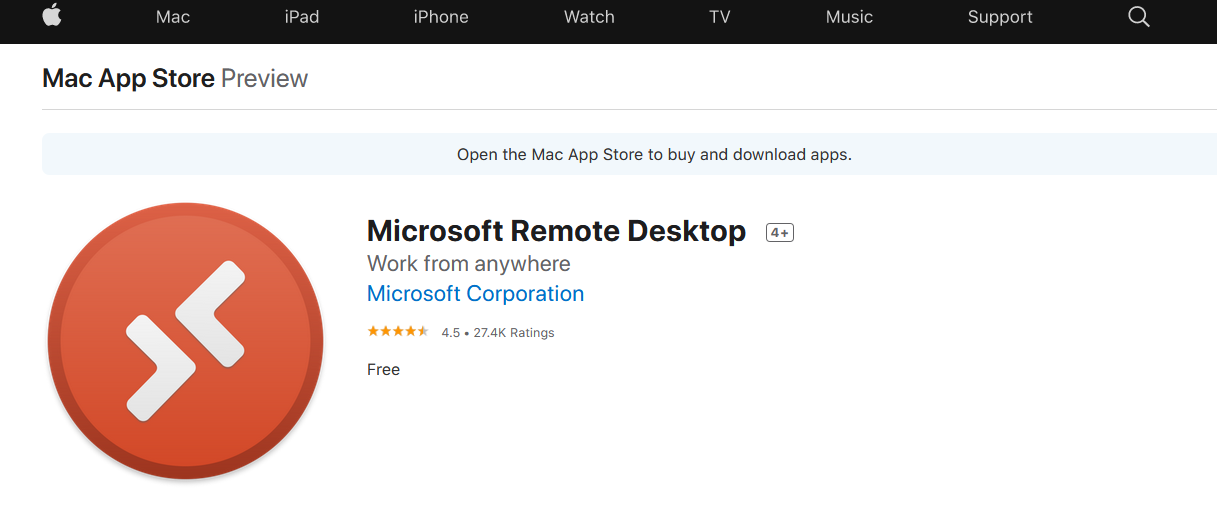
If you are using Mac, you will need to download the Microsoft Remote Desktop client from the iTunes store.
MAC
Pictured below is what you see if you were using a Mac. (I will add images for a Mac as time allows.)
Once RDP is setup using the links above for your appropriate operating system, locate that RDP file you downloaded. Open it by double-clicking on it.
If you get an error "We couldn't connect to the remote PC…" Make sure that your machine is turned on and completely set up. You may need to give it a few moments to complete installation.
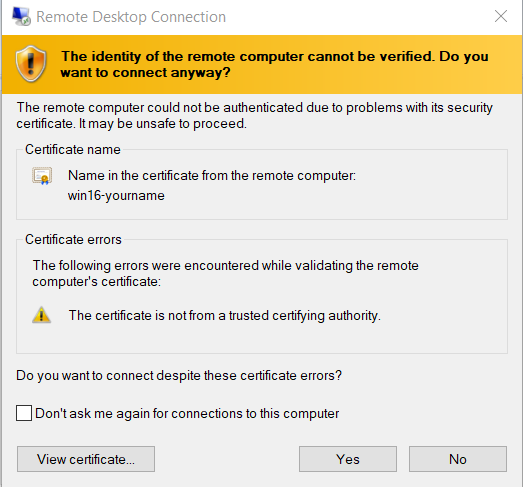
If you get a message about the "remote connection can't be identified" (see below)

Just click on Connect (Mac will say Continue).
It will now prompt you for your password. Locate the password you saved earlier and copy that into the field.
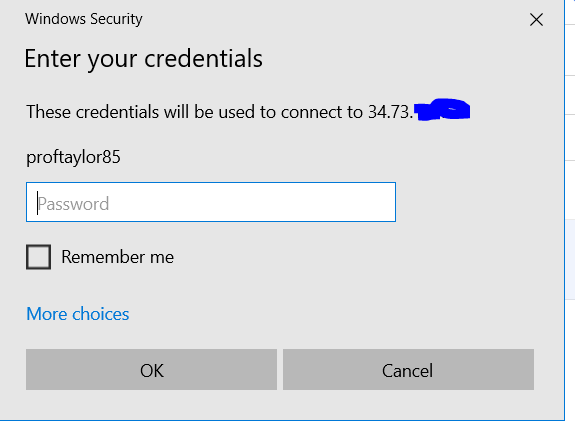
Take a screenshot similar to mine above where you are entering your credentials. Again, mask the IP address so it isn't fully shown.
Use my screenshot as a reference. Mac users will have a slightly different screen but it should be noticeable when you reach this point.
Once you provide that, you will be prompted by this page.
Click on Yes to continue to load into Windows. It may take a few moments the first time it loads as it is still creating all files and properties with those files.
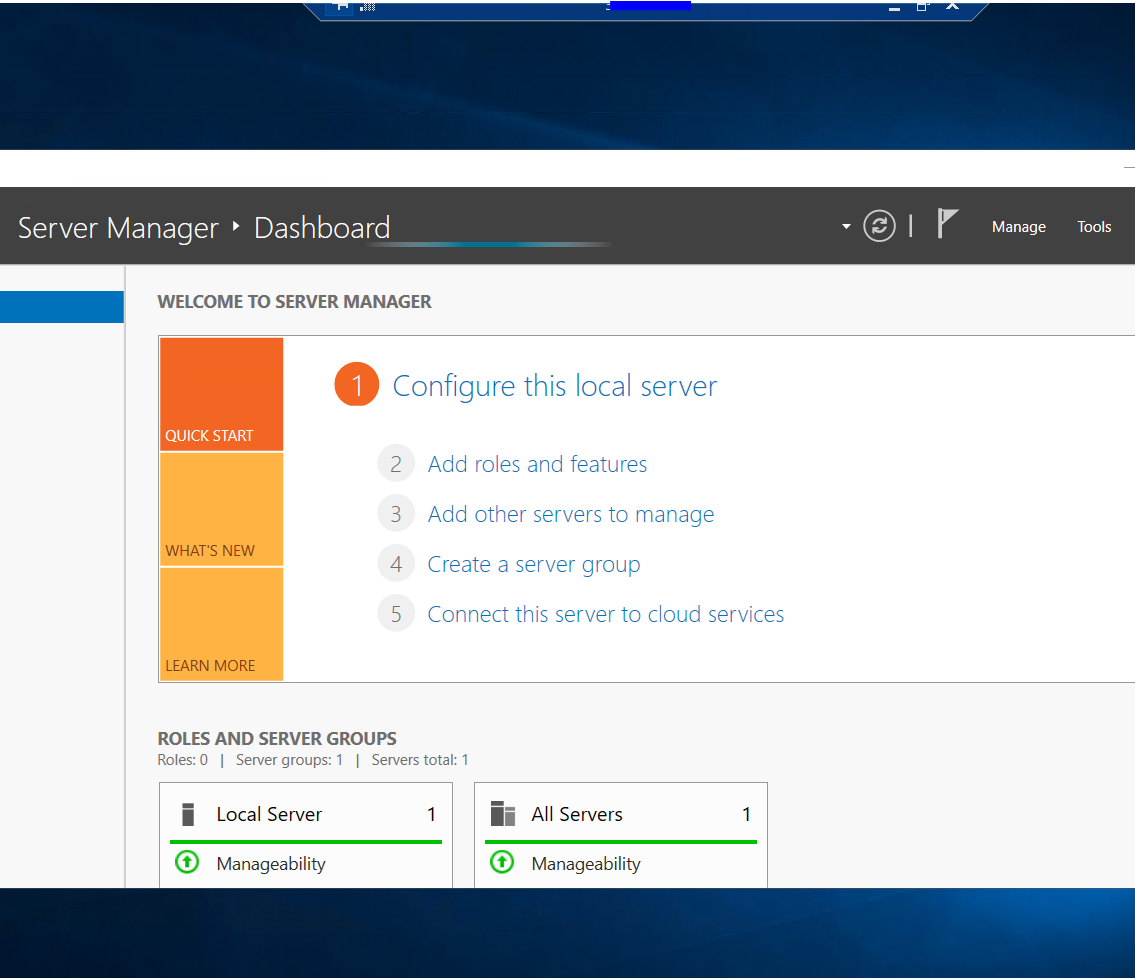
It will speed up significantly for future use. Once it is loaded in, you should see the following:
Note that it will have your IP address in the bar at the top. Remember, this is a live machine on the Internet so be careful who has access to this machine.
If the "Set Device to discoverable" pops up, you can ignore it by clicking out of it.
Now that we have our machine up and running, we will need to disable automatic updates. In a normal environment, you would want to have updates, but for our purposes, we don't need them.
On your Server 2016 machine, you need to open the Server Manager if it isn't already open. Click on Tools → Windows PowerShell.
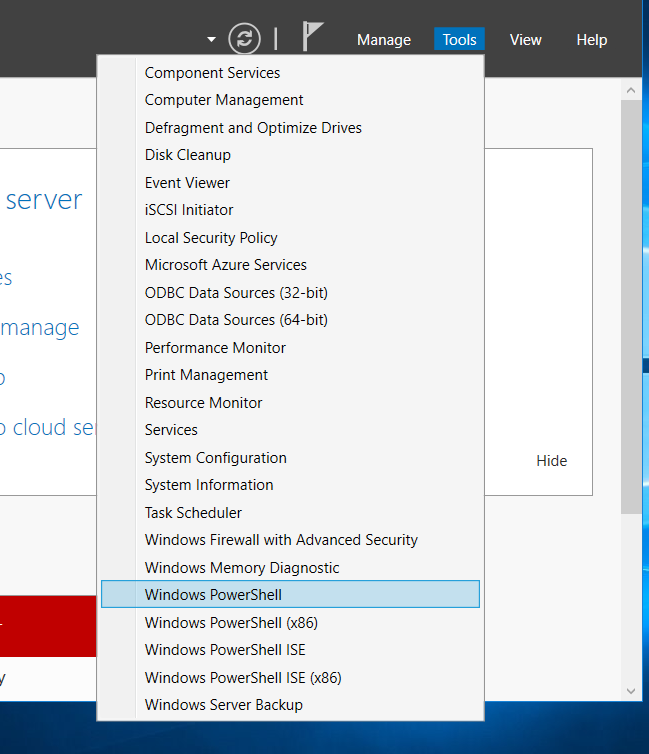
In PowerShell, type in the following command:
sconfig
The following window appears. We need to change option 5 to from automatic to manual updates.
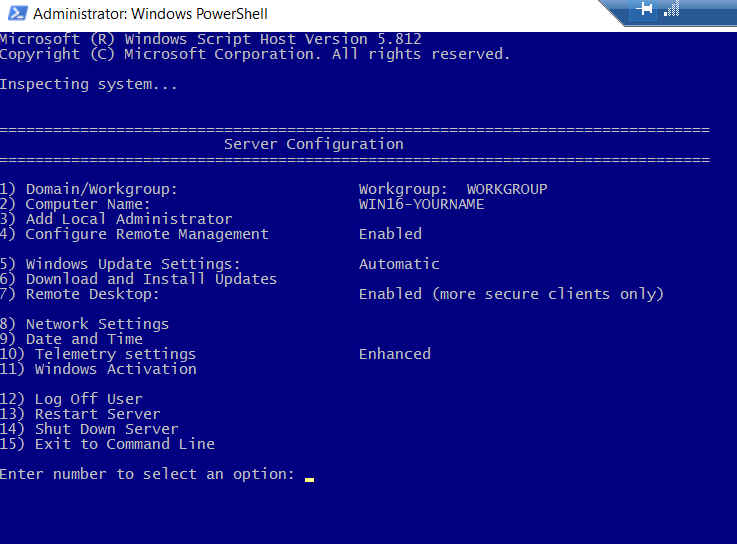
Enter 5 and type m. It should look like this once you have made the changes. A box may pop up noting that "Windows Update set to Manual. System will never check for updates."
If so, please click OK. Notice the highlighted area for reference once the configuration has been changed.

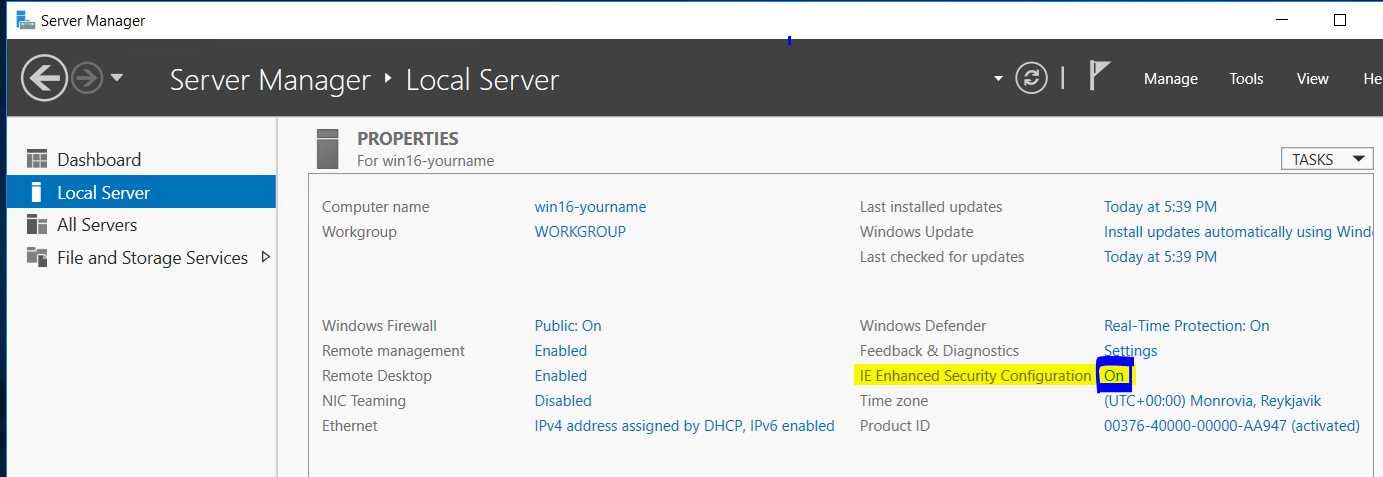
You can close the PowerShell Window now. The other thing we need to do is disable Internet Explorer's Enhanced Security Settings.
These are designed to lock down the browser which is a good thing, but since this will be used primarily for a victim machine, we will need Web browsing capabilities.
Go back to the Server Manager and click on the left side Local Server. From here look on the right side of the screen for IE Enhanced Security Configuration and note that it is on by default.
Click on the word On.
In the new box that appears, click both Off buttons as shown below.
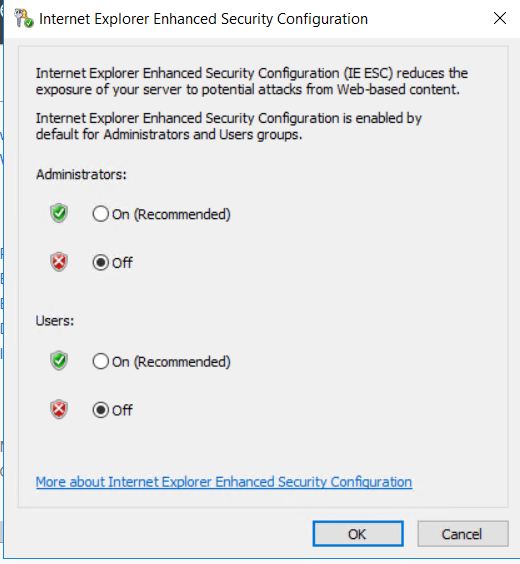
Click on OK.
Once you are done, please do the following to shut down your VM. Remember, do NOT leave it running unless you have a reason to. It will use your credits up that you will need for the semester.
This is the only warning I will provide about this.
From here, click the X in the corner to close your connection. It will prompt you about your remote session will be disconnected which is a just a confirmation that you want to close access to it currently.
THIS DOES NOT SHUT DOWN THE VM. Go back to your Google Cloud Platform site.
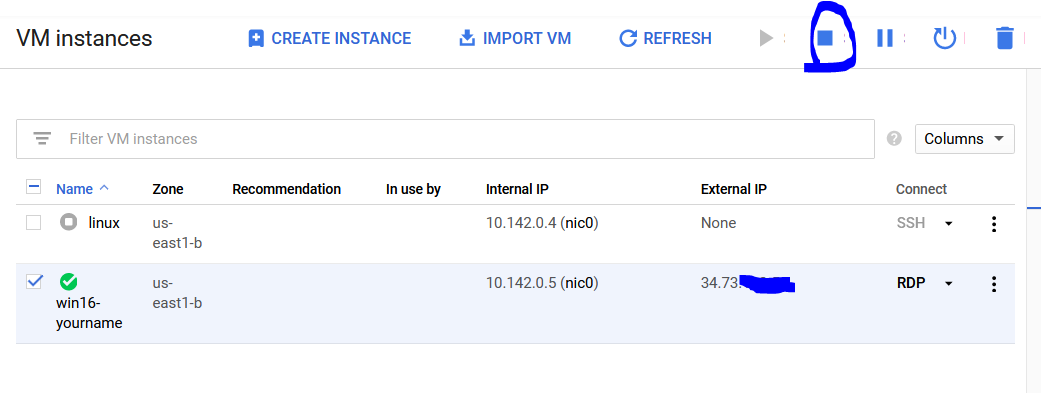
Click the checkbox for "win16-yourname" and click on the Stop square as shown above. It will prompt you to make sure that you are wanting to shut it down. Choose STOP to shut it down.
Once its shut down (this may take a few moments) you should see the following:
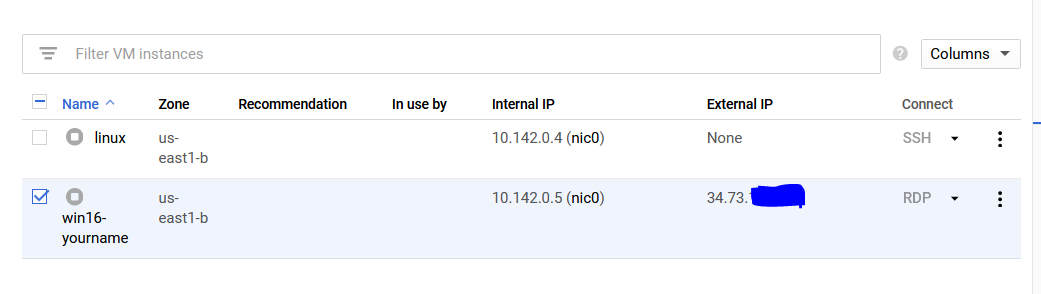
Notice how there is no green check mark beside it anymore. This means the system is shutdown. Your free credits for the processing of data will not be used. You may notice that it may decrease even when the system is not in use.
This is the small cost to keep the VM stored on Google's infrastructure. This will not exceed your free credits.
This concludes Project 04. With this project you've learned how to set up a Windows Server VM. PLEASE MAKE SURE YOU ARE SHUTTING DOWN YOUR VM EACH TIME UNLESS YOU ARE LEAVING IT RUNNING FOR A TASK IN THE COURSE.
Please make sure to submit your project as instructed by your instructor by it's due date and time.
Created in previous years, drafted online in January 2021