Debian VM(inside of Hyper-V of Windows Server 2019)
Expectations
After this project, you will be able to navigate around the Linux file system, copy, delete, move files and directories, search for strings in a file, lookup your IP address, edit a file with Nano, and ask a machine for users logged on.
It is expected upon completion that you will be adequately proficient with the basics of Linux and be able to complete the remaining projects.
Please be sure to create a Google Doc that contains screenshots with captions indicating what you are accomplishing.
This will be used to help show that you completed the project and can be used as a reference later on for you. This will also be your submission for this project.
The number of screenshots is to be determined but typically it should match the page count of the project.
Directions
Go to your cloud provider as explained in previous directions and load up the VM instances. See below for reference once you are logged in:
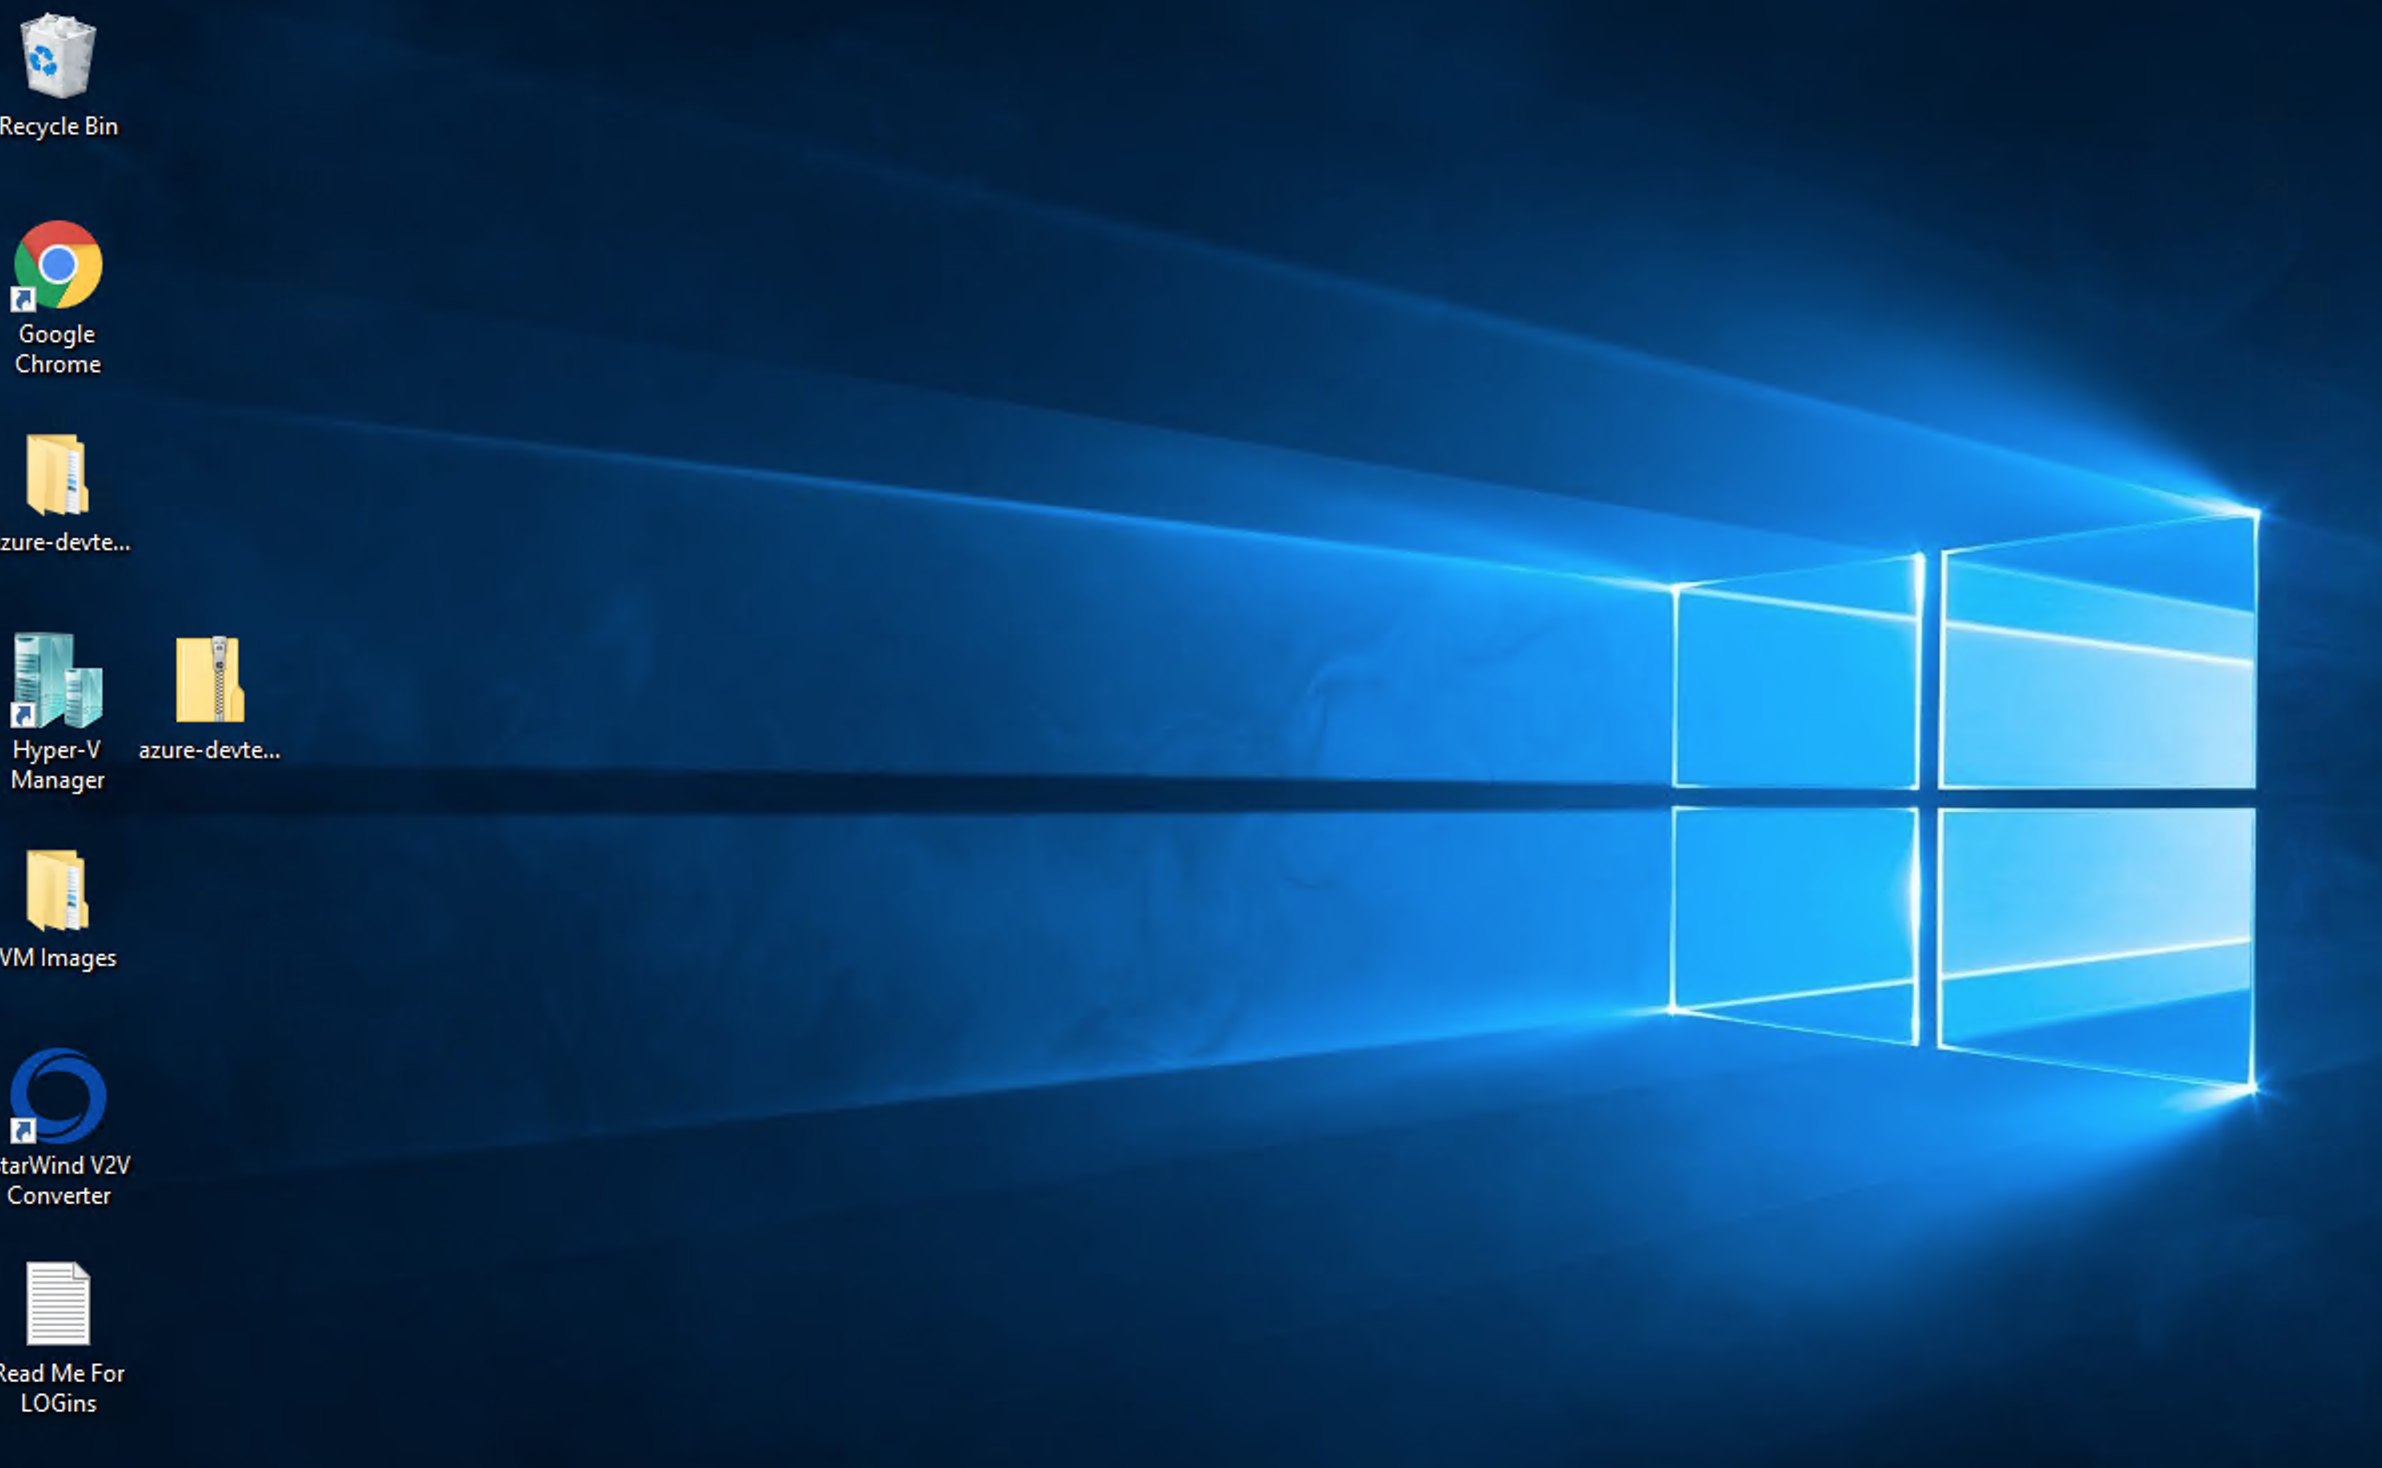
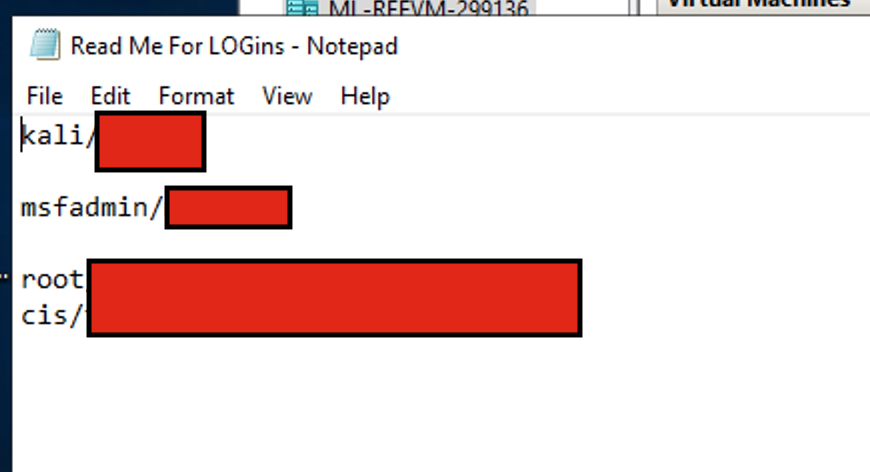
On your Desktop will be a text file that contains Login information. Each set of usernames/passwords are shown. Please make note of it for future projects.
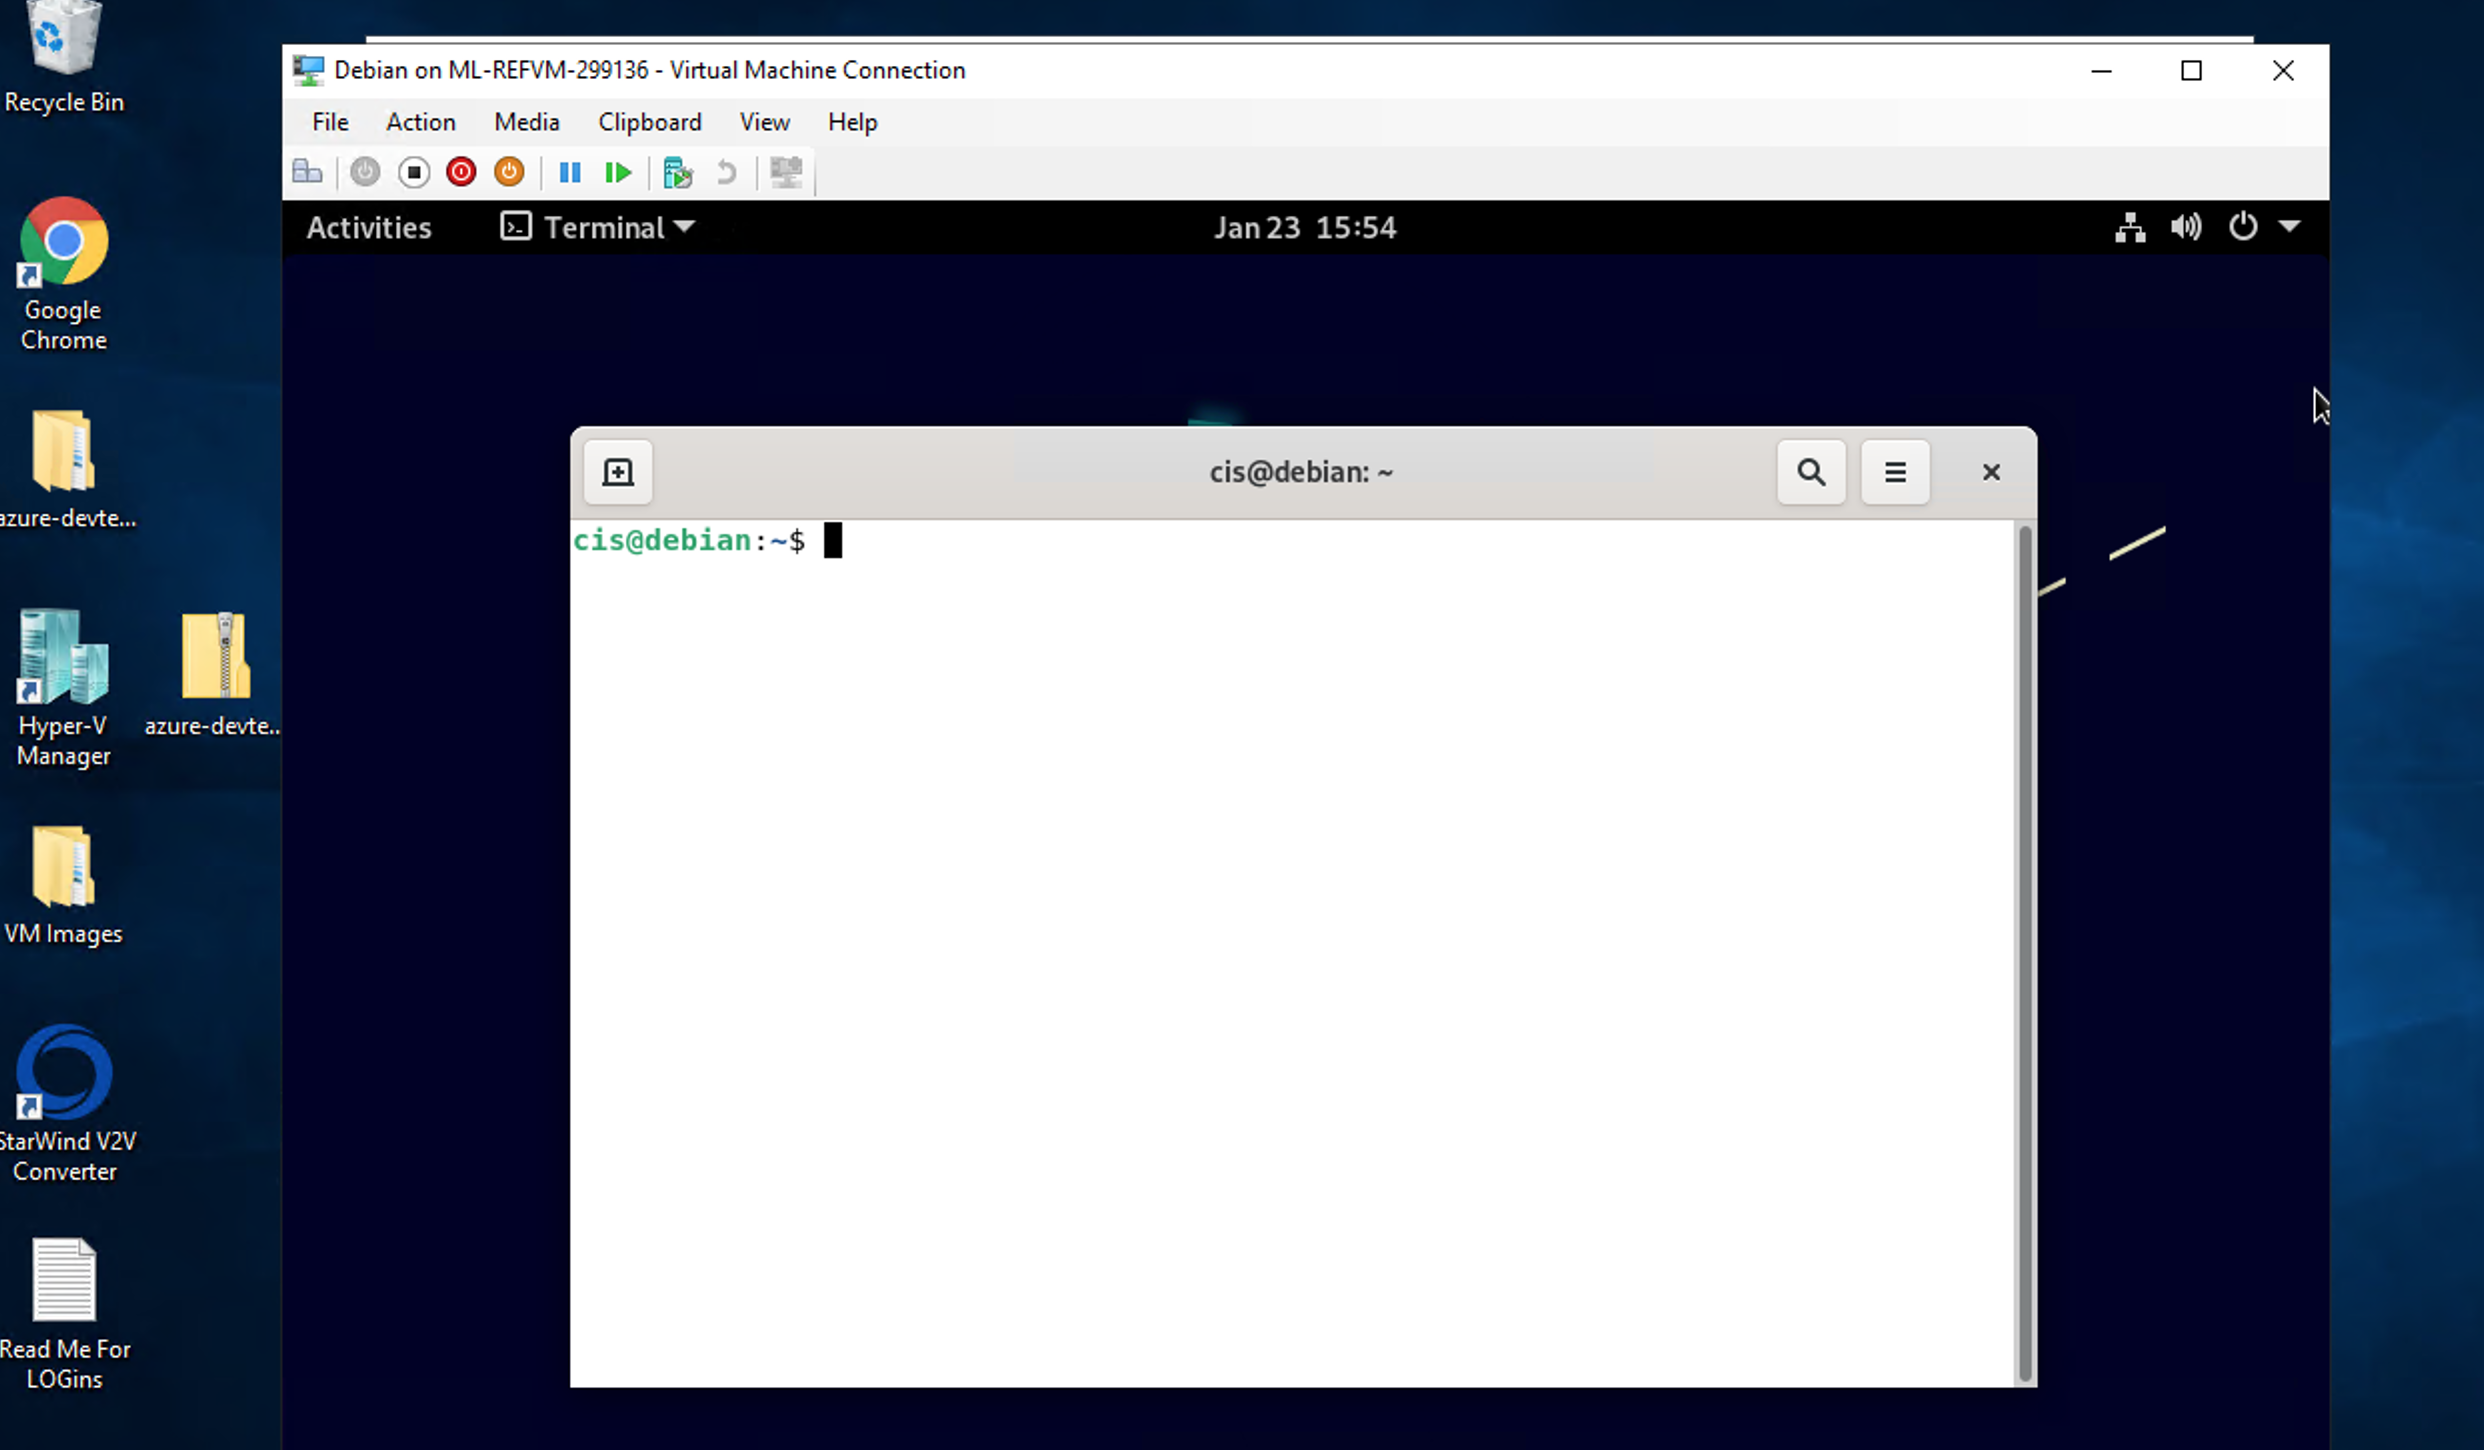
Once you are logged in, double click on Hyper-V Manager and select Debian. From there choose to start the machine. Once you log in, open up a Terminal session. You will know you found the right thing when you see the same image as below:
Now, let's take a look at your network card settings.
Type the command
ip addr
and press enter. You should get the following.
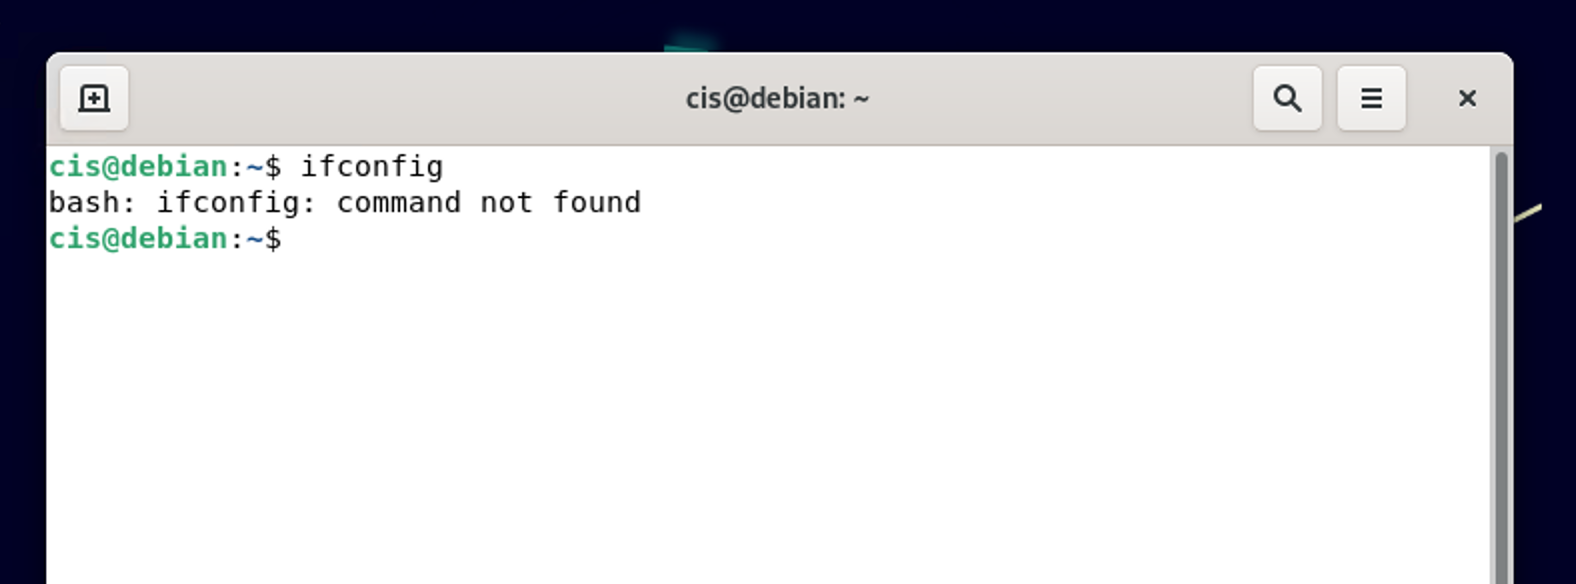
The reason why the system is showing bash, is because born again shell doesn't understand the command you a normal user are asking.
Linux administration requires a lot of patience so part of the goal of this exercise to begin to infuse patience into practice.
On most Linux distributions, the administrator is often referred to as the "super user" and to request that you simply ask/say "su" with any command.
So here is how one would think it would work.

Notice the output changed. Su or the superuser is being queried for something.
In most cases, this is default to users so the user ifconfig doesn't exist.
To further complicate things, when you are typing in commands in Linux, you give it a command, followed by options that are initiated with dashes or hyphens.
So again, here are some classic examples that new users do with Linux and you can see the output of each of them below:

As you can see, each command returns an error message due to use case.
To simplify this, the term "sudo" is used which means "super user do" or let the admin account perform it's action.
So type in
sudo ifconfig
You should see an output similar to below.
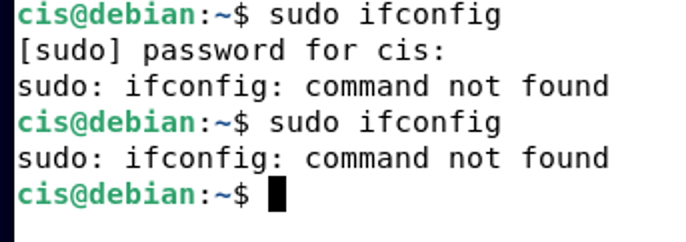
As you can see, it will prompt you for the password (you will not see it being typed in for security reasons so please type it carefully). Once you have done that, you will see that even the admin account does not have access to ifconfig. The reason for this is because its a depreciated tool. We need to make some changes to our repositories to be able to download tools. Enter the following:
cd /etc/apt

sudo nano sources.list

Once the new screen opens, you will need to add the following to the top of your document and uncomment the last two lines. See below for what your file is supposed to look like.
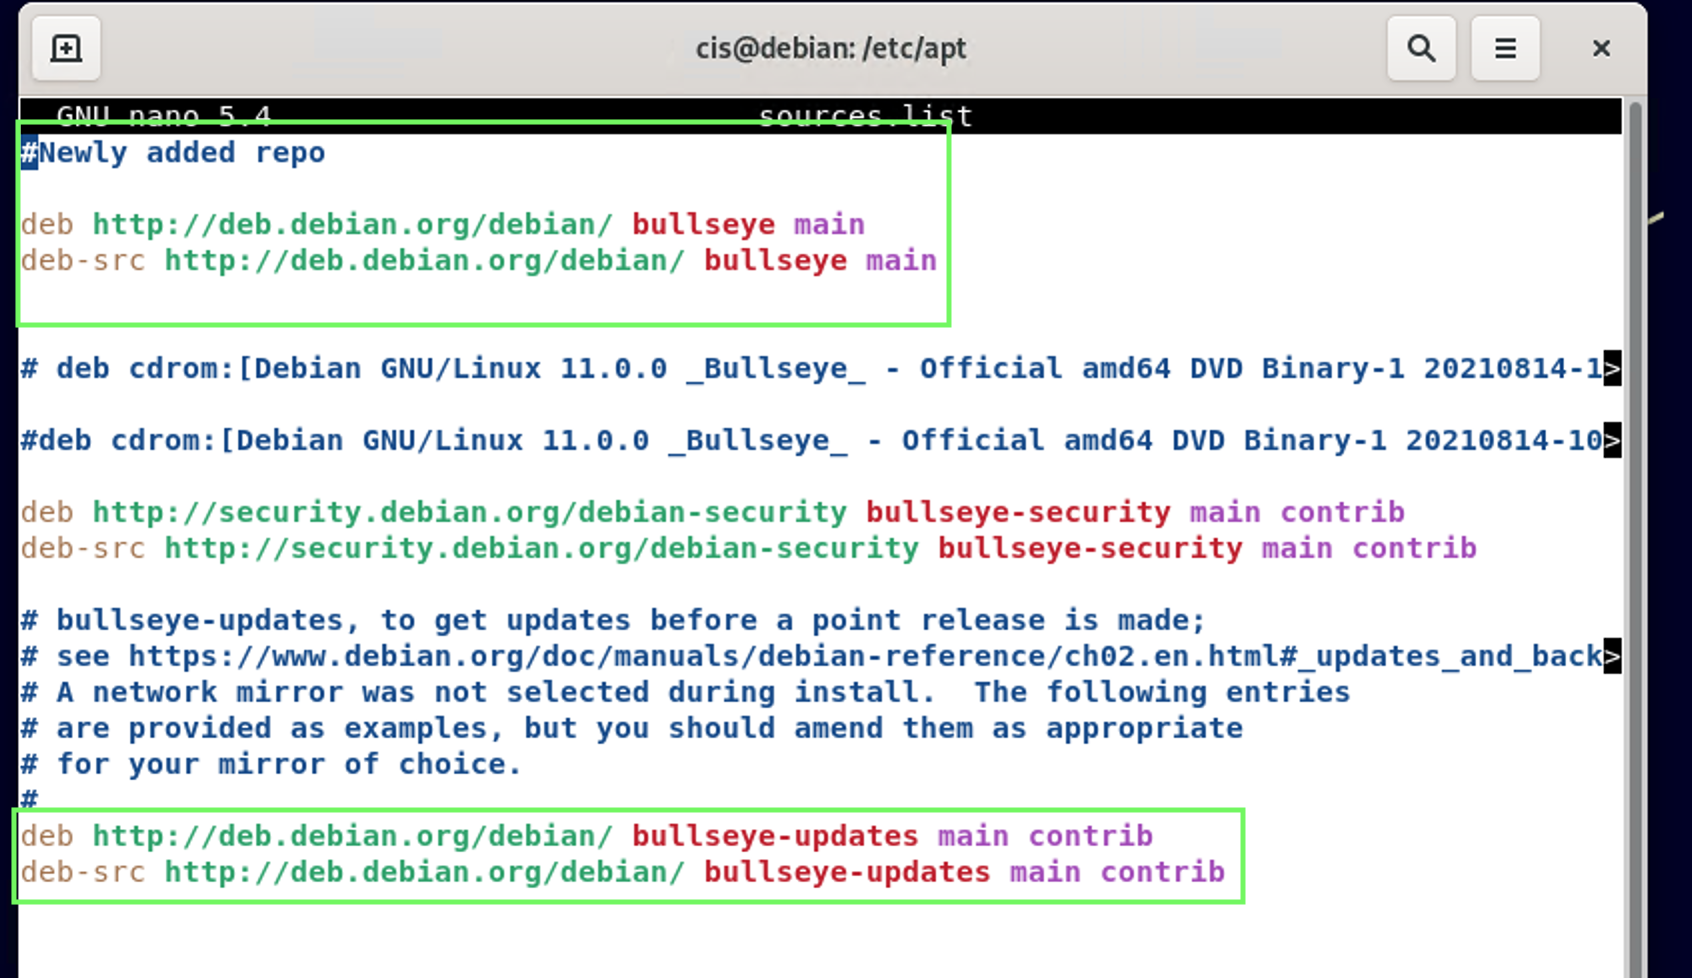
Once you have double checked everything, type Ctrl+X, Yand press enter.
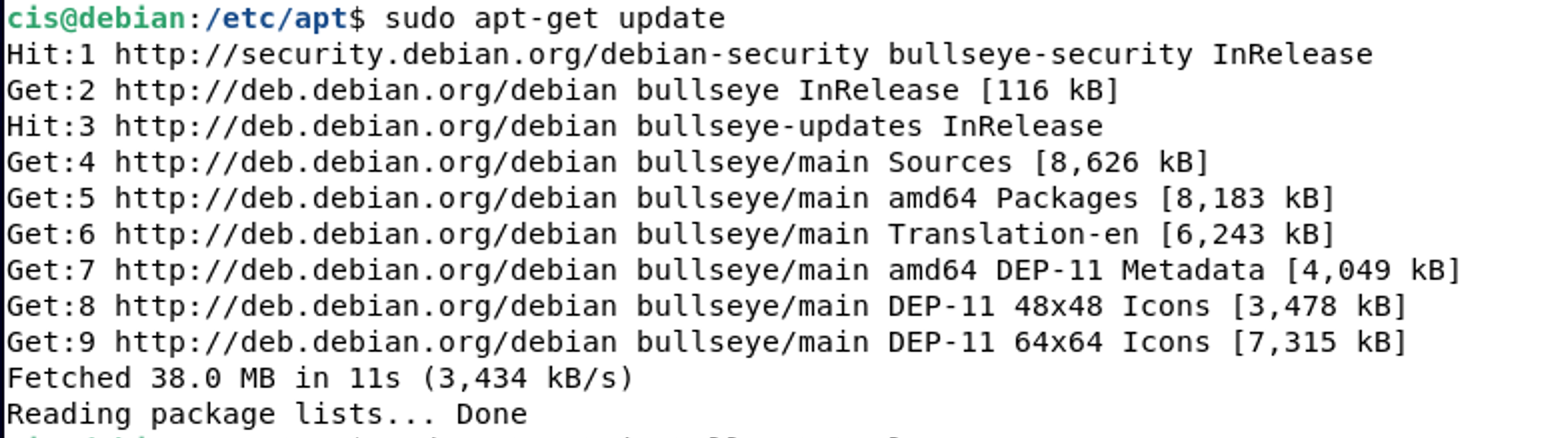
Now you need to run the following command:
sudo apt-get update
This will update you repositories.
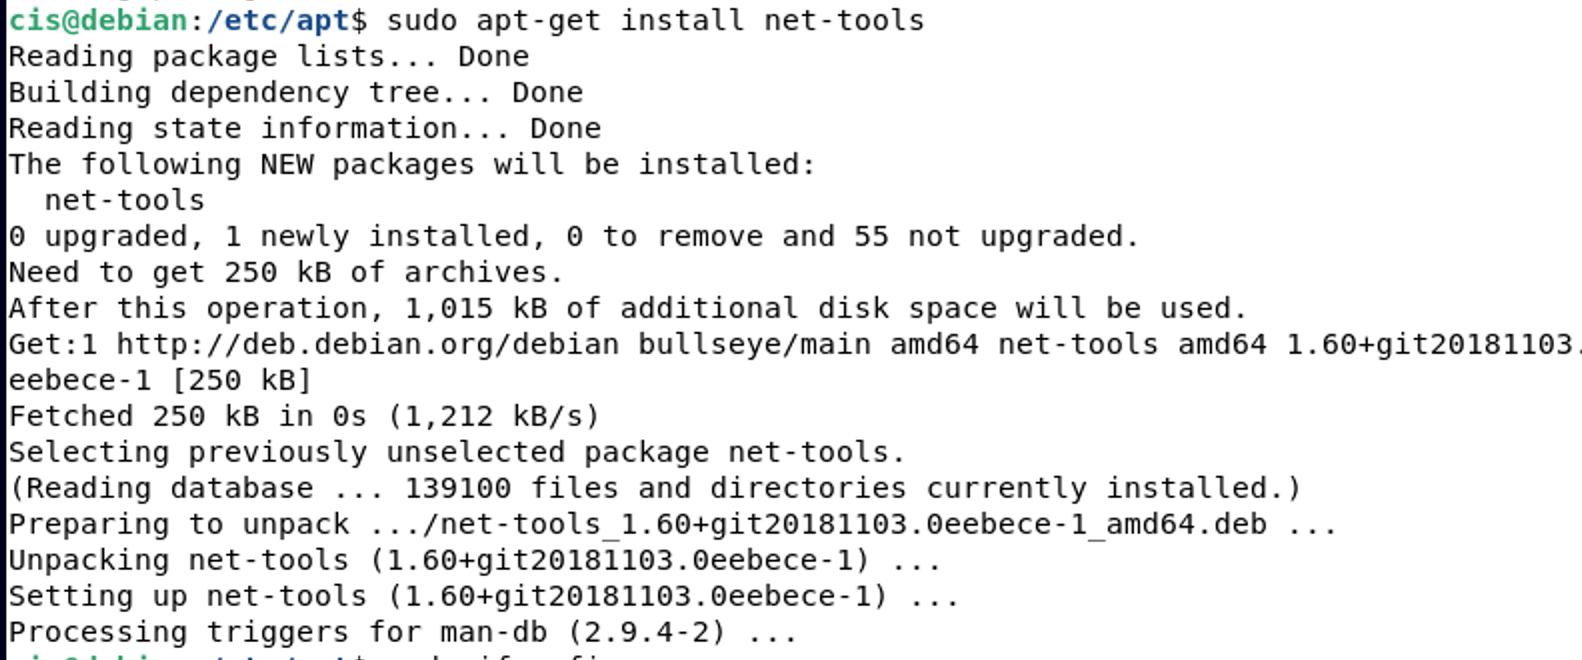
Now let's get the tool from the repo. Type in the following:
sudo apt-get install net-tools
So type in
sudo ifconfig
You should now see an the correct output similar to below.
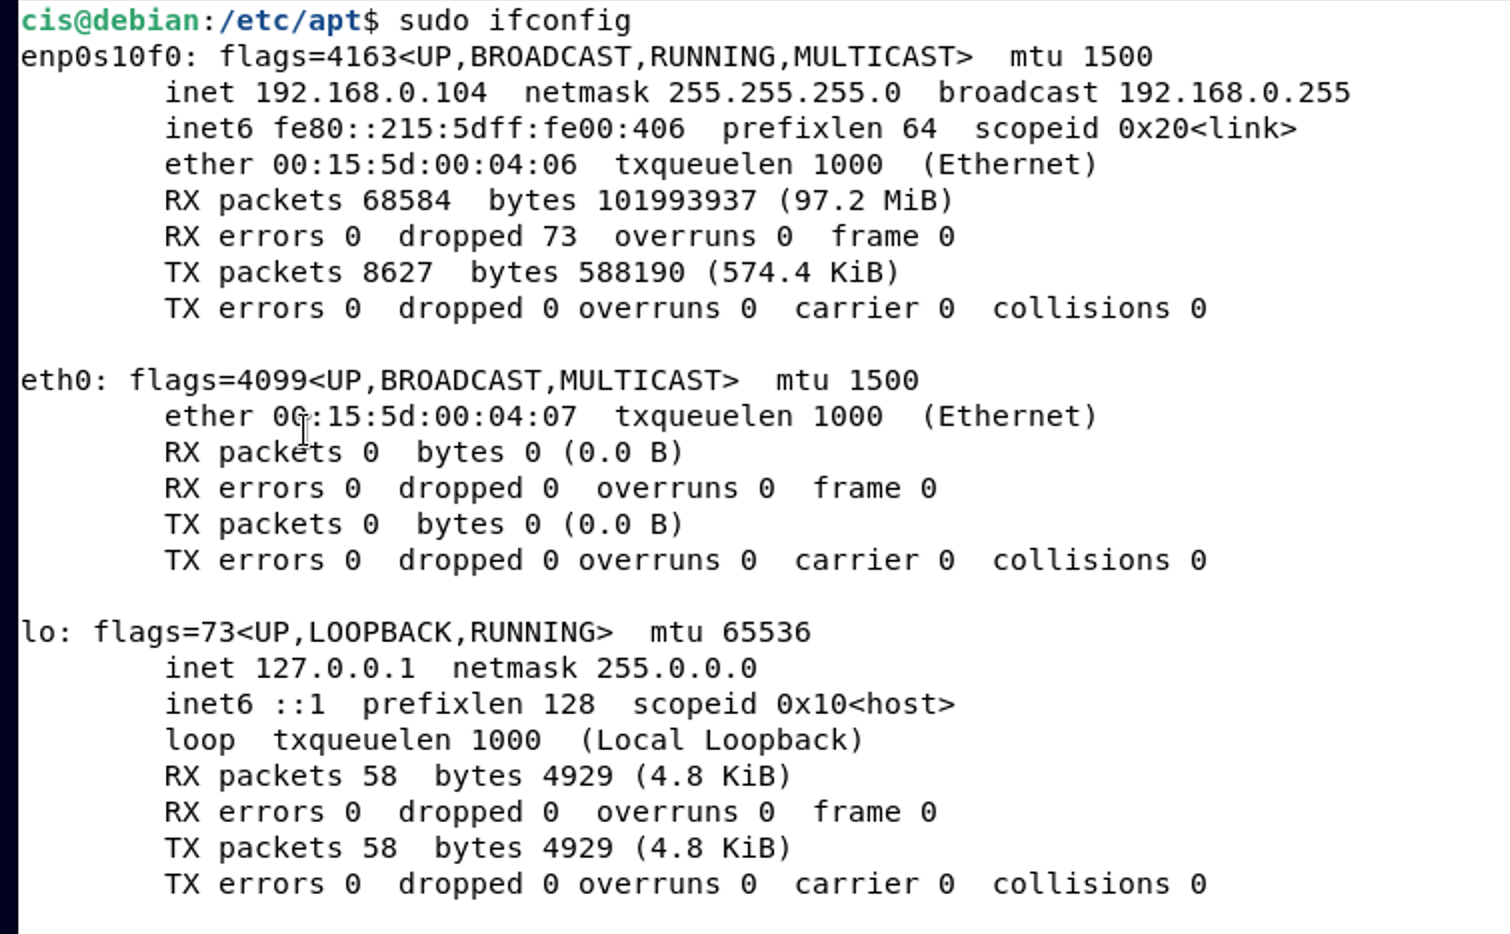
In the above screen shot you can see your Ethernet or NIC card's pertinent information (your Ethernet/NIC cards will be different). The first Ethernet card listed is ens4. It has an IP address of "192.168.0.104", a subnet mask of "255.255.255.0" and the broadcast address of "192.168.0.255".
As you add more network devices, more names would appear here. "lo" is the local loopback for your particular system. This allows you to send packets to yourself for testing purposes.
This would be the first place to trouble shoot network communications. If your network card is having problems you will see the counters after the RX & TX lines "errors:0" increase.
There are zero errors in the above captioned card.
Now, there is a newer and better way to access IP addresses, so I would recommend using this to get your addresses.
Type in
ip address show
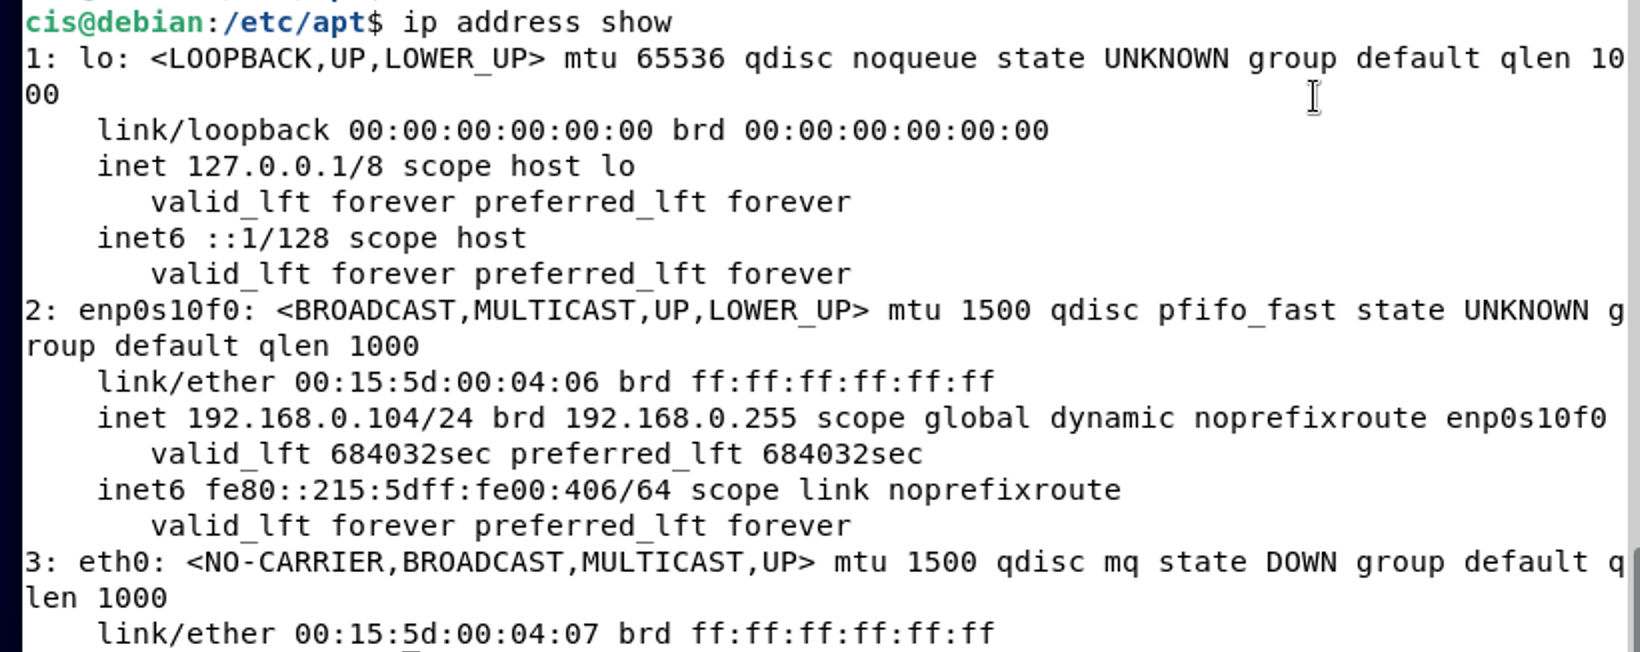
Again, you see the same information from above, but it doesn't require admin privileges. Also, newer networking protocols rely more on this than the old way so this is better for those purposes.
Ping needs work please skip for the moment
Lets get acquainted with more networking protocols and tools. First up will be ping. To issue a ping command type the following:
ping www.google.com

Note: To get back to the cursor/command prompt, hit both the Ctrl and C keys at the same time. This is referred to as killing a process and works in just about all Linux applications.
Notice that your virtual machine was able to make a connection using ICMP to Google's website. You would use this again to help verify connections on systems. The above shows when connections are working (see where it shows 0% packet loss).
In the figure above:
Minimum time was 1.050 milliseconds
Average time was 1.151 milliseconds
Maximum time was 1.233 milliseconds
Deviation time was 0.061 milliseconds. (Please note this is not standard deviation) The formula that's being used is ev = sqrt( (E (sqr(x)))/N - sqr( (E(x))/N)) which is the "mean deviation".
These are metrics that are used to help define your network. It is always a good idea to know how to test basic network connectivity.
Take a screenshot pinging a different website (anything besides Google). Use my screenshot for reference. Then answer the questions below to check for understanding.
Refer to your screen. Answer the questions below in the Google Doc that you started for this project.
Minimum time was ________ _milliseconds
Average time was __________ milliseconds
Maximum time was _______ milliseconds
Deviation time was _______ milliseconds.
When someone complains that "their Internet isn't working", this is one of the first tests you should make when troubleshooting. Ping an address by its numeric and then ping by name.
If the numeric is working and you get replies like above, but when you ping by name, you don't, then they have a DNS problem. Their DNS server is non-responsive or they have the wrong DNS server in their DNS settings.
Windows it's in the network card properties under "Internet Protocol/TCP-IP Protocol" properties dialog box.
RESUME HERE FOR NOW
The next thing we need to take a look at is your default gateway. This is the address your machine will route all traffic external to its own network, which is usually a router which goes to the Internet.
To find the default gateway the DHCP server configured for your card run the following command:
sudo route -n
(The above is an old method that requires admin or root privileges; the newer method is listed below)
ip route
Your output should be similar to below:
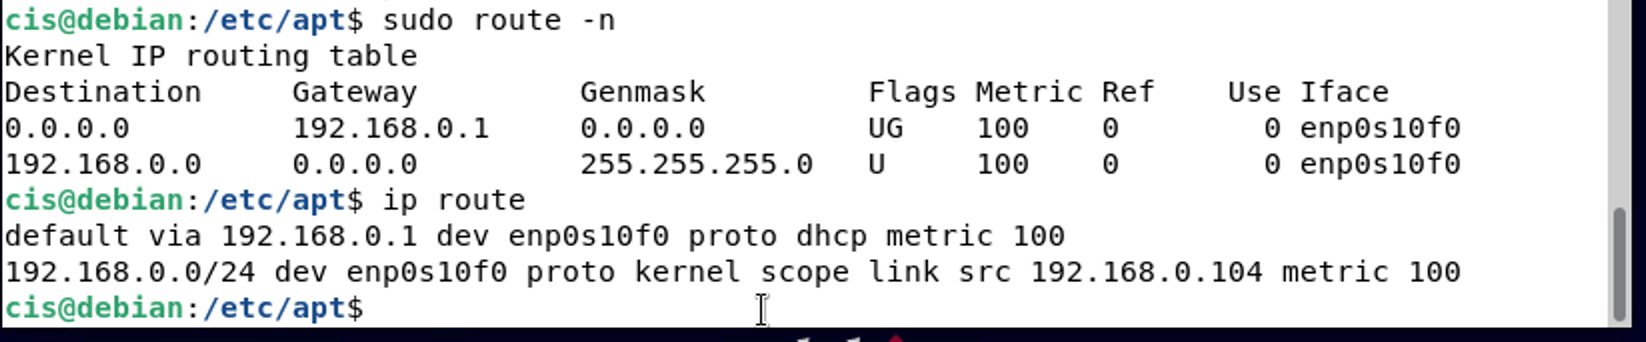
The line that starts with "0.0.0.0" is your default gateway line. Under the column "Gateway" on that line you will see your default gateway. In my case it's "10.142.0.1", yours may be different.
Again, two different ways and you should be using the new way as more protocols are supporting "IP" over "IF".
Take a screenshot showing your default gateway. Use the above screenshot as a reference.
From here, let's discover how to see users on a Linux system. The command pinky will do this. You can also request information from the logs about a user using pinky as well. Type the following noting that it is a lowercase L, NOT a numeric 1:
pinky -l $LOGNAME

One thing to note is that you can see from the first pinky command the IP address in which that user has logged into the system. If you are including this a screenshot, please be sure to mask that.
As you can see, you are also given things like the home directory for that user and the last time that user account has been accessed.
Speaking of directories let's move on to traversing our way around the Linux file system. To tell where you're currently at in the file system tree issue the pwd command.
This tells you your current directory (print working directory). Your output should be something like "/etc/apt"
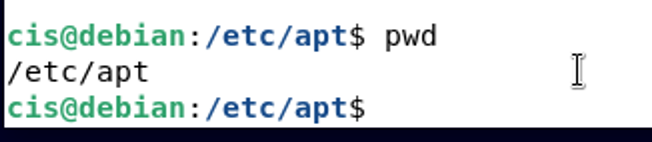
Take a screenshot here if it shows your name to help provide proof of completion.
You can see what files exist in the current directory by issuing the following command:
ls -l

The switch -l is a lower case "L". It's a long directory listing. If you want to see any hidden files in the current directory add an "a" to the switch with "ls -al".
If you want to look at file sizes in human readable form then add an "h" to the switch by "ls -alh" if you had a file that was several gigabytes in size the number of gigs would be listed as "1G" for one gigabyte.
You can look up all the switches or parameters to the ls command by running the manual command: man ls. As you can see from my example, there are currently no files in the directory I'm in. But we will fix that.
Let's move to a different directory.
To change out of the current directory let's run the "cd" command to jump the root of the tree by the following (note there is a space between the cd and the forward slash).
cd /
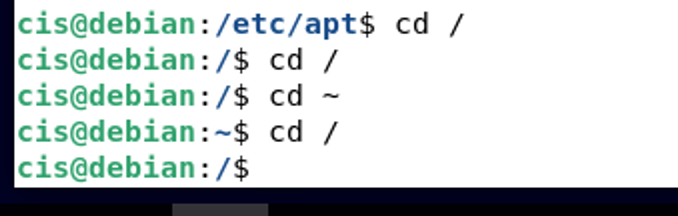
Notice how the prompt changed from a tilde (~) to a forward slash (/). We have now moved to the root directory which is the highest level you can get in a Linux Operating System.
Now do an ls -alh your output should be similar the one shown below:
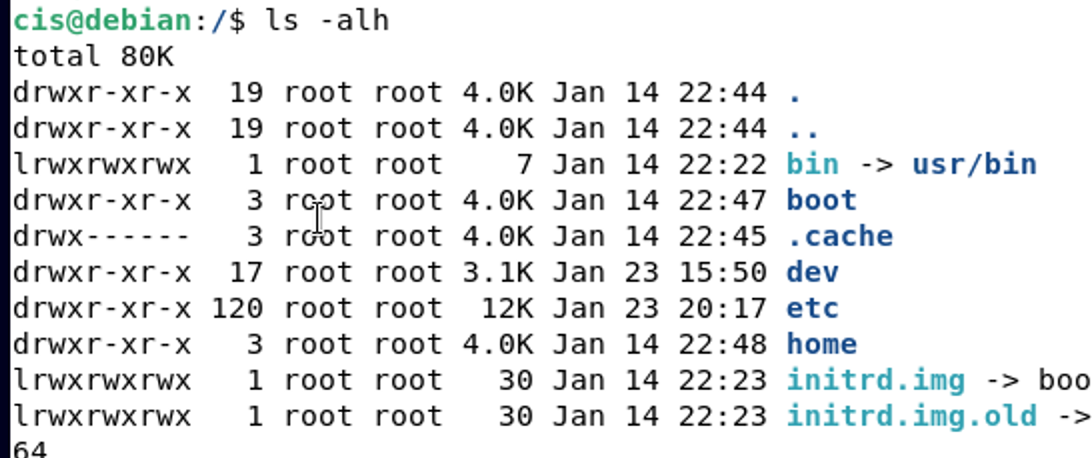
Notice the byte count is in human readable form, "K" stands for kilobytes.
Take a look at what the following means from the output above using the first entry.
d rwx r-x r-x 22 root root 4.0K Oct 8 19:03 .
The "d" means it's a directory
The first group of "rwx" is root's (owner) rights to the directory (read, write, execute)
The 2nd group of "r-x" are group's (root) rights (read, execute) – notice "no write" right
The 3rd group of "r-x" are everyone's rights (read, execute) – notice "no write" right
The second column is a number, in our example it is a "22". This is the number of hard-links to the directory.
A link is like a short-cut in Windows, in UNIX there are soft-links and hard-links, to go into further detail about links is out of the scope of this project, if you're interested "Google" for UNIX links.
The next column is the owner of the file, in our case it's owner is root, the 4th column is the group owner of the file and in our case it is also "root", the next column is the number of bytes and with the "h" switch we see it as 4 kilobytes, the next is the date & time of creation and finally the last column is the name of the file or directory. (so the . (space followed by a period) is the name of the directory)
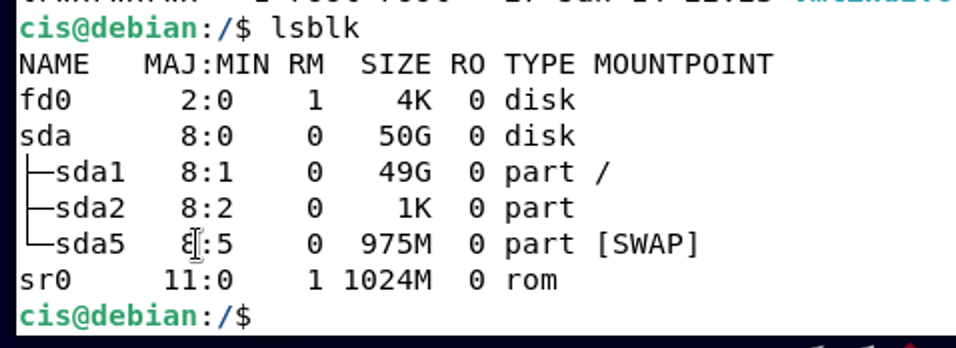
Another command you can perform is the lsblk. This stands for List Block Devices which will show you any devices that have memory available to them. (Hard drives, USB drives and RAM in particular)
Let's jump back into your personal directory by issuing the command:
cd

Again, pay particular attention to the end symbol (the tilde vs the forward slash).
Let's create an empty file with the command "touch":
touch test
This creates a file called "test".

Let's put your name in that file by using the "echo" command:
echo "YOUR NAME" > test
Now let's look in the file to see your name in it by using the "cat" command:
cat test
You should see an output similar to below:
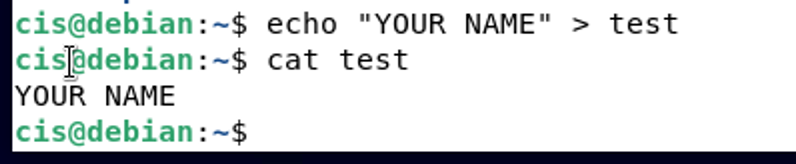
"cat" means to concatenate or to link together. In our case, linked what we typed into the file.
Let's add another name to the file by using the echo command but with two >> symbols:
echo "Mr. Taylor" >> test

If you didn't put the extra ">" sign then the file would have been over written with just Mr. Taylor's name. The double >> means append to the file.
Take a screenshot showing your name and my name contained within the file test. Use the screenshot above for reference.
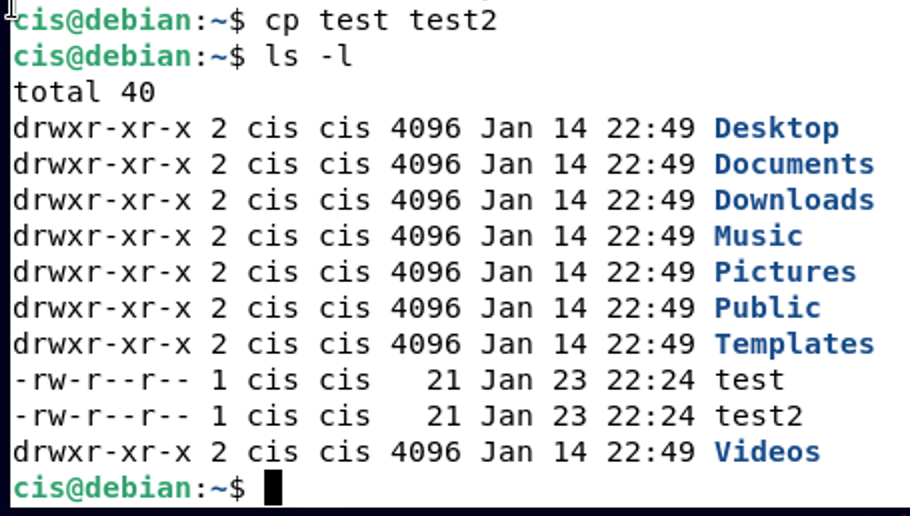
Let's now copy the file test to another file called test2 with the cp command:
cp test test2
Now if you do an "ls -l" you'll see two files in your directory "test" & "test2" with the exact same number of bytes, that's because they are identical.
Let's rename the file test2 to YOURNAME (Please use your first and last name here as one word) by using the "mv" command (Note that it is lowercase M and V for the command):
mv test2 YOURNAME
Now if you do another ls -l you'll still only see two files (test & YOURNAME), test2 no longer exists because you've moved it or re-named the file.
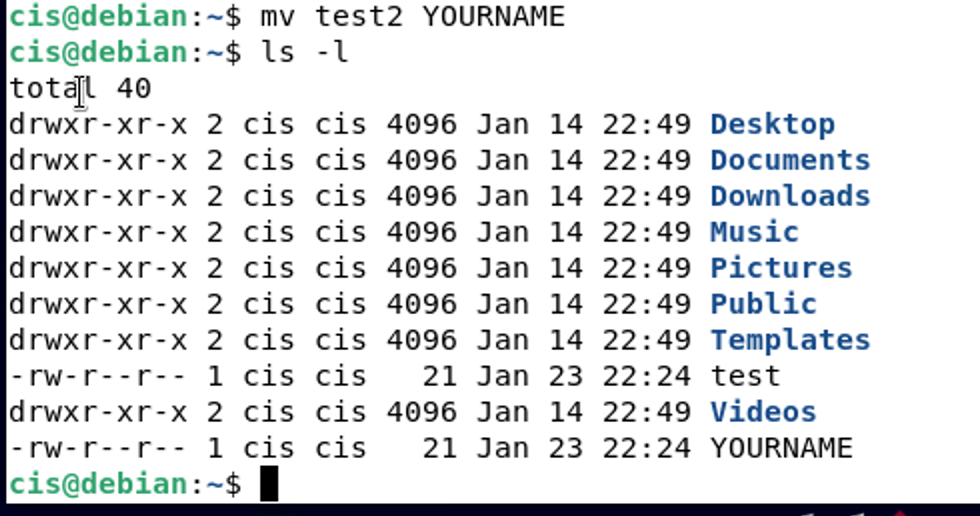
Take a screenshot showing the file names with exact number of bytes of each file. "Your name" file should appear in the screenshot. Use the screenshot above for reference.
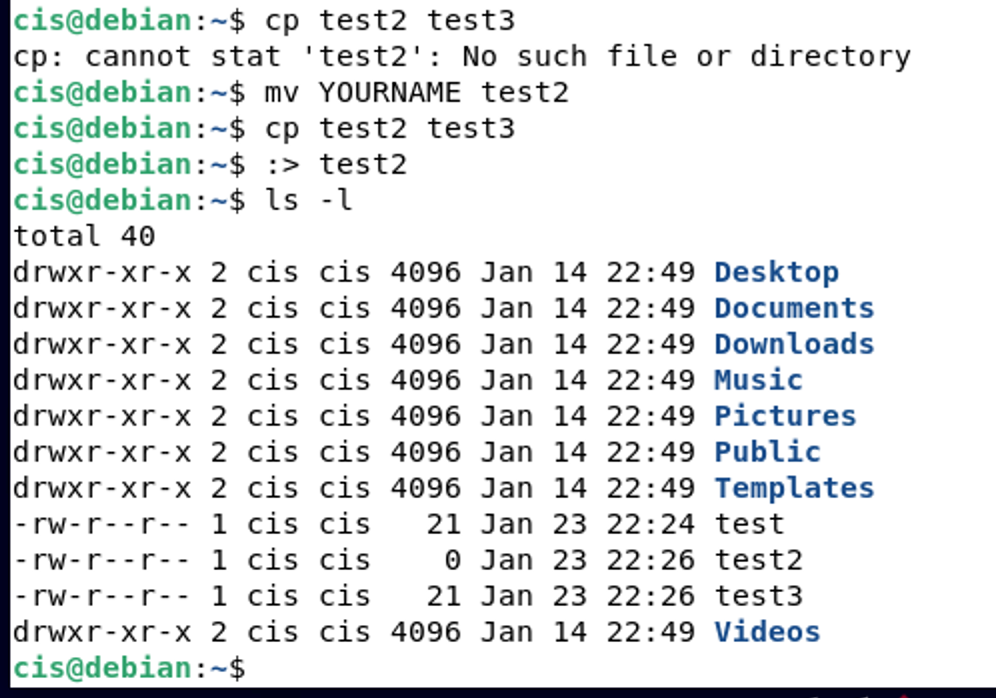
Let's copy YOURNAME back to test2 by using the move function.
mv YOURNAME test2
Now lets' copy test2 to test3 and then zero out test2, deleting its contents but keeping the file.
cp test2 test3
(This will copy the file)
:> test2
(This will zero byte the file test2, but still keep the file in existence)
Let's now make a directory called "mydir" with the mkdir command
mkdir mydir
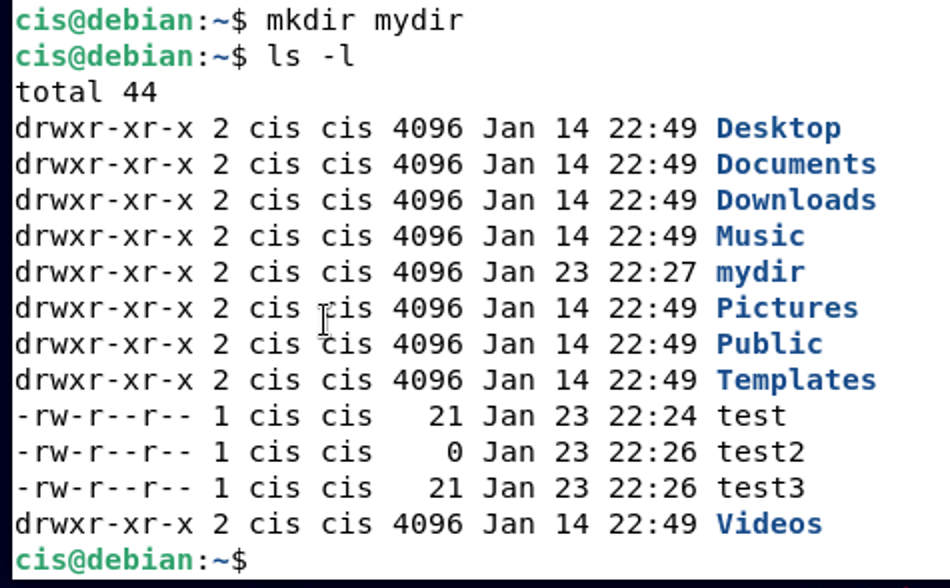
Take a screenshot showing your files in the current directory before they are moved into your newly created directory.
Let's move our test files into our new "mydir" directory with the move command:
mv test ./mydir
mv test2 ./mydir
mv test3 ./mydir
This moved the files one at a time; however we could have used a wild card character "*" (an asterisk, Example: mv test* ./mydir) to move all of them at once.
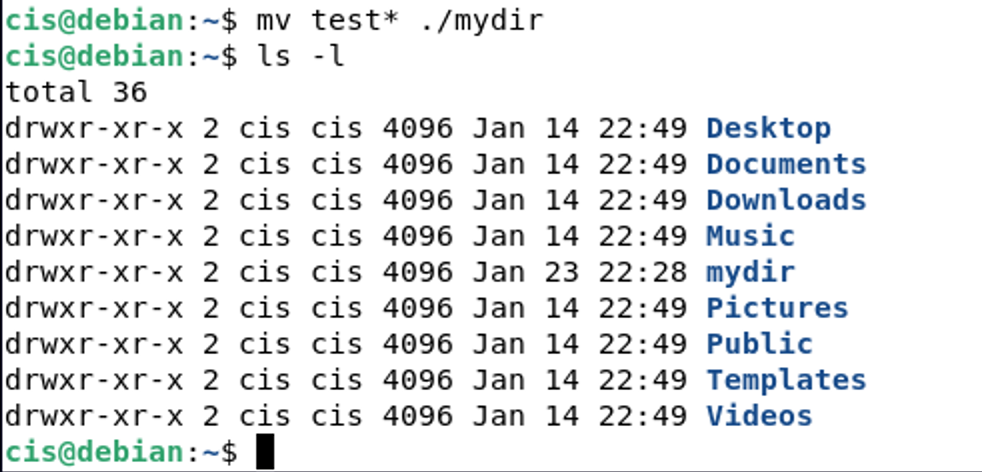
Let's use our cd command to jump into our "mydir" directory.
cd ./mydir
Take a screenshot of your new directory with your three files moved into the new directory.
Please note the single period with a forward slash means the current directory, the double period with a forward slash means the parent directory (the one above you).
If you are at the root of the file system "/" there is NO parent directory above you, you are as high as it gets in the file system.
Quiz Yourself
Change the file contents of each file by answering each question below and create a new fourth file:
1) Add your name to the file "test". Make it the only information in the file.
2) Add your favorite band name to the file "test2".
3) The file name test3 should be empty, but remain the directory.
4) Add the name of your best friend, your favorite teacher, and the university you want to attend in the fourth file with the name test.
Take a screenshot of each of the 4 quiz questions above being completed. This will show me that you understand how each of these functions work.
The grep command is real handy to find a string in a file. The "-i" makes it case insensitive! Issue the following to see it in action:
grep -i "yourname" *
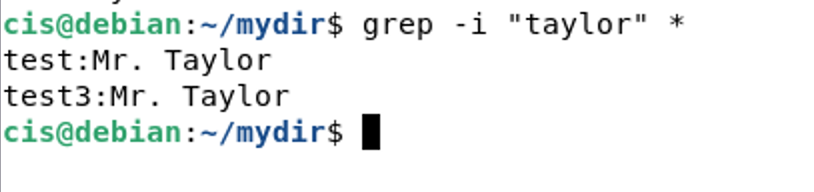
Take a screenshot using the reference above to showcase how grep works with your name. How many files did you find with your name in it?
Now delete our test3 file with the rm or remove command:
rm test3

One important short cut to note is the use of the up arrow key. If you'll hit your up arrow key you should see the previous command used.
Linux/Unix does a wonderful thing, it remembers your commands. If you'll continue to hit your up arrow key you will see all the commands you've typed so far.
The commands are stored in a hidden file in your personal directory. If you want to see all the commands you've run at once try the history command.
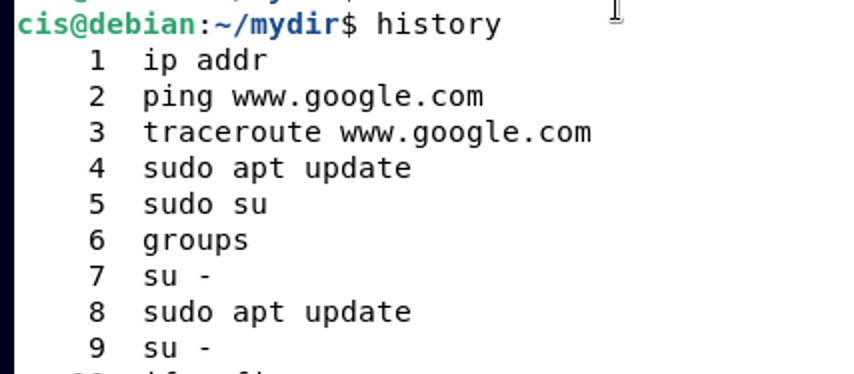
Each command is listed on the screen with a number in front of it. If you want to repeat a command in the list, then at the prompt type an exclamation mark and the number.
(Ex: !2 would run the second command issued) My history will be different than your history.
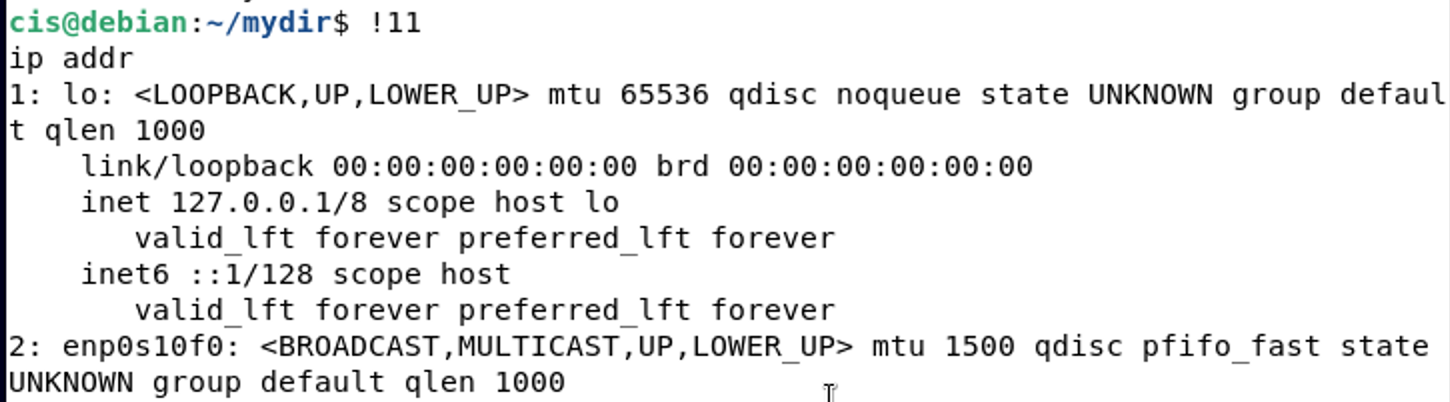
Take a screenshot demonstrating how history works. Pick any history item that will issue a command. You should include your history showing the number you are performing, followed by the action working.
As example, you can see in my history, 11 is a ip addr command. Below is the output from it.
Let's edit a file with "nano". First it's a good idea when you're new to "nano" (or any text editor) to copy the file you're going to edit to a backup file. Let's do this with the test file.
cp test test.backup

Now if you were to cat each file, you would see that they are same file. From here let's issue the following command to open the file in a text editor:
nano test
You should see a similar file depending on what is currently in your file.
Use your arrow keys and navigate to the end of the last line. Press enter and begin typing by adding a sentence or two about the coolest thing you've learned from this project in your test file. See below for an example.
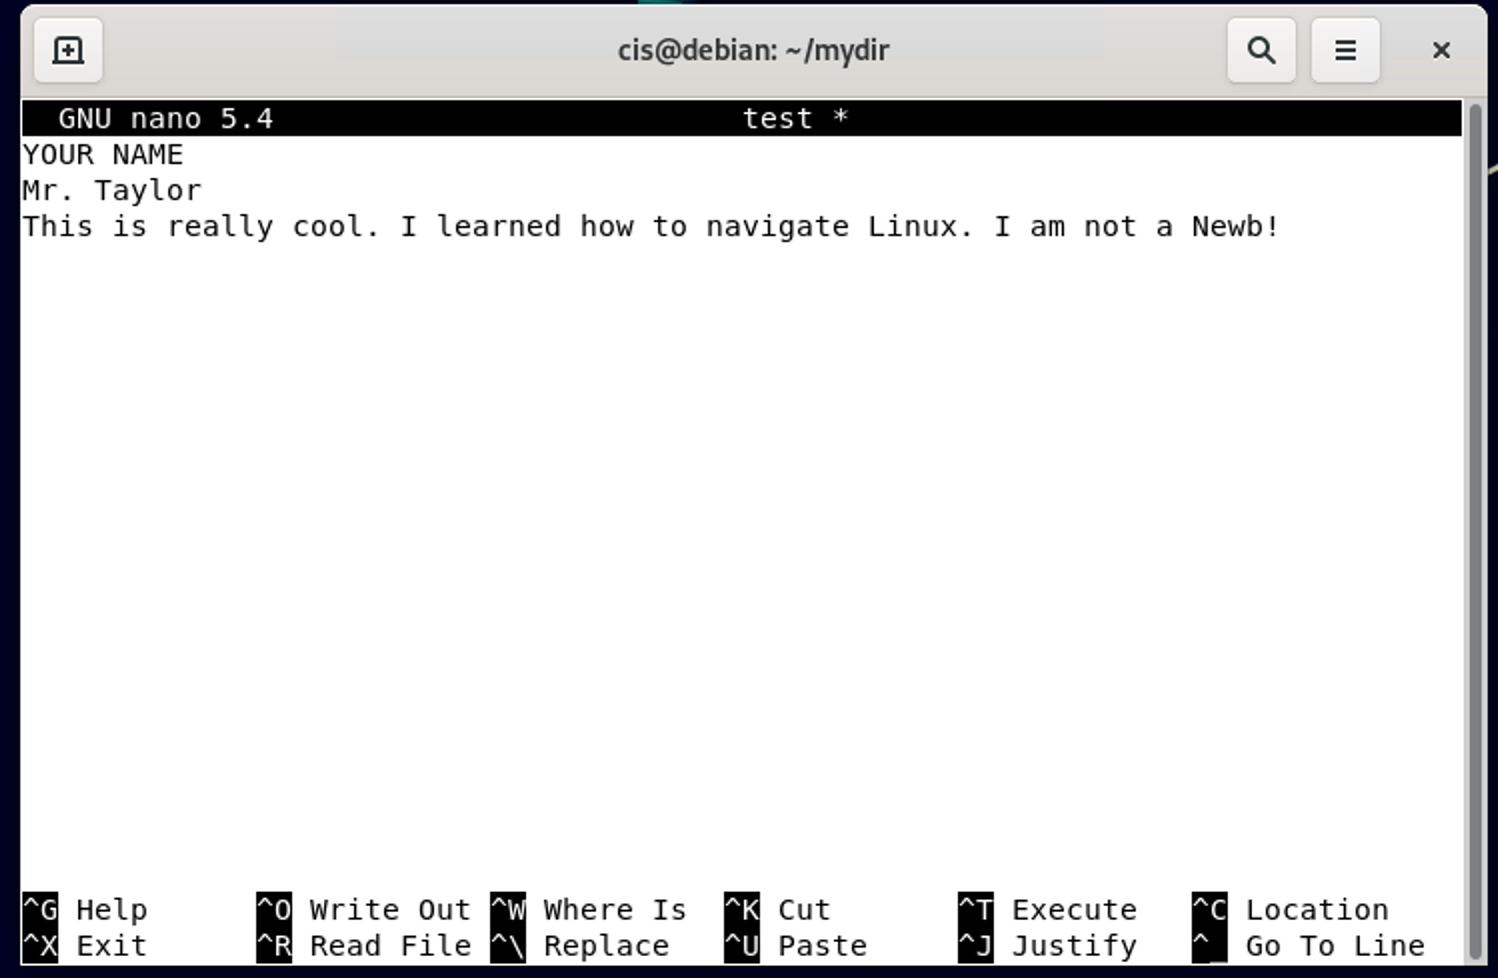
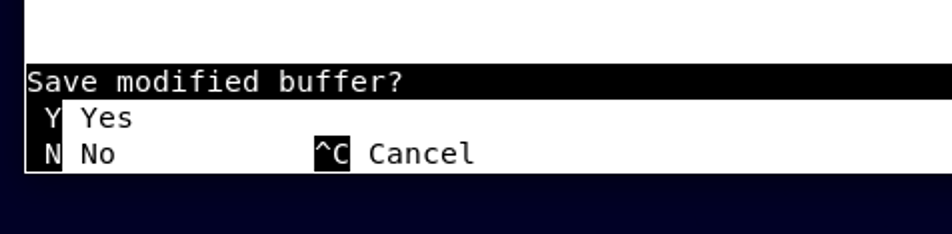
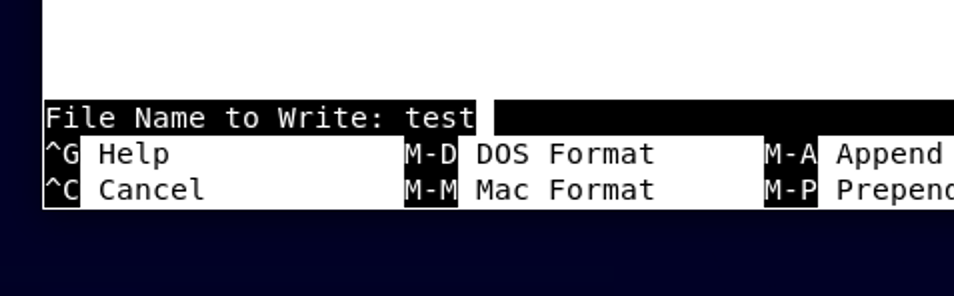
Press Ctrl and X to exit out of the program. It will ask you to "Save modified buffer?" Type Y for yes and press Enter. It will then ask for "File Name to Write:" Leave it as test and press Enter.
Now if you cat each file, you should see the differences between them.

Take a screenshot showing the differences between your files. Your files may have more information contained within them that what is shown and the image above is designed to be used as a reference point.
The last part of this project is to teach you the basics of Shell Scripting. It was explained early on about file permissions, so now you need to understand how they work.
You are also going to do some basic programming here as well. Type the following:
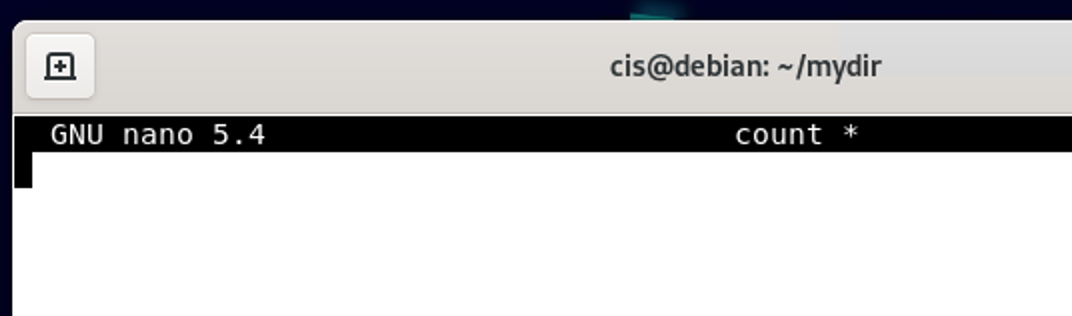
nano count
This should open a blank text editor named count.
Add the following code in:
 #!/bin/bash
for i in 1 2 3
do
echo $i
done
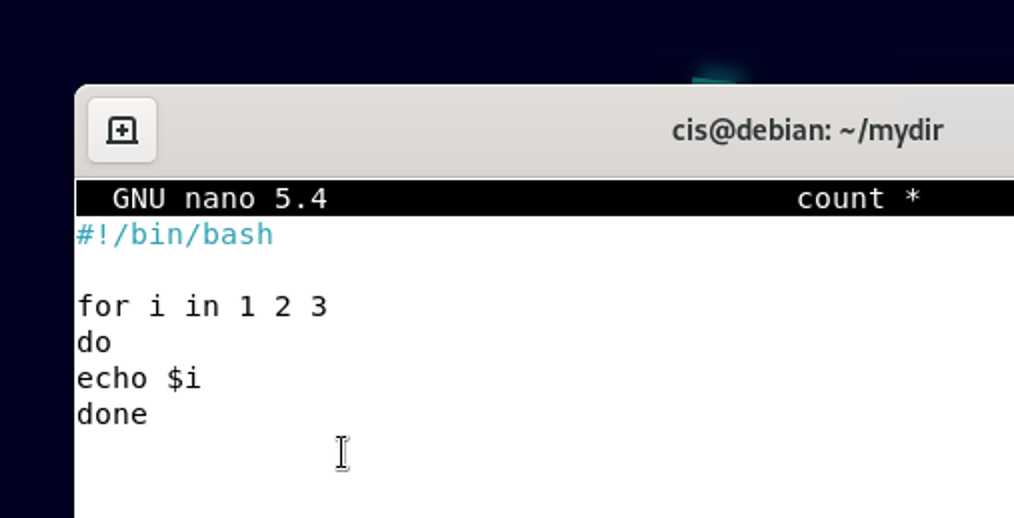
Save the file by hitting Ctrl and X at the same time, Y, and the Enter. Refer to the previous directions on Nano if you need a quick refresher.
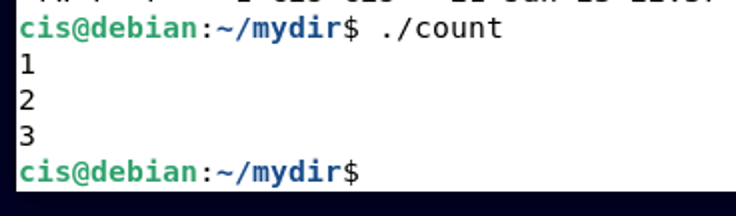
From here, to run a program in Linux, type the following:
./count

You should be getting a ‘Permission denied' error. The reason for that can be explained by looking at the properties of the file.
Use the appropriate command to see the same output from below:
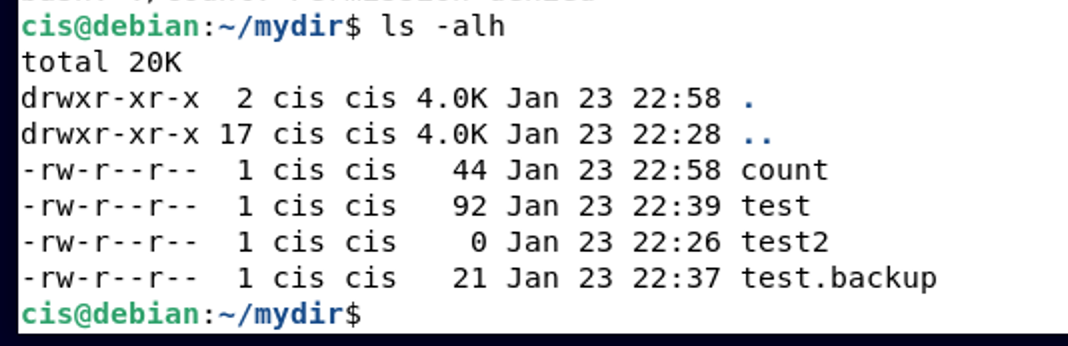
Notice the highlighted row (the third one down). Count only has read and write permissions and it needs execute to be able to do that. Let's give it the appropriate permissions.
Type the following:
chmod a+x count
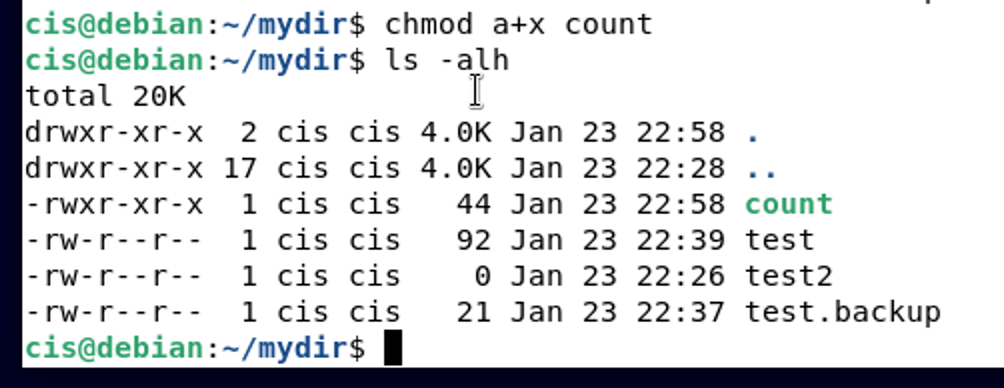
Notice how count is green in color, but it also has the execute permission (x) on each group? Now you can run your file by typing in ./count again.
The final step is to take our mydir directory and move it into a project directory called proj02.
To help keep your projects organized (and to show you how to move directories) complete the following using my supplied screenshot.
Take a screenshot showing your newly created directory. I need to see your completed move of your files.
This concludes the Linux Essentials project. This is just a small sample of the capabilities of Linux. Please be sure to submit your document to the instructor before the due date and time.
This document needs to contain screenshots with captions as well as answer any questions that appeared in the project.
If you have any questions, please don't hesitate to ask the instructor.
*PLEASE REMEMBER TO PROPERLY SHUT DOWN YOUR VM. Refer to previous directions if unclear as running VM's when not in use burns through your credits/hours!
Other commands to note (these are optional):
To shut down your Linux machine, use the shutdown command, the shutdown -h now command will shut down the computer right away and it will switch off.
Use the shutdown -r now command will re-boot the computer instead.
If you need to access a calendar, you can type in cal and it will display the current month. You can lookup certain month and year as well by putting the month (in digits) and year in after the command.
cal 04 1887 will show April 1887 as an example.
The command date will show today's date.
To get a steam locomotive on the screen, type /usr/games/sl. (Note: You may have to get the program first. Do you remember how to do that? Hint: apt-get install
To see your letters in reverse, type rev then type your word and press Enter.
To see your fortune, /usr/games/fortune. You may have to install it as well.
For fun, try to use the command toilet "Whatever you want to say". Installation required.
Lastly, you can see the matrix in Linux. Try the cmatrix command once you have installed it.
Created in previous years, drafted online in January 2021
Updated January 2022 for Debian 11