Port scans on networks that are unexpected or you that you do not have permission to be on can be illegal! Please proceed with caution for this project and note the directions VERY CAREFULLY! For the purposes of this project, since you will be scanning your own cloud machines, you will be fine.
You will need the following to complete this assignment:
****Need to add here.****
Please be sure to create a Google Doc that contains screenshots with captions indicating what you are accomplishing. This will be used to help show that you completed the project and can be used as a reference later on for you. This will also be your submission for this project. The number of screenshots is to be determined but typically it should match the page count of the project.
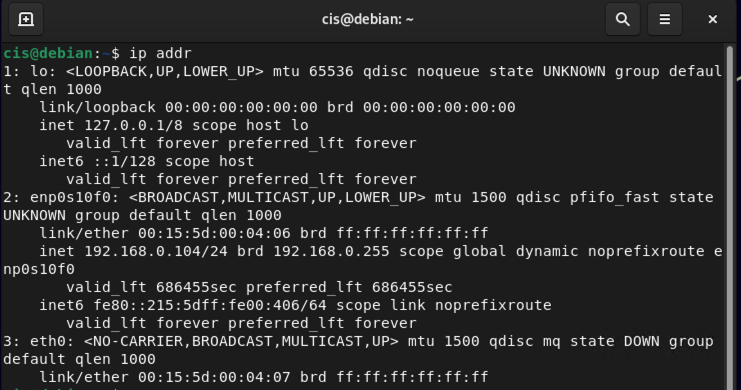
You will first want to begin by powering on both of your cloud machines (Debian and Windows Server 2019). Once they are online, connect to each system. We need to test connectivity of each system before we can move forward. Let's start with Debian Linux. In your terminal session, type in the following:
ip addr
For future reference, in order to stop the ping, you will need to type in Ctrl and C. *Mac users will use command instead of ctrl*
As you can see from my example, my IP address 192.168.0.104. Yours will be different but similar. Please make note of it.
Take a screenshot of your internal IP addresses.
Now switch over to your Windows Server 2019 system and open up a Command Prompt from the Start menu. Issue the following commands:
ipconfig
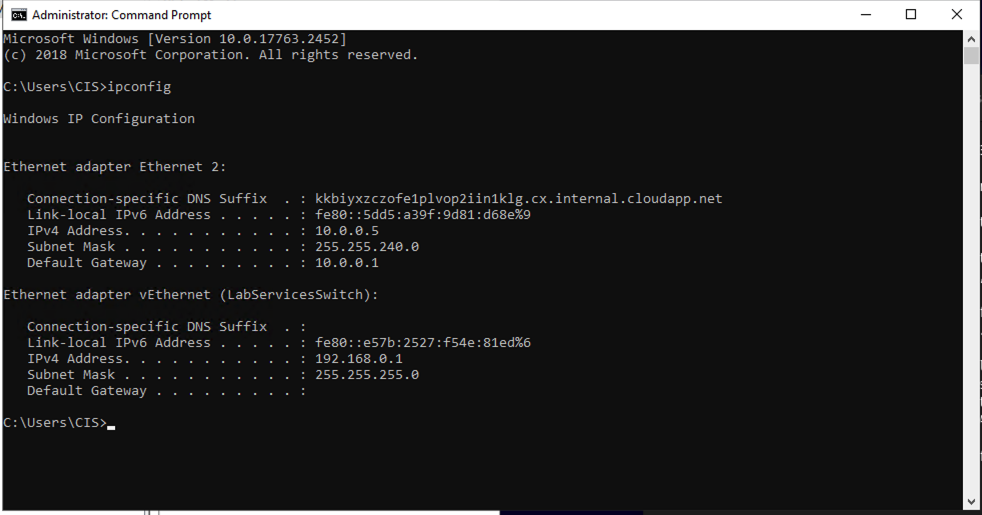
Again, for future reference, on a Windows system, by default, a ping will stop after 4 tries so you do not need to kill this process. The last networking test is to ping from Debian Linux to Windows Server 2019. The purpose of this ping is to make sure that both machines can see each other. Type in pingfollowed by the address of the target system. In my case, I'm using Debian to ping the Windows Server 2019 machine. In order to do this, in Debian Linux, you should issue a ping followed by the IP address of Windows Server 2016 system. You should also do the reverse of this to make sure there are no issues for networking.
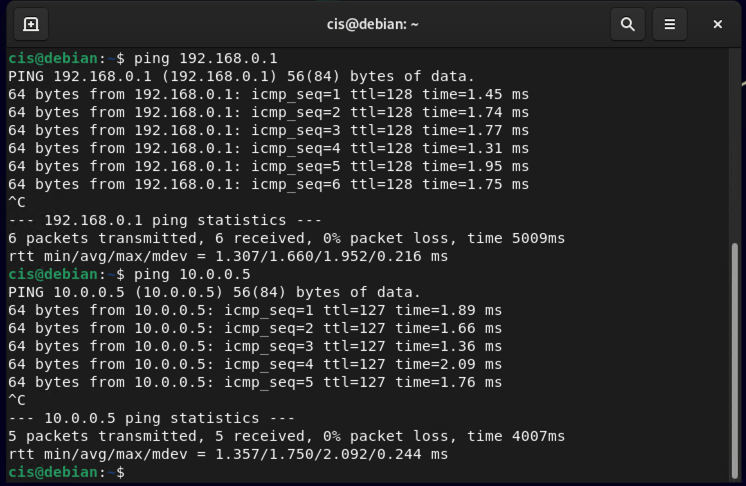
If the ping times out, you will need to adjust your settings. Refer to the following sites on how to locate the firewall and open the ports for ICMP.
How to enable ping on Windows Server
Allow ICMP on Server 2019
Now that you know the IP addresses of your systems and you have verified networking, we can begin using Nmap which is a network scanner or network mapper. Nmap is not installed by default. (You may have installed it from a previous project if so, you can skip ahead) In order to get nmap on your Debian system if its not already there, issue the following commands:
sudo apt install nmap -y
sudo nmap 192.168.0.104
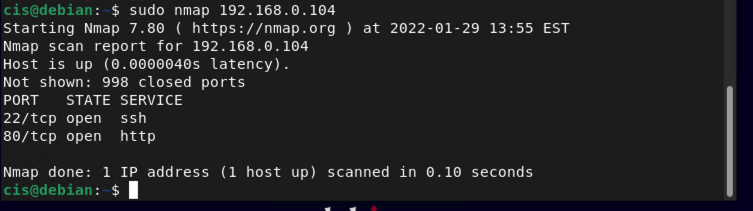
As as you can see from results, Linux is most cases has ports closed that do not need to be available.
Take a screenshot showing your port availability for your Debian System
Let's turn our attention to our Windows 2019 Server. Let's run an nmap scan against it. Type in the following command being sure to substitute your IP address and NOT the one shown:
sudo nmap 192.168.0.1
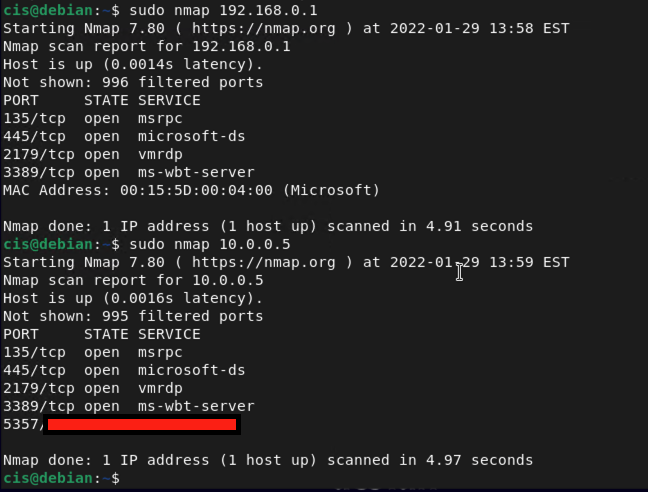
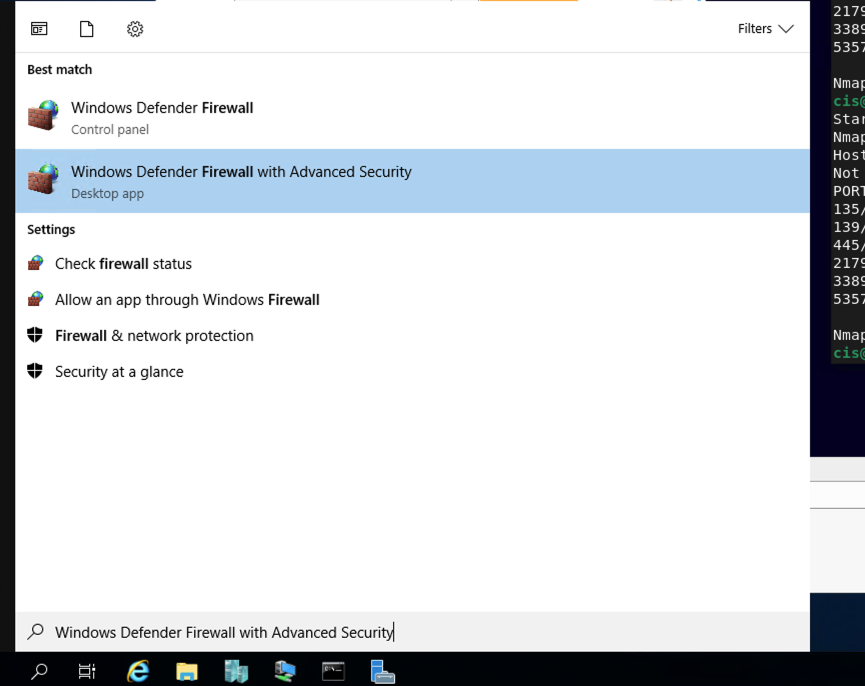
This is the with the Windows Firewall enabled. Lets see what happens when we disable it and run the scan again. To disable it, go to the Start menu on your Windows Server 2019 and type in FIREWALL. Click on Windows Defender Firewall with Advanced Security. A new window will open.
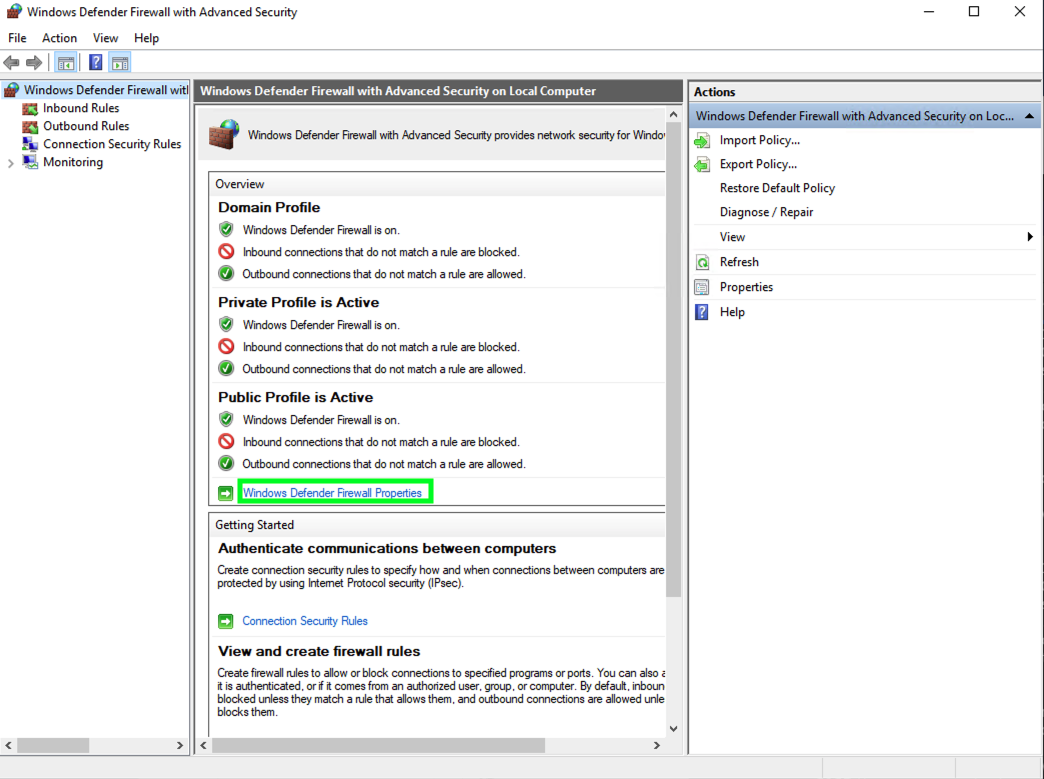
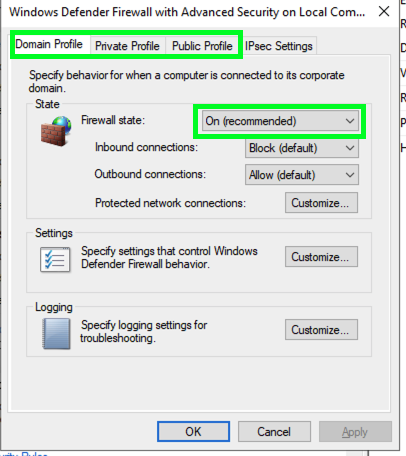
In the new window, locate Windows Defender Firewall Properties. Click on that. In the Properties Window, you will see tabs labelled Domain Profile, Private Profile, Public Profile. Under each of these you will see the state of the firewall. Make sure you turn Off on all THREE of these. Click on Apply.
Now switch back over to your Debian machine and re-run your scan. Note your results below.
sudo nmap 10.0.0.5
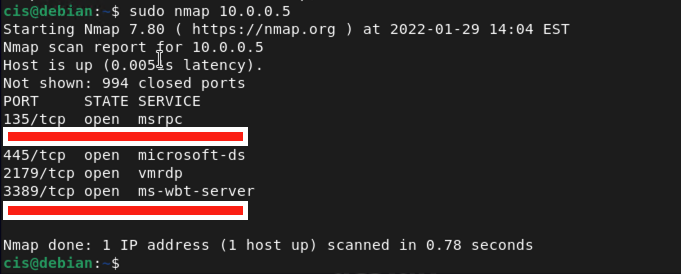
Take a screenshot showing the results of the scan with the Firewall OFF. Use mine for reference.
Be sure to go back to your Windows Server and turn ON the Firewall for the Domain Profile, Private Profile, Public Profile. Once you have done this, you will be able to add DNS and Remote Hosting to it. Back in Server 2019, go to the search box from before and type in Control.
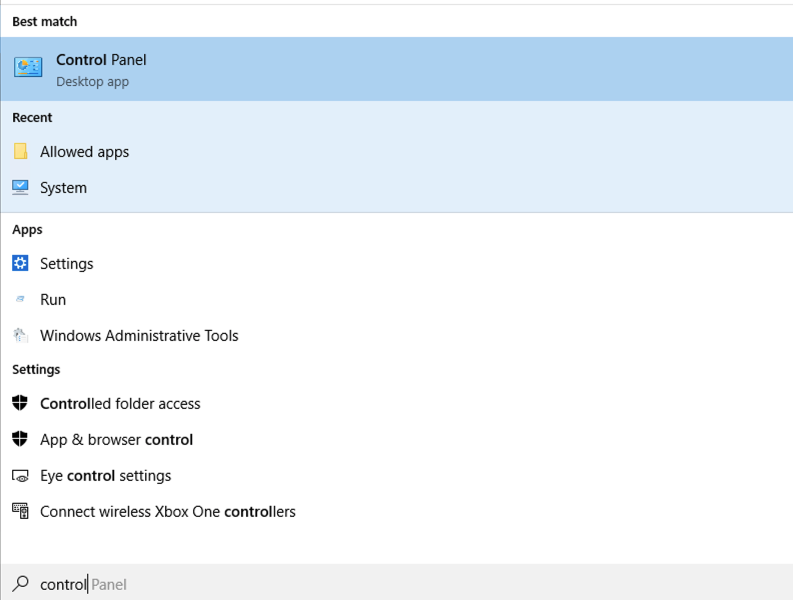
Choose the highlighted option Control Panel. In the Control Panel window, look for Programs and click on Turn Windows features on and off. The Server Manager window will open, followed by the Add Roles and Features Wizard. Click on Next to move to the next screen. In the Select installation type window, choose Next. In the Select destination server window, choose Next. You should now be at this screen:
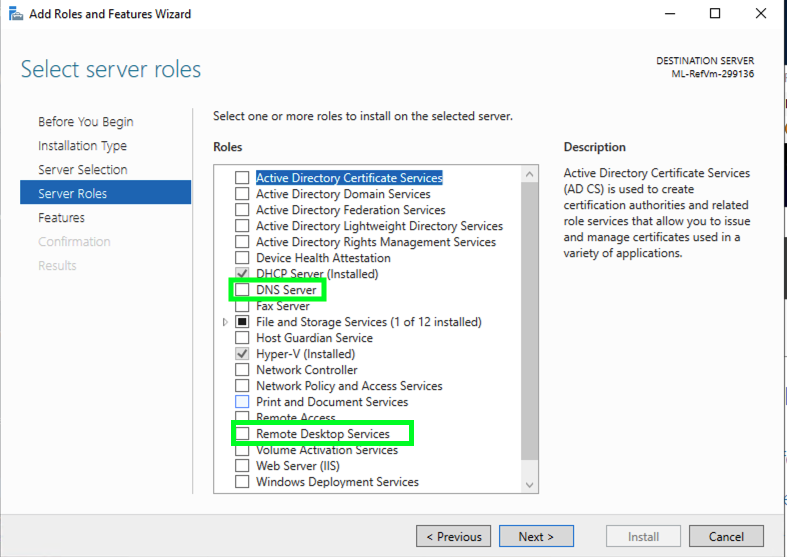
If some of the roles shown aren't checked on yours, it is fine for this project. From here, check the box for Remote Desktop Services first and then check the box for DNS Server. A new window will pop up.

Click on Add Features. If another dialogue pops up about Validation Results, choose Continue. For a normal DNS server, you would want a static IP address. Click on Next. On the Select features box, choose Next. From here, choose Next on Remote Desktop Services.
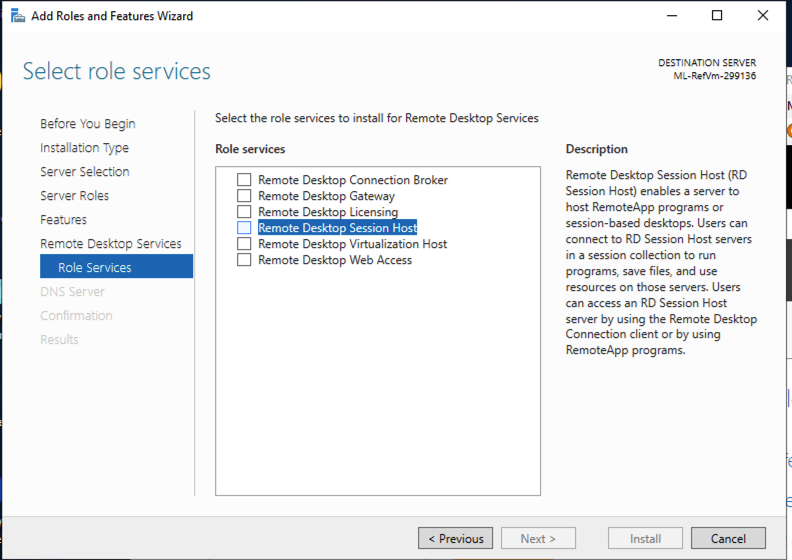
On the screen shown above, choose Remote Desktop Session Host. A new window opens about "adding features that are required..". Choose Add Features. The box for Remote Desktop Session Host should be checked. Click on Next. With the DNS Server window, choose Next. You should be at the following window now.
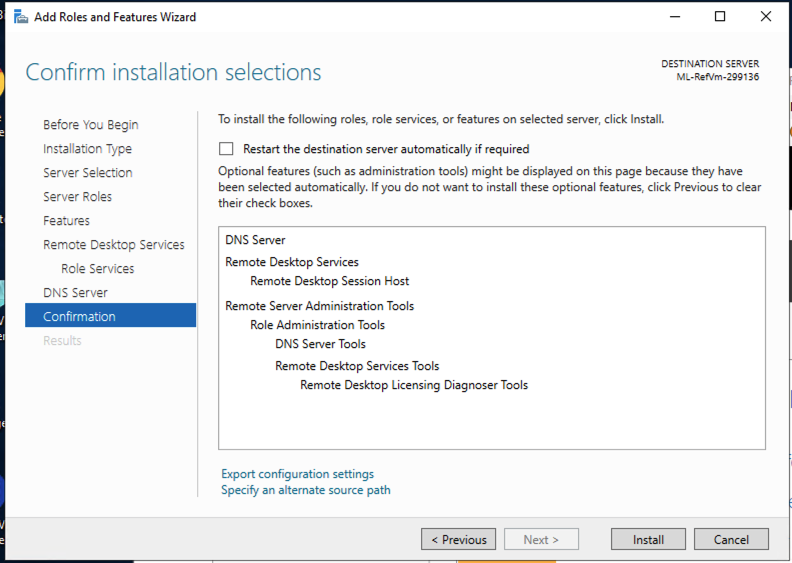
Click on Install. Once everything is finished, it will inform you that you need to restart to get everything activated. Click on Close. In order to do this, right-click on the Start menu and you should be able to navigate to Restart as shown below. Yours may say Update and restart.
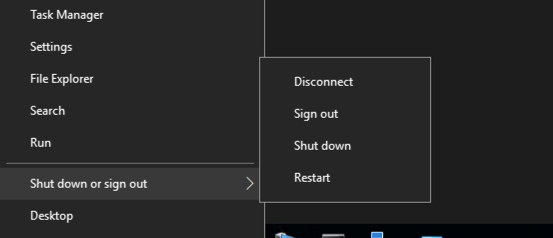
On the 'Choose a reason' box, just click on Continue. Your Windows Server 2019 should restart.
You will lose your connection to your cloud machine. Give the system a few minutes to reboot and reconnect to your cloud machine through your RDP file. Additionally, if your machines are having connectivity issues, please make sure everything gets shutdown and reboot accordingly.
Once you are signed in, valid that your networking settings haven't changed and that you have an IP address as you did earlier in the project. Once you have done this, switch back over to Debian and rerun an Nmap scan of your system. You may get that the host is down. If so, use the second command that adds a -Pn which treats all hosts as online basically ignoring host discovery. You should see the following results:
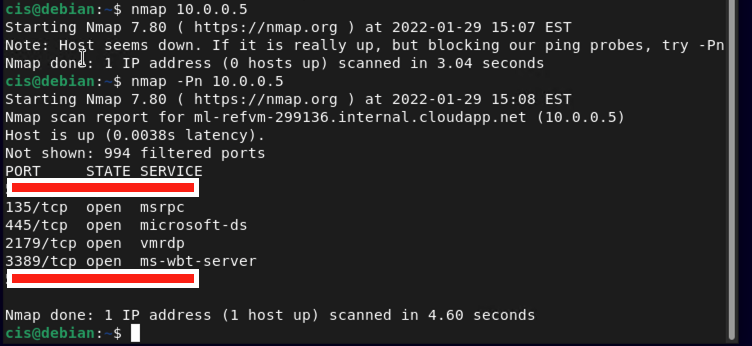
Take a screenshot showing your newly opened port. Describe on your assignment what this ports purpose is for.
Now, the last thing you will do is test out a few features in Nmap. The following link provides all of the different "switches" (options) you can provide to isolate particular ports and protocols in Nmap.
One of the most important switches you can use is the -A which by default is an Advanced scan. This scan looks for OS versions and service names associated with the ports that are open. Here is a sample of the -A switch.


The information carries on past what is shown. The image above is designed to give you a rough glimpse of what this switch does. In order to complete this project, you need to do the following.
Take a screenshot showing the option of -A on your system. Use the above screenshot for reference. PLEASE BE PATIENT AS SOME SCANS DO TAKE A WHILE. You can press Enter to get a status report of the scan. For a challenge, you also need an additional screenshot showing a scan using UDP on port 53. The screenshot below shows what you should get if you use the correct command. Use the reference link above.
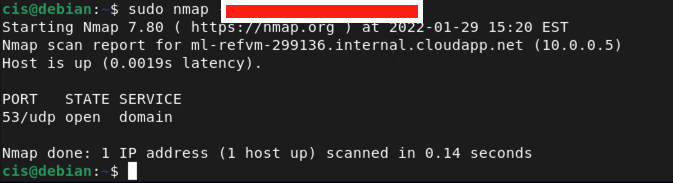
Note: There are several ways to accomplish this task, but I am looking for a command that will scan just UDP and on port 53. This will result in the fastest time. As a hint, you will require root priveleges to run this type of scan.
Don't forget to close the connection when its finished. Also make sure to poweroff the machine so it doesn't count against your hours.