You will need the following to complete this assignment:
****Need to add here.****
Please be sure to create a Google Doc that contains screenshots with captions indicating what you are accomplishing. This will be used to help show that you completed the project and can be used as a reference later on for you. This will also be your submission for this project. The number of screenshots is to be determined but typically it should match the page count of the project.
Boot up both of the Debian and Windows Server platforms. Verify that each have internet connectivity using pings between each system. Again, you need to make sure they can communicate with each other.
From here, on your Debian system type in the following:
sudo apt update
sudo apt install git -y
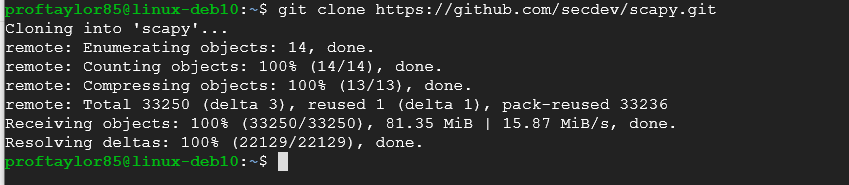
git clone https://github.com/secdev/scapy.git
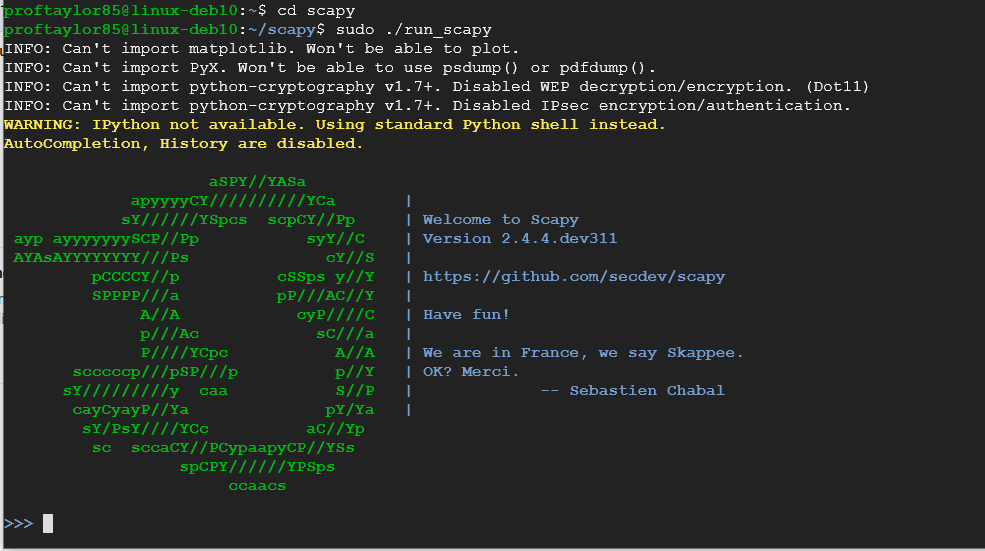
cd scapy
sudo ./run_scapy
Scapy uses python to create different kinds of packets. These packets are created through the use of declared variables in Python. Let's test this feature. Type in the following:
i = IP()
i.display()
What you have you done is created a variable called "i" with the type class of IP. The i.display() command informs you what you can change from the components listed.
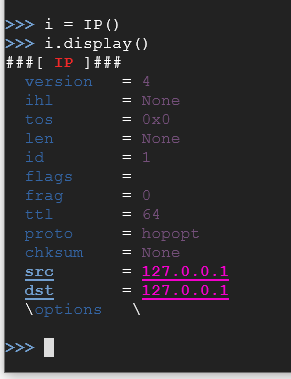
The version refers to IPv4, ihl refers to the Internet Header Length (used to separate header from data), the tos refers to Type of Service which deals with RFC (Request for Comments) which is a publication that the Internet Engineering Task Force created to help govern the internet and so on. The last two entries of src and dst refer to the Source and Destination addresses being used. Let’s set up our destination address with our victim's IP address. Please substitute the address shown for your victim's IP address (Server 2016).
i.dst="10.142.0.5"
i.display()
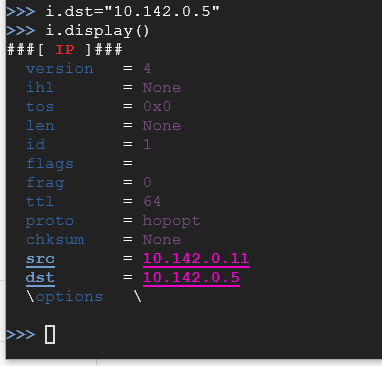
As you can see, it will automatically fill in your source address. Now let's create an object that can produce ICMP packets. Type the following:
ic = ICMP()
ic.display()
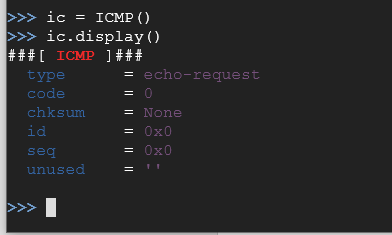
As you can see there aren’t many properties to address here as ICMP packets are pretty straight forward. Now let's use a command to send a packet on the network that will contain both IP and ICMP packets. The reason why we want to do this is to see that this program can send IP packets (Layer 3) and ICMP packets (Layer 4). Note that the command below is a lowercase s, lowercase r, and a number 1, NOT a lowercase L.
sr1(i/ic)

As you can see, you sent a packet of information over the network. Each type of packet that you created is separated by their respective variables. IP is pretty self-explanatory (or explained earlier), so I won't provide any details here. ICMP uses both echo-requests and echo-replies. Earlier, when you declared your variable for ICMP, you should have noticed that you were creating an echo-request packet. With this being sent out, the system was looking for an echo-reply and found one from the source address of 10.142.0.5.
So let’s send something with our newly created packets. Type the following and replace "YOUR NAME" with your actual name.
sr1(i/ic/"YOURNAME")

Take a screenshot showing the command used, with the full data packet including your name being shown.
Now let's try one last type of packet. Let's send a UDP packet across the network. In order to see UDP packets, a program called netcat will need to be installed so we can see UDP packets.
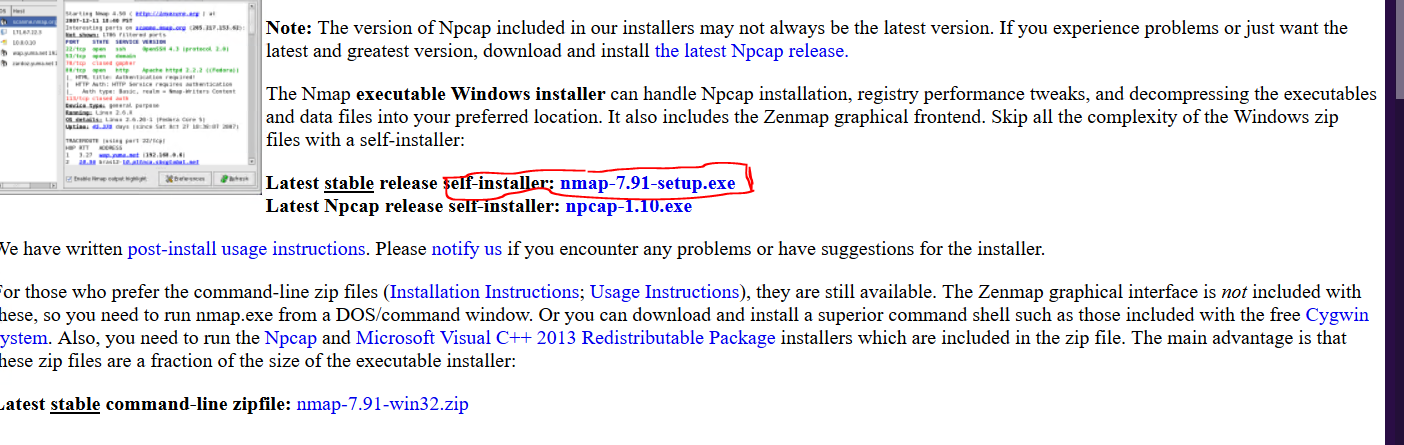
The easiest way to get the netcat listener on your Windows Server 2016 system will be to install Nmap on your system. Please go here and install Nmap on your system:
Nmap download
See the following screenshot for the location of the file named nmap-7.91-setup.exe
Please install the program with all of the default installations. Once it's finished installing, open up a command prompt. Now let's turn on netcat and have it listen on a random port number. Let's use a simple port consisting of four of the same number. In my example below, I use 5555. Type the following and note that what is shown below is a lowercase L and NOT a number 1.
ncat -u -l 5555
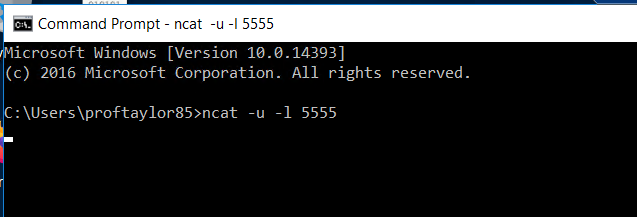
If you see a blank cursor with no error messages, Netcat should be listening for UDP packets on port 5555. Please leave this window open and open up a second command prompt. To prove that it’s listening on that port, issue this command:
netstat -an
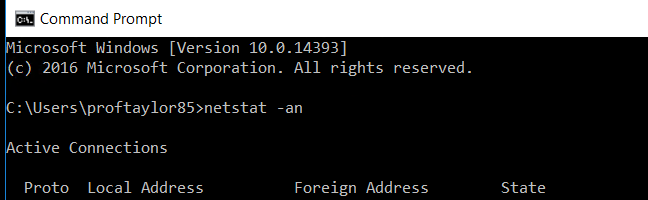
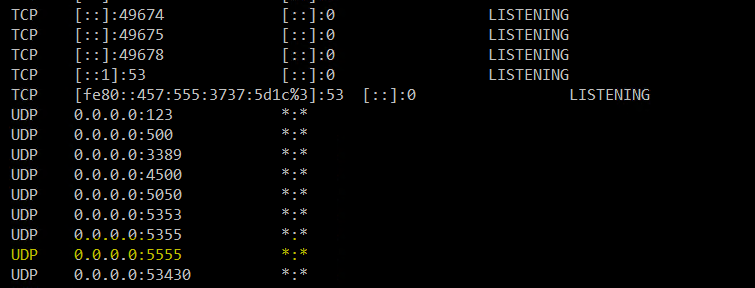
As you can see, UDP is open and listening on port 5555. Now, switch back over to your Debian machine so a UDP packet can be created. In the scapy window, type the following:
u = UDP()
u.display()
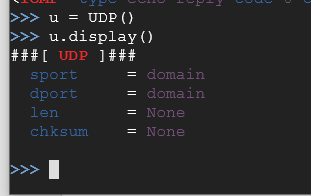
As you can see, there aren’t a lot of options for UDP packets either. You can specify the source port (sport) the destination port (dport), the length (len) of the UDP packet and header, and the checksum (chksum) which is used for error checking of the header and data.
What we are interested in is changing the destination port so issue the following command:
u.dport = 5555
u.display()

Now as you can see the port we choose has a purpose (which is fine for our example) of rplay. This is a sound server for the rplay audio system which is a music player in certain Linux distributions. If a port number doesn’t have an assigned value, it will simply just show the port number here instead of the ports purpose.
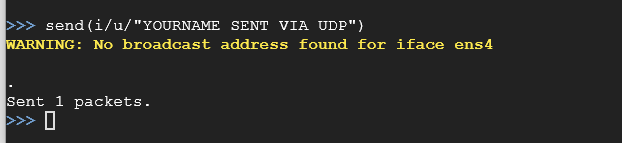
Now let’s send an UDP packet over to the target machine. Issue the following command:
send(i/u/"YOURNAME SENT VIA UDP\n")
If you switch back over to your target machine, you should see in the netcat listener window that the command you just issued will be there.
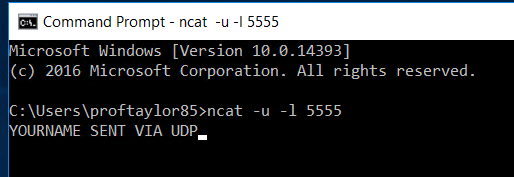
Please take a screenshot showing Your Name Sent Via UDP on the Windows Server 2016 machine for proof of completion.
Make sure you cancel your netcat listener by pressing either Enter or Ctrl +X. It will state Ncat: An existing connection was forcibly closed by the remote host... You may shutdown your Server2016 after this. The last item to cover to show how DNS works in Scapy. Type in the following:
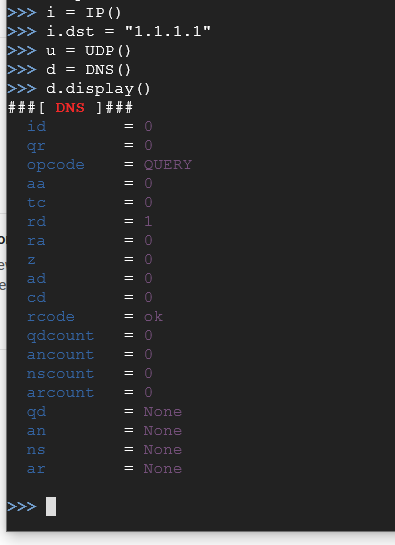
i = IP()
i.dst = "1.1.1.1"
u = UDP()
d = DNS()
d.display()
As we all know, DNS is the Domain Name System and looking through the manual of Scapy, the field that we are interested in is the "qd" which is used for querying a domain. Type in the following:
d.qd=DNSQR(qname="www.google.com")
d.display()
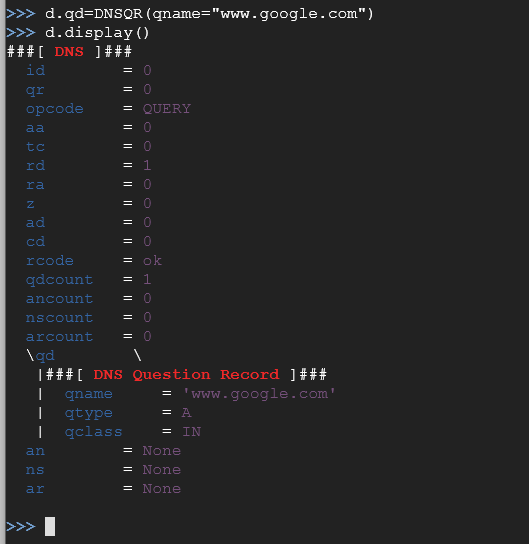
This created a DNS request for an A record of Google's website. Let's send our stack of data to Google to see what we get in return. If all goes well, we should get the IP address for the A record for Google's main website:
sr1(i/u/d)
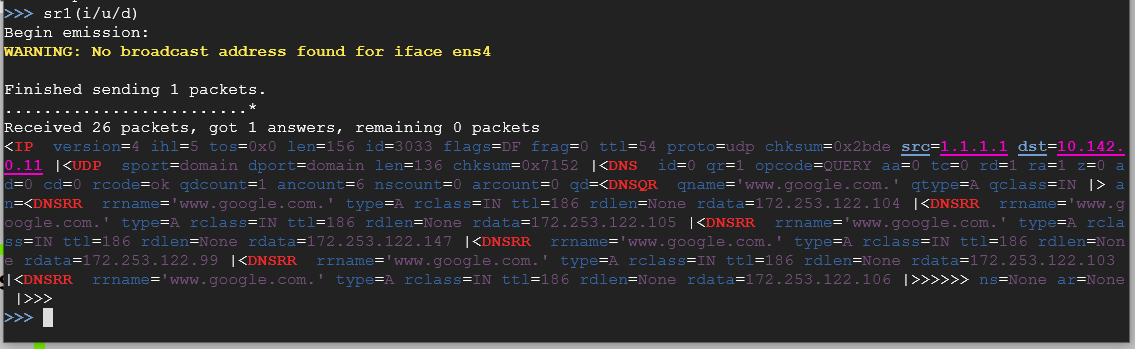
As you can see from the image above, my DNS response for the A record that belongs to Google is 172.253.122.106.
Take a screenshot showing that you completed the action above. For a challenge, CHOOSE 3 more websites to see what kind of DNS requests you receive. One of those should be my website: proftsec.info Take a screenshot of each scapy command used and what the results are for each website.
This concludes this project. PLEASE MAKE SURE YOU ARE SHUTTING DOWN YOUR VM EACH TIME UNLESS YOU ARE LEAVING IT RUNNING FOR A TASK IN THE COURSE. Please make sure to submit your project as instructed by your instructor by it's due date and time.
References
Scapy website
Scapy documentation
Github, Scapy source code
Scapy DNSQR