Caution: Port scans on networks that are unexpected or you that you do not have permission to be on can be illegal! Please proceed with caution for this project and note the directions VERY CAREFULLY!
Expectations
****Need to add here.****
Please be sure to create a Google Doc that contains screenshots with captions indicating what you are accomplishing. This will be used to help show that you completed the project and can be used as a reference later on for you. This will also be your submission for this project. The number of screenshots is to be determined but typically it should match the page count of the project.
Directions
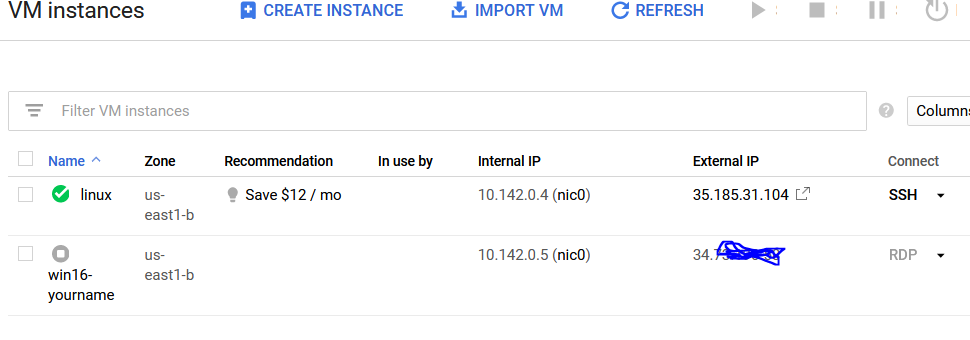
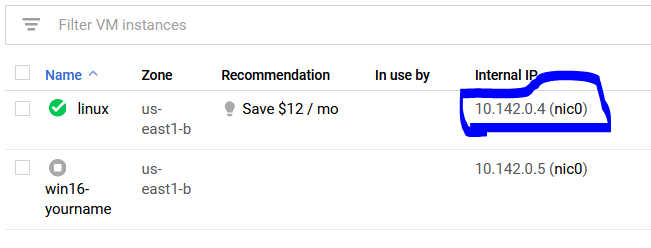
Refer to your previous directions for a complete step by step on how to boot up your Linux VM (Debian). As a quick reminder, visit the Google Cloud Platform, go to Compute Engine → VM instances . As you can see below, the "linux" VM is running because of the green check next to it. If you need to power it on, check the box next to the name and click on the play button.
From here, connect to your system via SSH. You should get the following prompt (with your system's name shown).

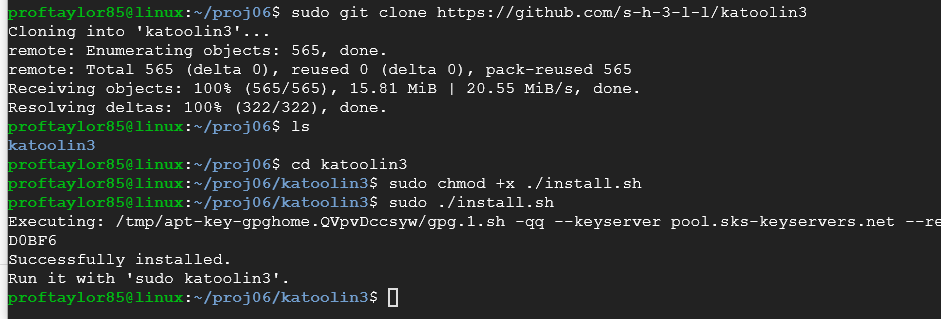
First, we need to make a few updates so issue the following commands:
sudo apt update
sudo apt install git dirmngr -y


Once it's finished, we can now download our packages for Katoolin.
*Note: Katoolin is written in Python 2.x. which is depreciated. We will be using Python 3.x for installation. If you were using an older system, you would have to look up how to do Python 2.x
Let's create a directory to put all of our files in for this project.
sudo mkdir proj06

Then move into that directory by issuing a
cd proj06

From here, you need to download the file, give the installer the appropriate permissions and install it. Enter the following commands:
sudo git clone https://github.com/s-h-3-l-l/katoolin3
cd katloon3
sudo chmod +x ./install.sh
sudo ./install.sh
As you can see from here, if everything installed correctly, you should be able to run it. If you run into an error about "Please install the python-apt package", you will need to make some changes to you Python system. If you are using the VM with the updates, you should be fine, but if you are using a different system, you may need to make these adjustments.
Let's run our new program.
sudo katoolin3
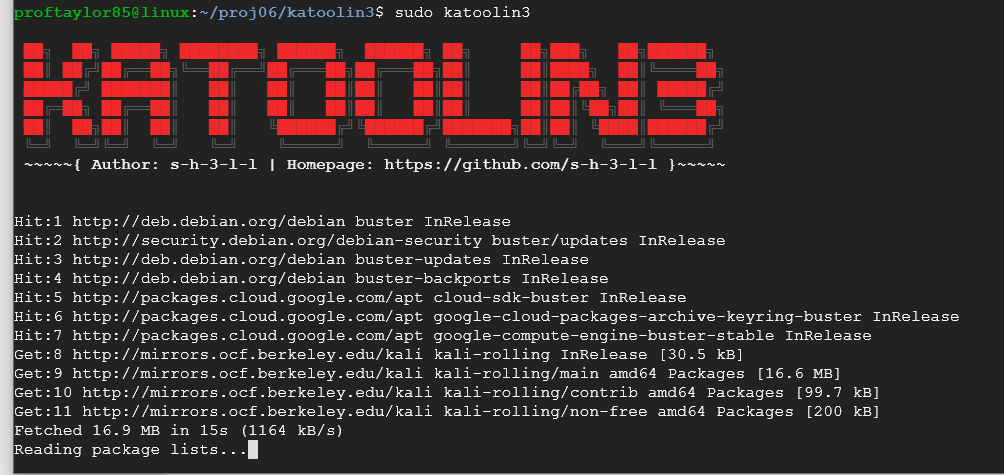
Note: It may take a few minutes depending on your connection speed to get these packages installed. Please be patient. See this disclaimer:

Once everything is up and running you should see the following:
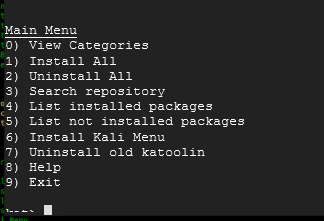
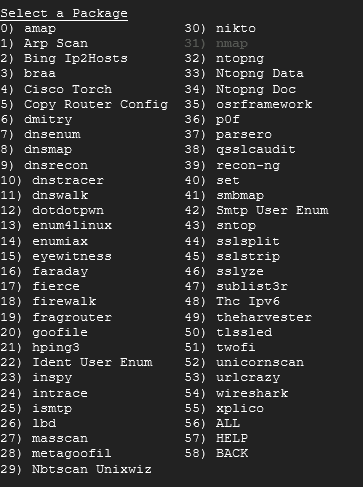
This is the main menu for Katoolin which is a Python script that will allow the user to install any program from any category from Kali Linux which is a penetration testing/security suite Linux Distribution. Once you master how this works, you could take any Linux Distribution and apply it. Type in 0 and press Enter.
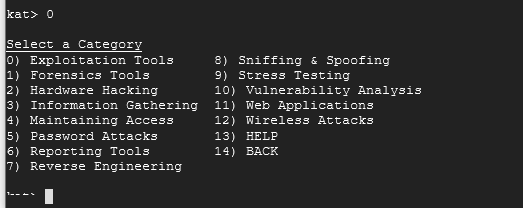
As you can see there are 12 different categories of tools available. Each category can have multiple sets of tools within it. Let's go back so type in 14.
You should be back on the main menu. As you can see, you can install all tools (large file size and not always the best choice), uninstall all, search the repository for specifics, etc. Let's look at 3 for a moment. Type 3 and press ENTER. Now, I'd be curious to see what is available for password cracking. Type that in at the search prompt.
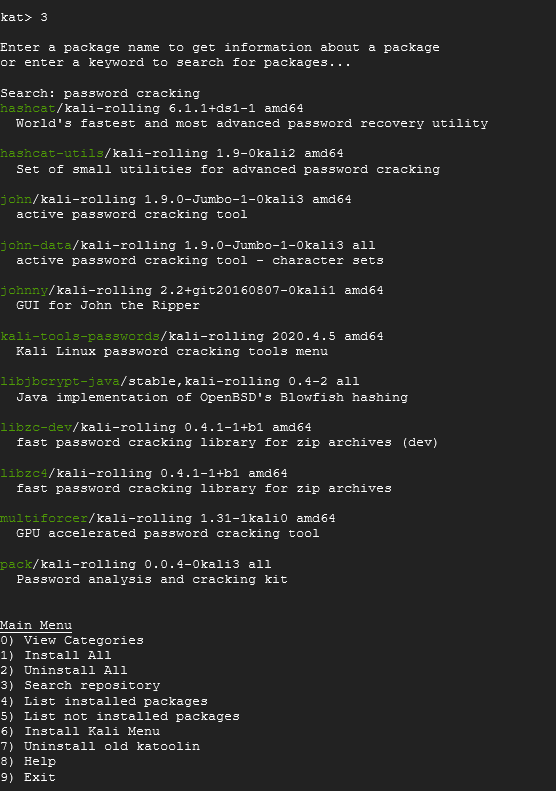
As you can see it will search for any tool that meets your requirement and provides a brief description of them. Pretty neat, huh?
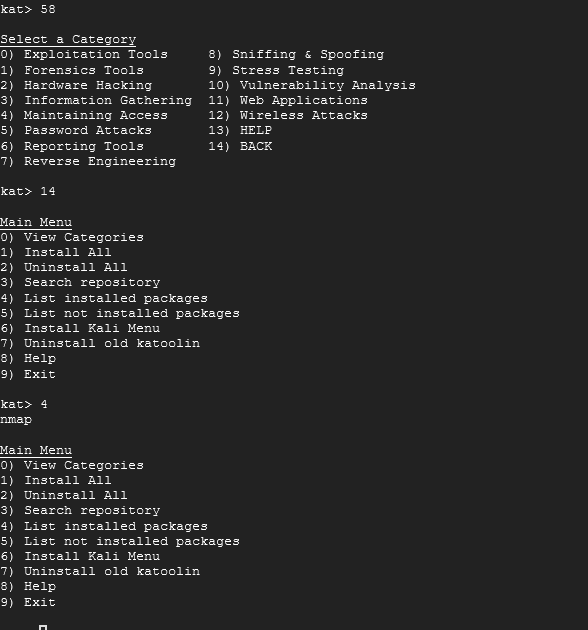
What we really are after currently is a tool called nmap (network mapper) which will help with scanning of systems. Type in 3 again and look up nmap.
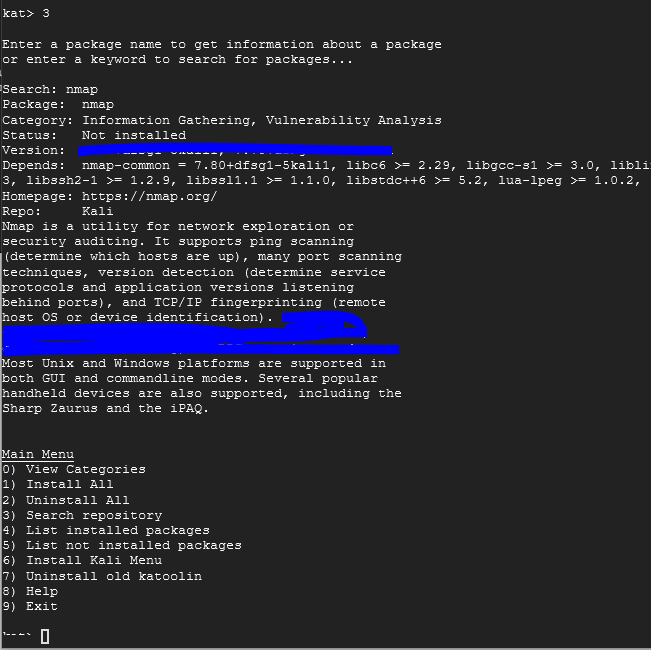
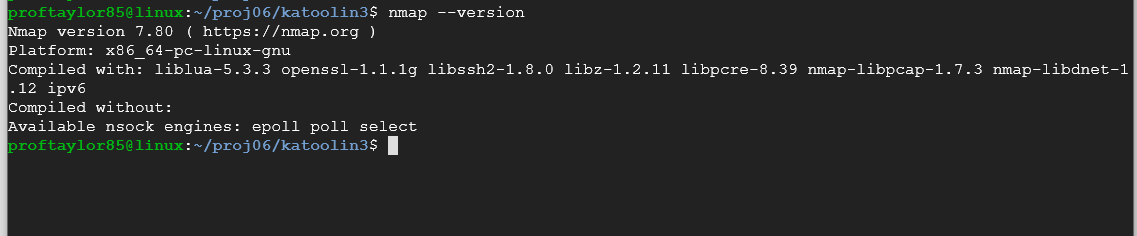
Take a screenshot similar to mine but showing the Version number. In the caption, you need to type in the sentence that is covered in the description of the file.
Now let's install it. Type 0, press Enter, followed next by 3.
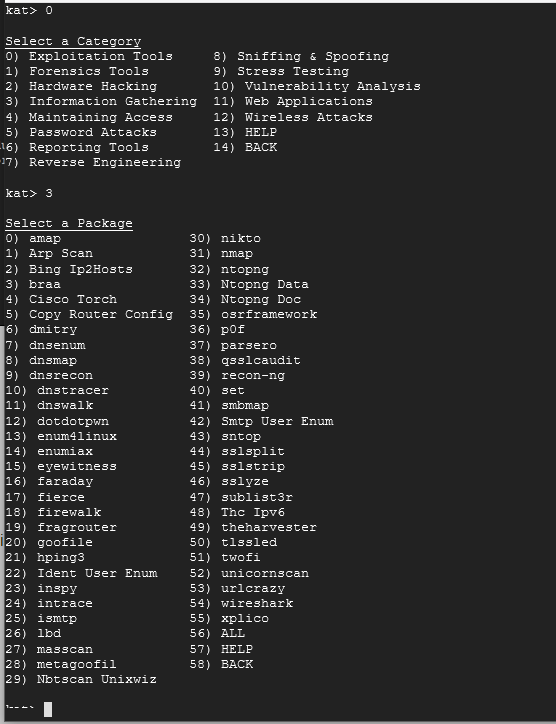
From here, you should see nmap in the list. Choose 31 to install it. Choose any default responses that appear in blue screens. Once it's installed, you should see the following:
Notice how 31 is grayed out? This means it's installed. To exit this menu, type in 58 followed by 14. At the main menu, type 4 to show that it's installed.
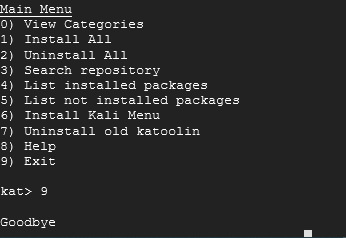
From here, you can exit by typing in 9. You will be greeted by a Goodbye. Press Enter twice.
Upon exiting out you should be back at a prompt like this one:

Let's find out if nmap was installed. Type in the following:
nmap --version
Now, let's scan ourselves to make sure this works correctly. Go back to your Google Cloud Platform and look for the internal address to your "linux" system. See below for reference.
Let's scan ourselves to see if nmap is working correctly. Use your address from your system, not mine.
nmap 10.142.0.4
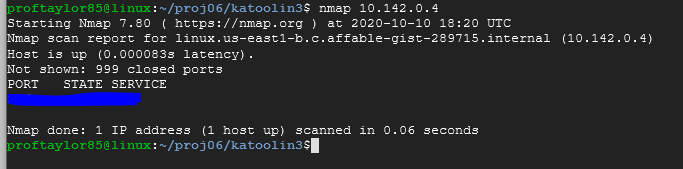
There should be only one port open on your system and your hint is that you are currently connecting to your system using it.
Take a screenshot showing your system with the appropriate connection (port and service) shown.
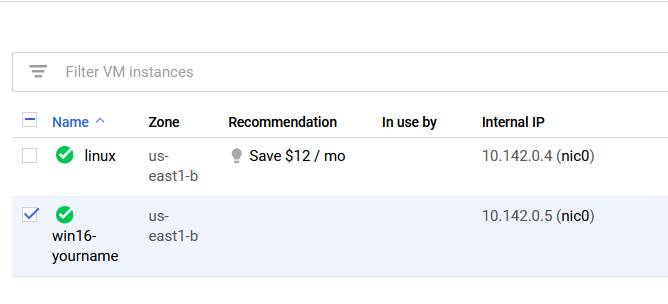
Now that it's working, let's quickly test it on our Windows Server 2016 VM. Go back to your Google Cloud Platform page and start up that system. Use my screenshot below for reference.
Just like before, use your Windows Server 2016 internal IP address. Run a scan on it to see what ports are open on it.
blockquote>nmap 10.142.0.5
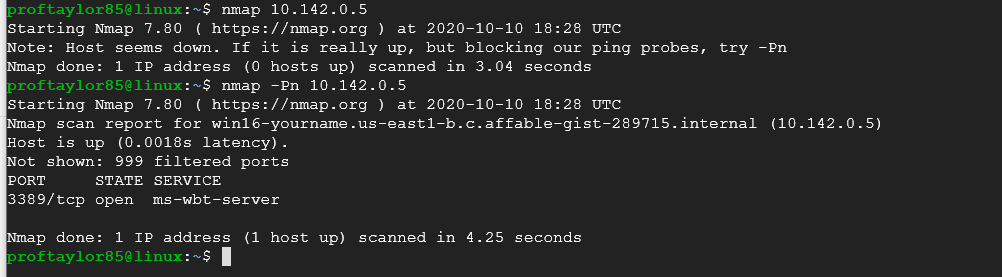
In the second part of the screenshot above, I attempted to scan the Windows Server 2016 without using ping (Windows Firewall by default will ignore them) and it returned some information. The command used is nmap -Pn 10.142.0.5
Please make sure that you are substituting your address and not typing in mine.
Take a screenshot showing your Windows Server 2016 system with its open port(s). Use my screenshot for reference.
This concludes Project 06.
PLEASE MAKE SURE YOU ARE SHUTTING DOWN YOUR VM EACH TIME UNLESS YOU ARE LEAVING IT RUNNING FOR A TASK IN THE COURSE.
Please make sure to submit your project as instructed by your instructor by its due date and time.
Created in previous years, drafted online in January 2021