You will need the following to complete this assignment:
****Need to add here.****
Please be sure to create a Google Doc that contains screenshots with captions indicating what you are accomplishing. This will be used to help show that you completed the project and can be used as a reference later on for you. This will also be your submission for this project. The number of screenshots is to be determined but typically it should match the page count of the project.
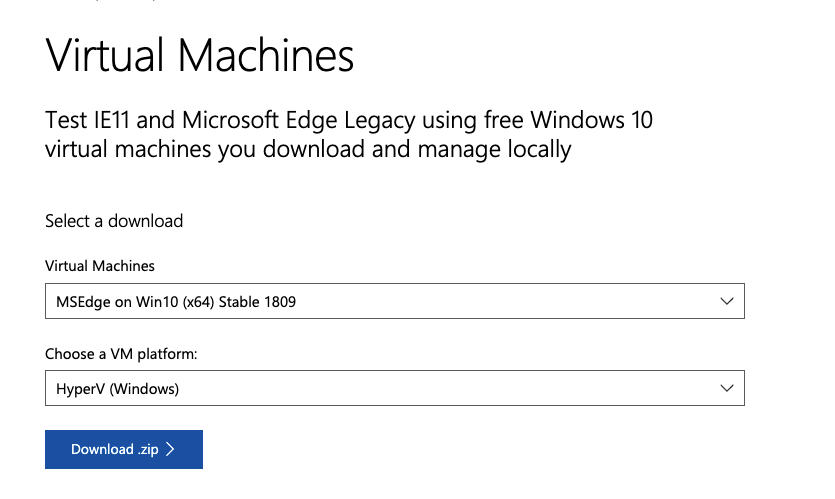
The name of the file will be MSEdge.Win10.HyperV.zip and will be approximately 6GB in size.
Please bear in mind it make take some time to download so please be patient with it.
Once it is downloaded, unzip it by right-clicking on it and choosing Extract All. Once you have unzipped it, it will appear as a folder in your Downloads folder. It will be approximately 17.2GB in size so again, please be patient for the system to unpack the data.
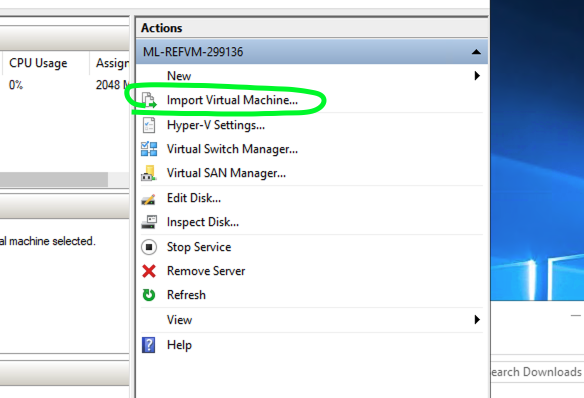
From here, open up the Hyper-V Manager found on your Desktop. Choose Import Virtual Machine
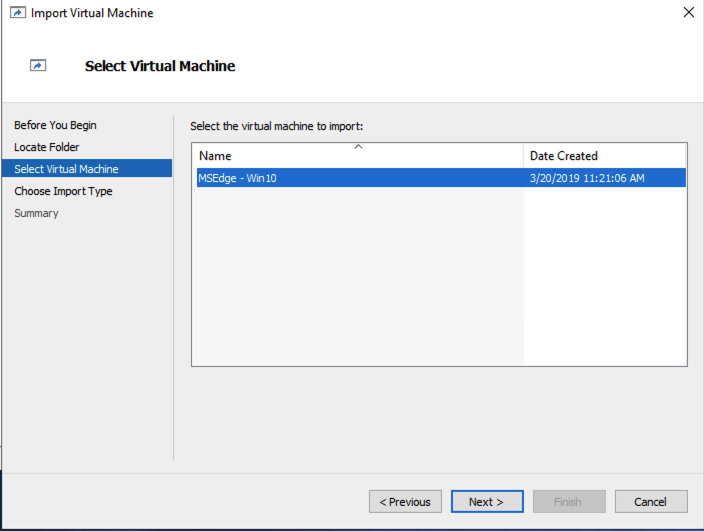
On the Before You Begin window select Next. On the Locate Folder window, choose Browse... Navigate to your Downloads, choose MSEdge.Win10.HyperV → Virtual Machines and then choose Select Folder. Then choose Next. You should see the following screen:
If at any point the Windows 10 system fails to load, you will need to delete the unzipped folder in your Downloads, and unzip the original compressed file again.
From here, choose Next. On the Choose Import Type select the first option and choose Next. The next window asks about Connect Network. In the drop down menu, choose the LabServicesSwitch. Choose Next and then Finish. From here boot up the VM.
If everything was entered correctly, you should come to the following window:
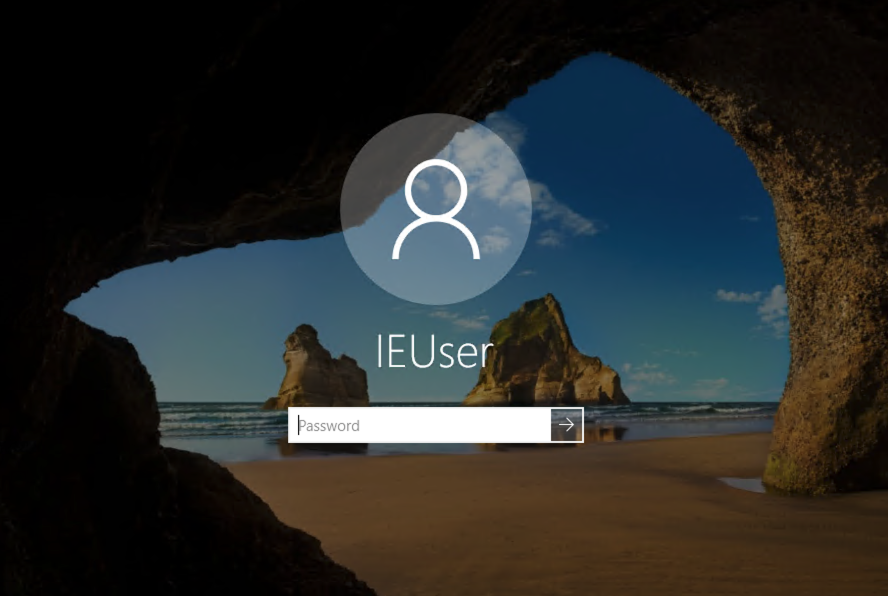
As you can see the username is IEUser. The password is Passw0rd!. This information was given to us at the location where we downloaded the Windows 10 file. Enter the credentials and log into your Window 10 box.
Please note that this image is only good for 90 days. Please do not save anything important to it as it will be lost after 90 days!
Okay from here we need to look at making some changes to this system. To begin with, lets disable Windows Update. In lower-left corner there is a Search box. Enter the word SERVICES. Once services is open, scroll through the list to find Windows Update.
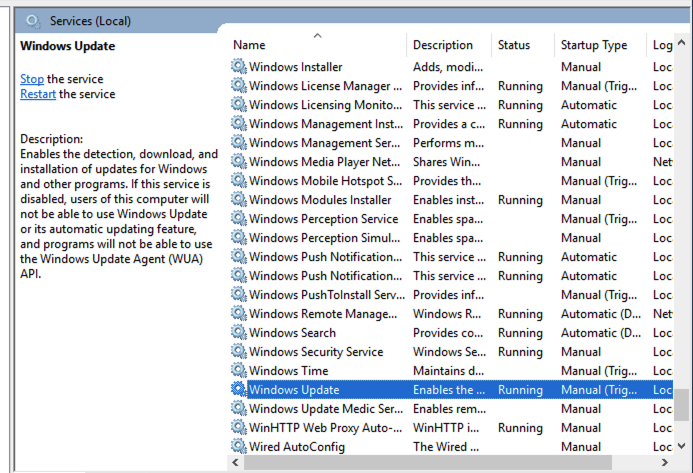
Double click it and in the properties window, choose the Starup type to Disabled. Click OK once you have done that. Now we need to move to Windows Defender. Type in the search box DEFEND. Open up Windows Defender Settings.
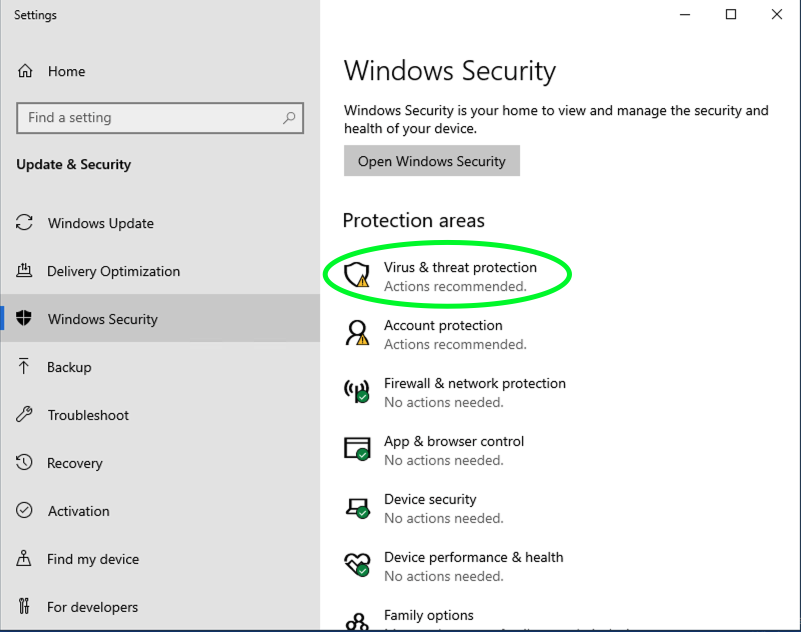
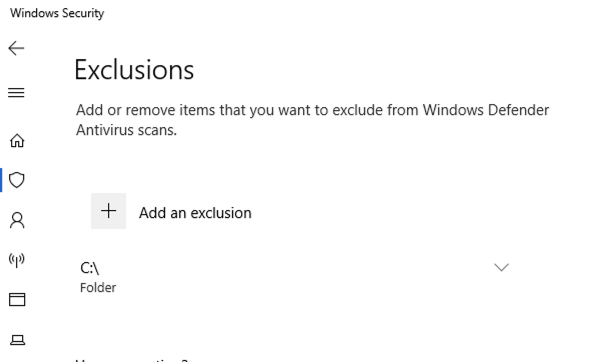
From here choose Virus & threat protection.. Click on Manage settings under Virus & threat protection settings. Scroll down until you find the Exclusions section. Click on Add or remove exclusions. You should see + Add a exclusion as a choice. Click on it and choose Folder. Navigate to the C drive and add it. Your screen should look like the one below.
The last thing you need to do is verify that your system has the correct IP addressing. Go down to the search box again and type in cmd. Type in ipconfig and validate that you have a 192.168.x.x address.
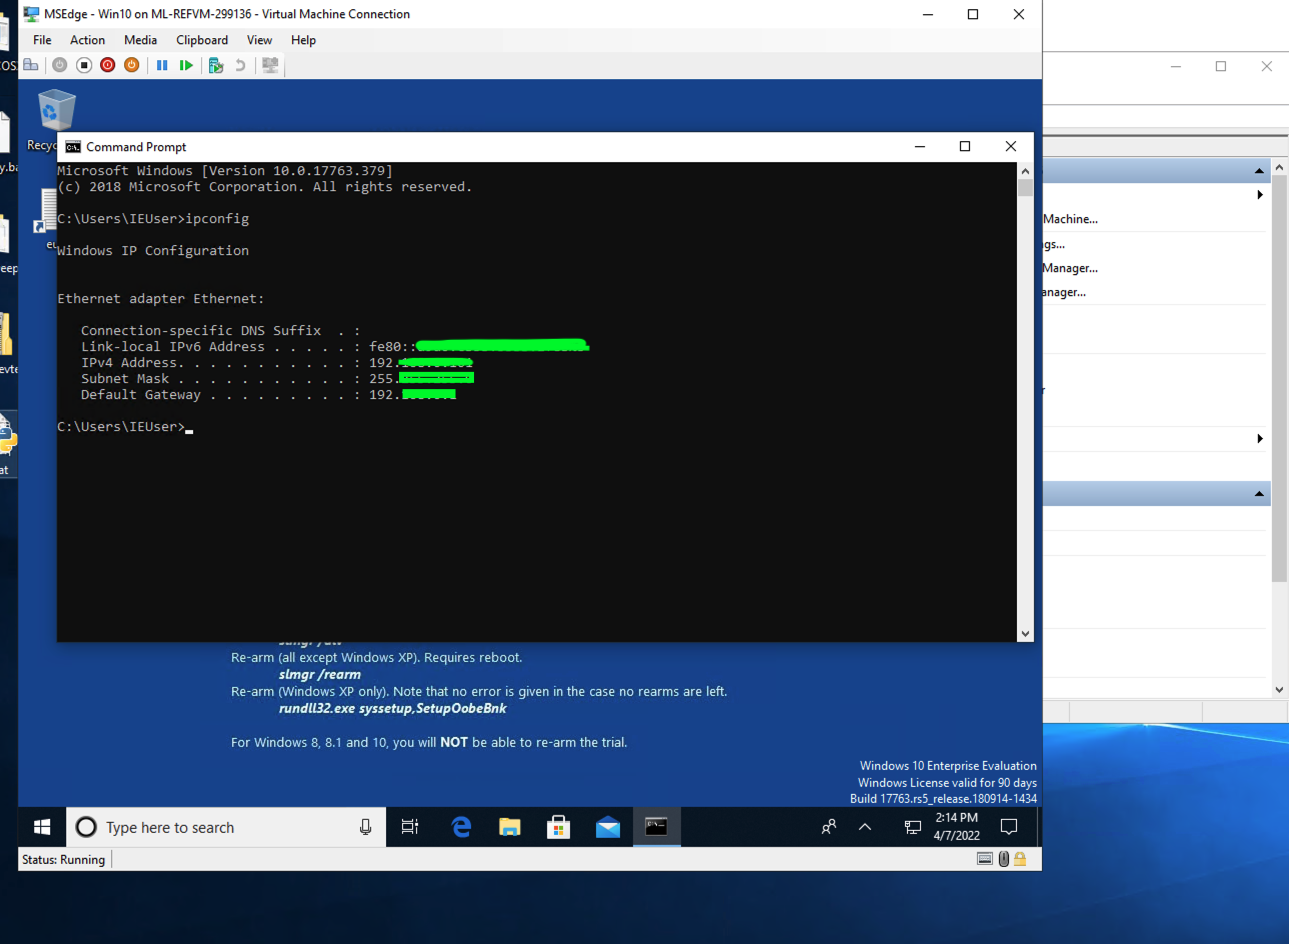
For proof of completion, submit just one screenshot similar to mine above that shows that your system has an internal address with a date and time shown.
This completes this project.
References
Microsoft Developer/Edge Accounts