
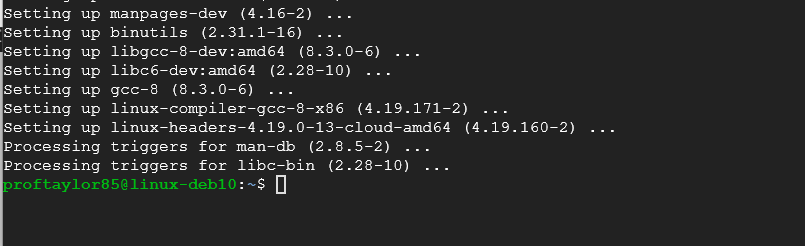
In case you are wondering, the first command looked for updates and the second command attempts to install header files which are files that contain certain declarations and definitions for the Linux kernel (the underpinnings of the OS). "Uname" is what is referred to as a Command Substitution which in this case is attempting to take the output of the command to replace the command itself.
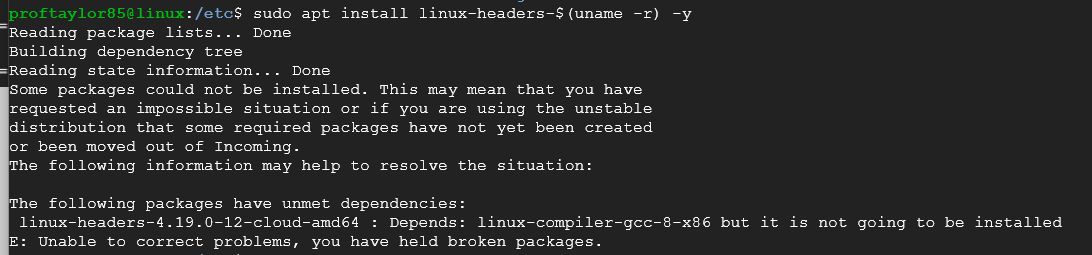
If you see the screen below, there is a problem with your Linux installation and you should just create a fresh instance as something didn't install correctly.
Now lets install wireguard and try to change to that directory and see what happens.
sudo apt install -y wireguard

Odd, lets see why we can't access it. Issue the following commands:
cd /etc/
ls -l
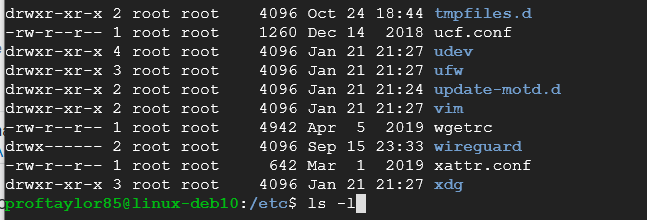
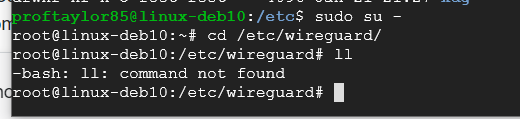
As you can see from the image, wireguard is a directory (indicated by the 'd') and that only root has read, write and execute 'rwx' privileges). Before we become root, let's show off the alias command. This command will allow you to create commands that can perform actions for you. Note: Those are lowercase L's not numeric 1's.
alias ll="ls -l"
ll

As you can see, this effectively allows you to create your own commands should you want to perform multiple things in one step.
As a refresher combine a way to use alias to run one command that will display your name.
Now let's become the root user to generate our public and private keys. Please remember to hide your private key. Use my image below for reference. You will need to be able to copy/paste these so keep them handy.
sudo su -
cd /etc/wireguard
ll
Notice what happens when you run the ll command as root? Fix this and proceed on with the rest of the commands.
Take a screenshot showing your ll command working as root.
wg genkey | tee privatekey | wg pubkey > publickey
chmod 600 *
cat privatekey
cat publickey
exit
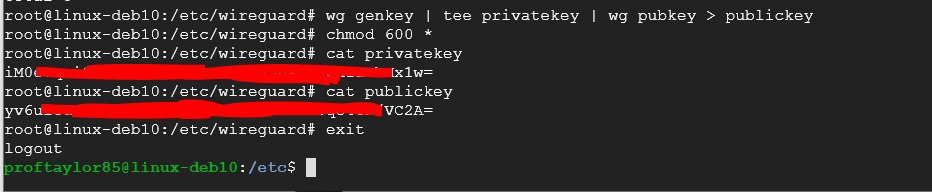
Take a screenshote here showing your keys. PLEASE be sure to hide/mask portions of them or else they will not be valid.
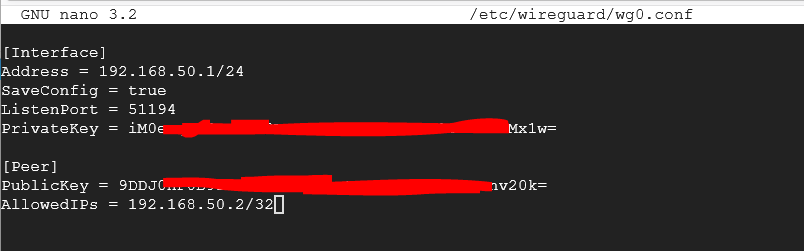
Now we need to setup the configuration file for Wireguard. Enter the following information into a text editor like Nano.
PLEASE USE YOUR PRIVATE KEY FROM EARLIER, NOT THE ONE SHOWN IN THE COMMANDS BELOW.
sudo nano /etc/wireguard/wg0.conf
In Nano, enter the following again making sure to use your private key, NOT the one shown:
[Interface]
Address = 192.168.50.1/24
ListenPort = 51194
PrivateKey = iM0xxxxxxxxxxxxxxxxMx1w=
SaveConfig = true

Make sure you save it and close with Ctrl+x, Y, Enter
Take a screenshot here just like the image shown above but with your information entered and your private key masked
Now lets enable wireguard to meke sure it working and listening on the correct port. Enter the following commands:
sudo systemctl enable wg-quick@wg0
sudo systemctl start wg-quick@wg0

Let's verify that we have a listening port on 51194 and that we have a networking interface called wg0.
netstat -na | grep "51194"
ip addr
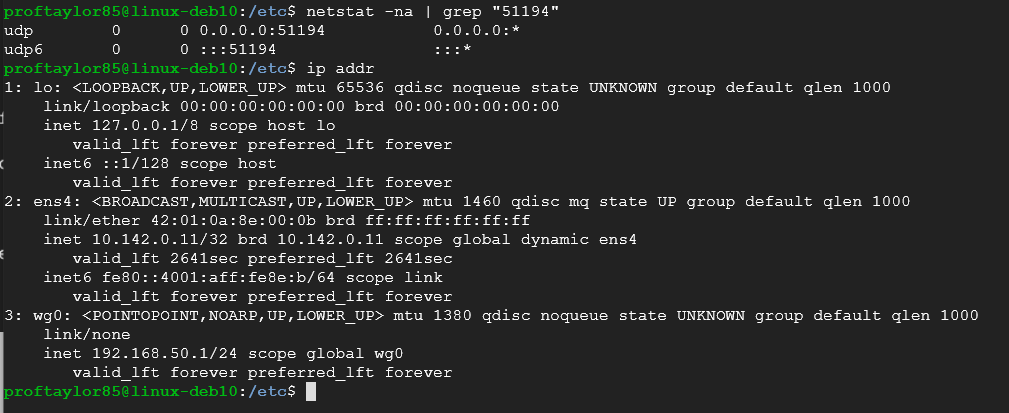
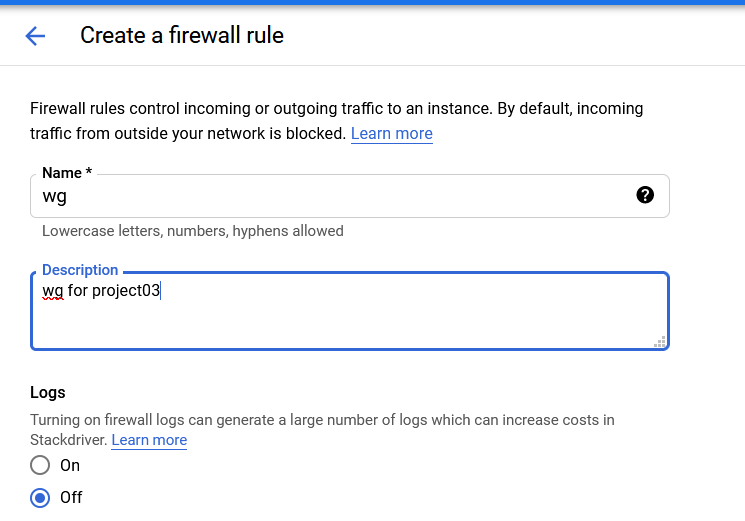
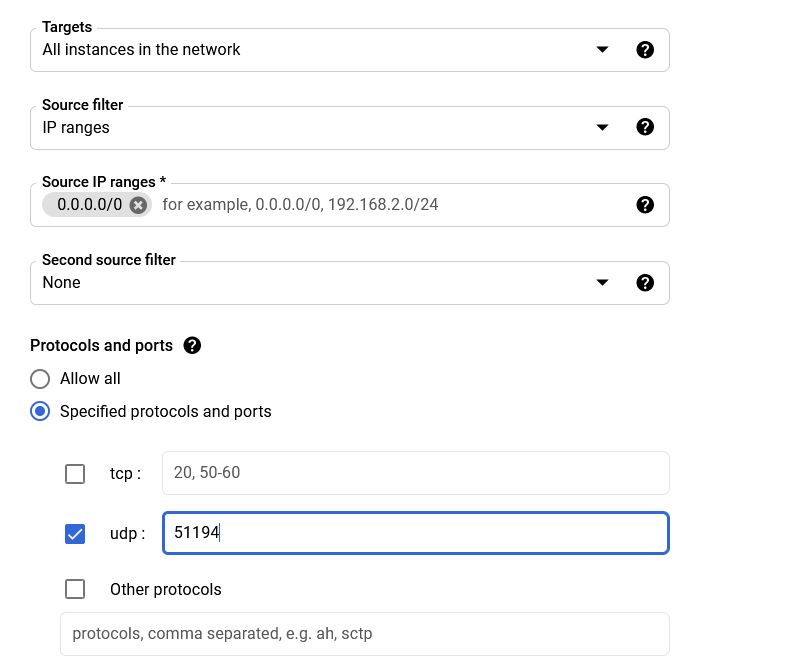
If you see the above screenshot, you should be good to proceed. If not, go back and look for syntax errors. From here, we need to open a port in the Google Cloud Firewall. Go back to your web browser that has the Google Cloud platform in it. Click on the Navigation Menu in the top left corner (the three lines). From here, go to the Networking Section and click on VPC networks → Firewall. Locate the words CREATE FIREWALL RULE. Enter the following:
Click on Create at the bottom.
(Scroll down on Google Cloud to see this)
Now that Google Cloud's firewall is setup, we need to find the IP address for your Linux Debian VM. Using the Navigation Menu, find theCompute Section and click on Compute Engine → VM Instances. Locate your Linux Debian system. Using my screenshot, you can see my public IP address begins with 35 and ends with 72.

Make note of it because you will need that for the client configuration. Speaking of which, go ahead and boot up your Windows Server 2016 VM. Go ahead and connect via RDP to it. Once you are on your system, open up a web browser and proceed here Wireguard Install.
Download the installer and run it with the defaults. Once it's installed you should see the following:
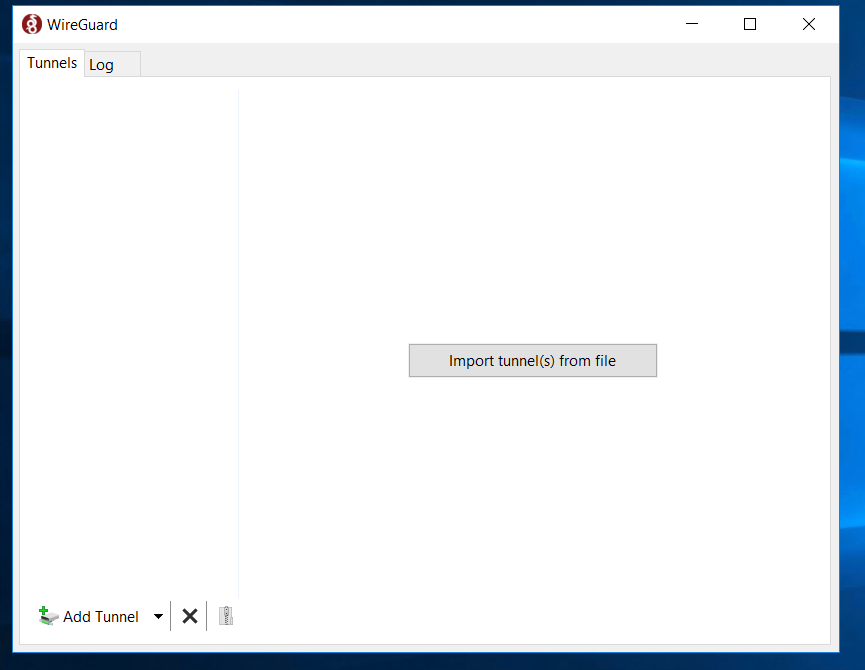
From here, click on Add Tunnel and then Add empty tunnel
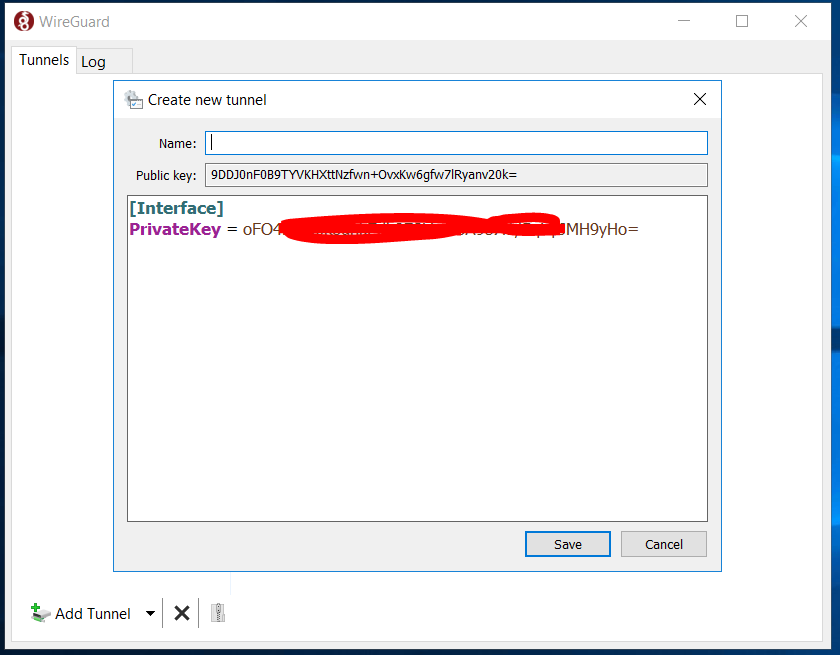
As you can see, it will populate a privatekey and a publickey for the client. Make note of this as you will need to share portions of this back with the Linux Debian system. You will also need to add to this file. The name of it will be GoogleCloudDeb.
Add the following being careful to note that the EndPoint IP should be your Google Cloud Debian IP address from earlier and that the PublicKey under Peer will be the Debian system's public key from earlier. MAKE SURE YOU ARE USING YOUR INFORMATION FOR THE KEYS, NOT THE ONE SHOWN BELOW
Address = 192.168.50.2/24
[Peer]
EndPoint = 35.231.229.72:51194
PublicKey = yv6uxxxxxxxxxxxxxxxxxxxxC2A=
AllowedIPs = 192.168.50.0/24
PersistentKeepAlive = 20
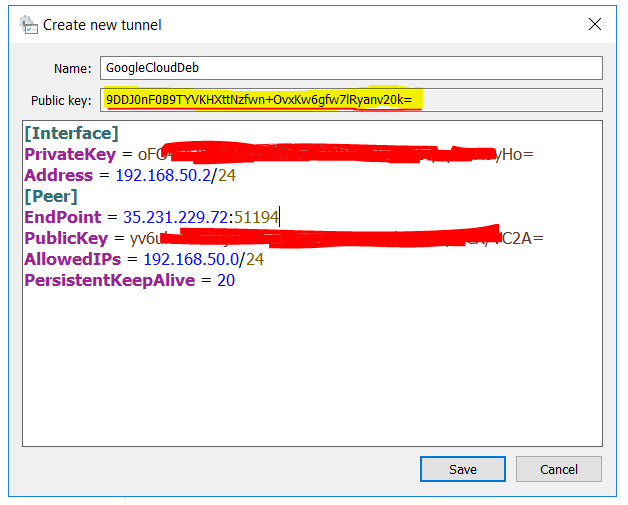
As previously mentioned, you will need to note the PublicKey that is highlighted at the top. This is the PublicKey for the client that will need to be shared with the Linux Debian Server. Before we can do that, we need to Save and Activate it. Do that now. Switch back over to your Debian machine. Enter the following:
sudo systemctl stop wg-quick@wg0
sudo nano /etc/wireguard/wg0.conf
We need to add the client's publickey so that we can connect to it. Add the following switching out the correct keys:
[Peer]
PublicKey = 9DDJxxxxxxxxxxxxxxxxxxxv20k=
AllowedIPs = 192.168.50.2/32
Make sure you save it and close with Ctrl+x, Y, Enter
Enter the commands below to start up wireguard's adapter again.
sudo systemctl enable wg-quick@wg0
sudo systemctl start wg-quick@wg0
Switch back over to your Windows Server 2016 and click on the Log tab. You should see something very similar to mine.
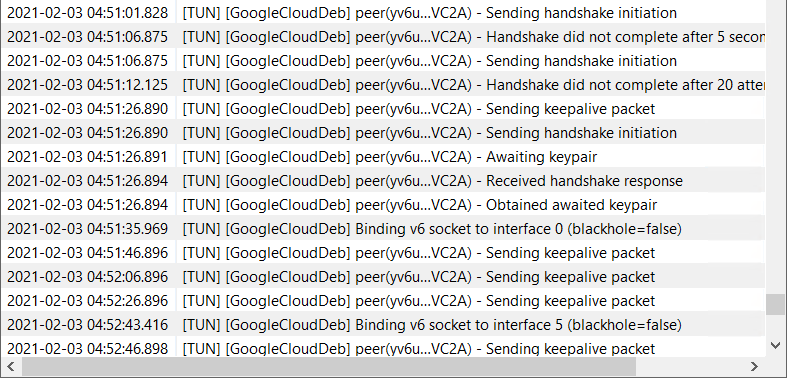
Notice the handshake did not complete until I exchanged the keys? Take a screenshot showing your active connection between the systems. In your own words describe what occurred between the systems. Take a moment to explore the VPN's functionality. Use Wireshark to see the connections.
Don't forget to deactivate the connection if you do not need it. The same applies to SHUTTING DOWN your systems when they do NOT need to run to save you money!
New Project created in January 2021
Debian 10 set up WireGuard VPN server
Kernel Headers in Linux
Stack Overflow: Failing Headers